 …and when I say fruit roll ups…I mean FRUIT roll ups not fruit flavored roll ups. These super healthy treats are great for kids and much easier than you may think! Plus, you can even use food storage to make it all happen. Yes, sometimes the world is perfect!  Now before you start worrying that you won’t be able to try this because you
don’t have a dehydrator-think again! As long as you have an oven, you can do
this! And did I mention these are much cheaper to make than the real fruit
leather you can buy? Yep-cooking from scratch is a good thing my friends! Homemade Fruit Roll Ups
Ingredients:
Method:
Place fruit and water in blender and blend until very smooth. Line a baking
sheet with aluminum foil and spray with non-stick spray. Pour fruit mixture onto
aluminum foil and spread evenly and thin on top of aluminum foil. Bake at 250
degrees for 25 minutes. WITH OUT OPENING YOUR OVEN DOOR, turn the oven off and
let sit for 8 hours. After 8 hours, peel fruit leather off aluminum foil and
place on wax, parchment or cling wrap. Cut into long strips with scissors and
roll up.
HAM AND CHEESE ROLLS
One batch of bread recipe/ or 1 loaf rhodes frozen dough, thawed
8 oz. ham or turkey thinly sliced
1/2 lb. shredded cheese (Jarlsberg is our family’s favorite, but cheddar or
whatever you have works great!)
Mix together:
1/2 cup dijon mustard
2-3 Tblsp honey.
Roll out dough in a rectangle as you would for cinnamon rolls. Spread
mustard-honey mixture on dough, leaving 1/2 inch along edges. Lay meat slices on
dough and sprinkle with cheese. Roll up jelly-roll style. Slice into 10-12 equal
slices with a sharp knife. Place in greased muffin tin (for gourmet look) or
place on greased cookie sheet (for easier clean up, use Reynolds non-stick
Release foil–then you don’t even have to grease it!). Let rise until double,
about 45 mins-1 hour. Bake 400 degrees for 10 minutes until light brown. They
can be baked at a lower temperature, for a longer time, as you would a loaf of
bread, just watch them carefully! Serve warm, or at room temperature.
(these recipes taken from everyday food storage)
Zucchini Corn Fritters (gluten free)
 Crispy and flavorful! Ingredients: 2 medium zucchini, coarsely grated 1 Tbsp butter or margarine 1/2 onion, finely chopped 1 clove garlic, minced 2 cups corn 1/2 cup cornmeal, fine grind 1/4 cup brown rice flour 1/4 cup cornstarch 1/4 tsp baking powder 3/4 tsp salt 1/4 tsp pepper 3/4 cup buttermilk, or milk alternative 1 egg Directions: Spinkle grated zucchini with 1/2 tsp salt and let sit for 10 minutes. Then spread out onto a kitchen towel and gently press the zucchini to get as much excess moisture out as you can. Heat butter in skillet and saute onion and garlic for a few mintues. Then add corn and continue cooking until onions are soft. Se aside to cool a bit. In a small bowl combine the cornmeal, flour, cornstarch, baking powder and seasonings. In a large bowl combine the milk and egg, then add in the onion mixture. Mix well, then stir in the flour mixture until just combined. To fry fritters; heat some oil in a skillet and spoon a heaping tablespoon of mixture into hot skillet (flatten out). When bottom turns golden brown, flip. Serve with sour cream if you like. Banana Blueberry MuffinsMakes 15 muffins
This recipes uses coconut oil, a healthy alternative to the hydrogenated fats and butter found in many baked goods.
 2 tablespoons coconut flour 2 tablespoons cream of rice cereal ¼ cup modified tapioca starch, optional 3 ½ teaspoons baking powder ¼ teaspoon xanthan gum ¼ teaspoon salt ¾ cup organic sugar 1 cup fresh blueberries* 2 tablespoons extra virgin coconut oil 1 cup warm coconut milk (mix well before measuring) 2 medium-large ripe bananas, mashed - Cinnamon sugar or organic unsweetened shredded coconut, optional 1. Preheat oven to 350 degrees. Lightly grease muffin tins or use muffin liners and lightly spray with cooking oil. 2. Mix together gluten-free flour blend, coconut flour, cream of rice, modified tapioca starch, baking powder, xanthan gum, salt and sugar. 3. Gently fold in blueberries. 4. Make a well in the batter and pour in coconut oil, coconut milk and mashed banana. Blend but don’t over-mix. 5. Pour batter into prepared muffin tins. Sprinkle with cinnamon sugar or shredded coconut, if desired. 6. Bake about 20 minutes until muffin tops are golden and a sharp paring knife inserted in center comes out clean and hot to the touch. 7. Cool 10 minutes. Remove from pan and cool completely. TIP Not crazy about coconut? Replace coconut flour with rice bran or gluten-free oat flour. Replace coconut oil with vegetable oil or margarine of choice. Replace coconut milk with milk of choice. *TIP You can also use frozen blueberries. Don’t defrost before adding to recipe. |
Sunday, September 30, 2012

Sunday, September 23, 2012
Back to school recipes.
|
Did you know you can make
your own Pop Tarts? Yes, you really can and if I were you, I’d get your kids in
the kitchen helping you make them. They can make their own combinations of
whatever they’d like AND you’ve got them in the kitchen talking about school and
slyly teaching them how to cook! These taste really good and that is coming from
a NON Pop Tart lover. So basically….it doesn’t taste like cardboard but actually
like little breakfasts pies…like they are supposed to!

Pop Tarts
Ingredients:
Method:
Mix flour, salt, and dry milk
powder together. Add oil and mix until mixture is crumble, then add water (or
fresh milk if that is what you are using). Stir until mixture forms a ball of
dough. Roll dough between two sheets of parchment paper to form a rectangle.Cut
dough into rectangles 6 inches wide by 5 inches high. Place filling on one half
of the dough leaving ½ inch around sides. Fold over and pinch sides together
with a fork to close.
Place on baking sheet lined
with parchment paper and bake at 350 for 15-20 minutes or until golden
brown.
(Taken from Everyday Food Storage)
Back to School Survival: Whole Wheat Banana Bread
Okay, so my all time favorite breakfast is a boiled egg and a slice of a quick bread with a glass of milk. It keeps me full, tastes great, is easy to clean up, and my kids will even eat it! It is my go-to breakfast. I just make large batches of quick bread like this ultra delicious whole wheat banana bread and freeze them so they are easy to pull out of the freezer. And here is my tip for perfectly boiled eggs….are you ready…put the eggs in the pot and fill with water. Put the pot on the burner and turn to high. When the water boils, leave it for 5 minutes and then cover and remove from heat for 15 minutes. Perfect boiled eggs every time!
 Low-Fat Whole Wheat Banana Bread
4 T margarine (or butter), softened
¼ C applesauce 2 eggs (2 T. Dehydrated Eggs +1/4 C. Water) 2 T skim milk or water ¾ C packed light brown sugar 1 C mashed banana (2-3 medium bananas) 1 ¾ C Whole Wheat Flour 2 t baking powder ½ t baking soda ¼ t salt (optional) ¼ C coarsely chopped walnuts or pecans (optional)
Beat margarine, applesauce, eggs, milk, and brown sugar in large mixer bowl until smooth. Add banana and blend at low speed; beat at high speed 1 to 2 minutes. Combine flour, baking
powder, baking soda, and salt; mix into batter. Mix in nuts. Pour batter into greased loaf pan, . Bake at 350º F until bread is golden and toothpick inserted in center comes out clean (55 to 60 minutes). Cool in pan on wire rack 10 minutes; remove from pan and cool to room temperature.
Gluten Free Peanut Butter Cookies
Ingredients1 cup creamy peanut butter1 cup granulated sugar plus more for rolling the cookies in 1 large egg – lightly beaten with a fork 1 teaspoon baking powder 1 teaspoon vanilla extract DirectionsPreheat oven to 350 degrees. Line two baking sheets with parchment paper or silicon baking liners.In a large bowl mix the peanut butter with 1 cup sugar. Stir until well blended. Add the egg, baking powder and vanilla. Stir well. Pour some additional sugar in a small bowl. Take 1 tablespoon the dough and roll in a ball. Roll the dough ball in the sugar and place on prepared baking sheet. Repeat with the rest of the dough. Savory Peach ChickenIngredients2 tablespoons olive oil6 boneless, skinless chicken thighs salt and pepper 1 medium onion, diced 1 green pepper, chopped 1 red pepper, chopped 2 cloves garlic, mined 1 – 26 ounce jar BAKER Natural Peach Pie Filling1 tablespoon gluten-free soy sauce ½ teaspoon crushed red pepper (more or less depending on how spicy you want it) Juice of 1 lemon DirectionsHeat a large skillet over medium-high heat. Add the olive oil and heat. Season the chicken with some salt and pepper and brown in the hot oil, about 3 or 4 minutes per side. Remove the chicken to a plate, add the onion and peppers and cook until they start to brown and soften, about 5 minutes. Add the garlic and cook for 30 seconds.Add the peach pie filling, soy sauce, crushed red pepper and stir to combine. Add the chicken along with any juices that have accumulated on the plate, cover the skillet, turn heat down to medium and cook until the chicken is cooked through, about 10 minutes. Add the lemon juice, stir and serve. ServingsThis gluten free recipe makes 6 servings. |
Sunday, September 16, 2012
Banana Bread with Rice Flour (gluten free)   A great way to use up some of those overripe bananas. Ingredients: WET INGREDIENTS 1/2 cup butter or vegetable oil such as canola oil 2/3 cups honey 1 1/2 cups ripe, mashed banana DRY INGREDIENTS 1 cup white rice flour 1 cup brown rice flour 1/4 cup tapioca flour 1/4 cup potato starch 1 Tbsp gluten free baking powder 1 tsp xanthan gum 1/2 tsp salt 1 Tbsp egg substitute Directions: Preheat oven to 350°F. Mix together the wet ingredients. In a separate bowl, combine all of the dry ingredients. Slowly add the dry ingredients to the wet ingredients and mix until well combined. Pour batter into 2 greased loaf pans. Place in the center of the oven and bake for about 40 minutes or until golden and cooked through (insert a toothpick in the center and if it comes up clean, it’s done). | |||||
|


Sunday, September 9, 2012
Message this week taken from LDS.org
MESSAGE FROM THE FIRST PRESIDENCY
Dear Brothers and Sisters:
Our Heavenly Father created this beautiful earth, with all its abundance,
for our benefit and use. His purpose is to provide for our needs
as we walk in faith and obedience. He has lovingly commanded us to
“prepare every needful thing” (see D&C 109:8) so that, should adversity
come, we may care for ourselves and our neighbors and support bishops
as they care for others.
We encourage Church members worldwide to prepare for adversity
in life by having a basic supply of food and water and some money in
savings.
We ask that you be wise as you store food and water and build your
savings. Do not go to extremes; it is not prudent, for example, to go into
debt to establish your food storage all at once. With careful planning, you
can, over time, establish a home storage supply and a financial reserve.
We realize that some of you may not have financial resources or
space for such storage. Some of you may be prohibited by law from
storing large amounts of food. We encourage you to store as much as
circumstances allow.
May the Lord bless you in your home storage efforts.
The First Presidency
THE BASICS OF FAMILY HOME STORAGE
THREE-MONTH SUPPLY
Build a small supply of food that is part of your
normal, daily diet. One way to do this is to purchase a
few extra items each week to build a one-week supply
of food. Then you can gradually increase your supply
until it is sufficient for three months. These items
should be rotated regularly to avoid spoilage.
DRINKING WATER
Store drinking water for circumstances in which the
water supply may be polluted or disrupted.
If water comes directly from a good, pretreated
source then no additional purification is needed;
otherwise, pretreat water before use. Store water in
sturdy, leak-proof, breakage-resistant containers.
Consider using plastic bottles commonly used for
juices and soda.
Keep water containers away from heat sources and
direct sunlight.
FINANCIAL RESERVE
Establish a financial reserve by saving a little money
each week and gradually increasing it to a reasonable
amount (see
All Is Safely Gathered In: Family Finances
guide).
LONGER-TERM SUPPLY
For longer-term needs, and where permitted, gradually
build a supply of food that will last a long time
and that you can use to stay alive, such as wheat,
white rice, and beans.
These items can last 30 years or more when properly
packaged and stored in a cool, dry place. A portion of
these items may be rotated in your three-month supply.
Monday, September 3, 2012
The Best Foods for Long-Term Storage
Grains
- Whole grains, especially wheat, have an incredibly long shelf life if stored in dry, vacuum-packed containers. Whole wheat lasts from 10 to 20 years if stored properly, and most other grains last approximately 10 years. It's very important that the grains be whole, not cracked or ground into flour, because cracked grain and flour don't last as long. It's also extremely important to protect grains against rodents, insects and moisture, as any of these quickly destroy your stored grains. Store your grains off the ground in vacuum-packed containers, if possible.
Dried Legumes, Dried Vegetables and Dried Fruit
- Dried legumes, like soybeans, split peas and lentils, last approximately seven years if protected against moisture, temperature swings and pests. Dried vegetables and dried fruit have a comparable shelf life. Because these foods are dried, they are more susceptible to moisture in the air, so protect them in sealed, vacuum-packed containers that are stored off the ground.
Dry Milk
- Dehydrated milk can keep for up to five years if stored properly. However, if any moisture is introduced, dry milk spoils more quickly than other items. Store dry milk in smaller, vacuum-sealed containers, so that you won't lose all your milk if one package fails.
Commercial Canned Food
- Most commercial canned food, generally, keeps for about two years, although you should always check the expiration date printed on the can. On one hand, commercial canned goods have the advantage of being prepackaged in tough containers, making them much easier to store. They also offer some variety in a post-disaster diet and can easily be used in day-to-day cooking as their expiration dates approach. On the other hand, they may not last as long as properly stored dried foods and, generally, require a can opener.
Sunday, August 26, 2012
Top 10 items to have in your food storage!
1. Water-
Having enough water in your long term food storage is very important. Water is
not only for drinking but cooking and personal hygiene as well. Make sure you
have plenty of water for everyone in your family and your animals as well.
Bleach bottles are a great place to store water, just a little bit of bleach
will keep your water safe for use much longer than storing water alone.
3. Fats- Don’t let the name fool you; these are an important part of your diet and are necessary for your long term food storage. What you choose to store from this list may vary but here are some ideas, peanut butter, salad dressing (great for adding flavor to anything you are cooking not just salads), shortening, vegetable oil, and mayonnaise. All these items on the list are great for cooking and changing up your everyday recipes. Try using them in some of your meals now so you will know how to use them in your food storage.
4. Drink mixes- Get a variety of mixes so that you can have a variety of drinks. Mixing up what you have to drink will allow you to not get bored of plain old water. If you are a coffee drinker store some instant coffee that you can mix with some hot water.
5. Spices and seasonings- Don’t forget your spices! Adding different spices to your meals will give you the ability to change things up. No one wants to eat plain oatmeal for breakfast EVERY day, add brown sugar one day and cinnamon the next. Having a variety of items to “spice” up the mundane will keep everyone happy, even the kids!
6. Candy- Just because you are storing food in case of emergency doesn’t mean you should forget the comfort foods. Children will love you if you keep some sweets around and you know that it’s a must for you too. Hard candy is a great item to store but look into canning some of your extra Halloween candy.
7. Legumes- That’s right, you may not love beans and peas but having them in your food storage will allow you to have a well balanced diet. These can give you protein when you don’t have enough meat and also provide fiber for your diet.
8. Cooking essentials- Don’t forget some of the items you may take for granted like sugar, salt, baking powder and canned milk. These are all items you will need to have on hand for turning that flour you are storing into something your family will eat. While you are at it don’t forget powdered milk! It’s a must for food storage! Think about that oatmeal with just water on it! Even in emergencies you don’t have to live without your comforts, just plan ahead!
9. Multi-Vitamins- Even if you make sure to store the best foods and you make sure you are eating a balanced diet having multi- vitamins around will allow you to make sure your body is getting the nutrients you need.
10. Cooking supplies- Let’s say you are in an emergency and you lose power, how are you going to cook all this amazing food you have in storage? Make sure you have cooking supplies like a camp stove with extra fuel and some matches. Also think about pots and pans, even if you grab them from your kitchen make sure you have some available to you for cooking. Think about silverware and the other utensils you use every day when you are cooking and keep some of those with your food storage.
Happy for week of school! Have a great week!
2. Grains- Items such as
wheat, flour, rice, and pasta are great items to store. Some of these items, if
stored properly, can last up to 30 years! These are staples in most daily diets
so it only makes sense to have them in your food storage as well. Make sure you store
the same types of food you eat on a regular basis; this will assist you in not
getting sick from eating things you aren’t used to eating.
3. Fats- Don’t let the name fool you; these are an important part of your diet and are necessary for your long term food storage. What you choose to store from this list may vary but here are some ideas, peanut butter, salad dressing (great for adding flavor to anything you are cooking not just salads), shortening, vegetable oil, and mayonnaise. All these items on the list are great for cooking and changing up your everyday recipes. Try using them in some of your meals now so you will know how to use them in your food storage.
4. Drink mixes- Get a variety of mixes so that you can have a variety of drinks. Mixing up what you have to drink will allow you to not get bored of plain old water. If you are a coffee drinker store some instant coffee that you can mix with some hot water.
5. Spices and seasonings- Don’t forget your spices! Adding different spices to your meals will give you the ability to change things up. No one wants to eat plain oatmeal for breakfast EVERY day, add brown sugar one day and cinnamon the next. Having a variety of items to “spice” up the mundane will keep everyone happy, even the kids!
6. Candy- Just because you are storing food in case of emergency doesn’t mean you should forget the comfort foods. Children will love you if you keep some sweets around and you know that it’s a must for you too. Hard candy is a great item to store but look into canning some of your extra Halloween candy.
7. Legumes- That’s right, you may not love beans and peas but having them in your food storage will allow you to have a well balanced diet. These can give you protein when you don’t have enough meat and also provide fiber for your diet.
8. Cooking essentials- Don’t forget some of the items you may take for granted like sugar, salt, baking powder and canned milk. These are all items you will need to have on hand for turning that flour you are storing into something your family will eat. While you are at it don’t forget powdered milk! It’s a must for food storage! Think about that oatmeal with just water on it! Even in emergencies you don’t have to live without your comforts, just plan ahead!
9. Multi-Vitamins- Even if you make sure to store the best foods and you make sure you are eating a balanced diet having multi- vitamins around will allow you to make sure your body is getting the nutrients you need.
10. Cooking supplies- Let’s say you are in an emergency and you lose power, how are you going to cook all this amazing food you have in storage? Make sure you have cooking supplies like a camp stove with extra fuel and some matches. Also think about pots and pans, even if you grab them from your kitchen make sure you have some available to you for cooking. Think about silverware and the other utensils you use every day when you are cooking and keep some of those with your food storage.
Happy for week of school! Have a great week!
Sunday, August 19, 2012
The Importance of Food Storage
The Importance of Food Storage
by Miriam CaldwellHow long could you last without a trip to the grocery store? What if you didn't count buying fresh milk? If there was a particular reason that you couldn't travel would you and your family be okay? As winter weather comes, you may not be able to make it to the store for two or three days and they may be low on food due to an ice storm and a run on the groceries.
In addition to surviving an ice storm or a blizzard do you have enough food to last you longer than that? If you do have enough food to avoid the grocery store for a month or two what types of food would your family be eating? Would they quickly become tired of canned tuna and peas? These questions may make you step back and look at how prepared you really are.
When you are planning your food storage you need to store foods that your family will eat. You also need to store a variety of foods. There may be a great sale on peanut butter, and so you stock up on that. Your family will protest if they have peanut butter every day or for every meal. You can plan by having a monthly menu that you follow or you may choose to stock up by what you need to make a specific meal.
It is important that you rotate and use your food storage. You really should store what you eat and eat what you store. This will make the transition easier if you are every forced to rely solely on food storage. You can also save money because once you have a stockpile you only need to purchase the item when it is on sale.
If you do not have any food storage you should begin with at least one week's supply of food. This supply should be easy to fix and easy to move. You can store it in your emergency kit. It is nice to know that you have enough to last your family at least one week.
The past few weeks I have posted articles about the importance of food storage. It is my hope that it will encourage those that don't have their food storage to begin it. For those of us that do have food storage I am hopeful this will continue to add to the importance of having food storage. Have a great week.
Sunday, August 12, 2012
Why have food storage?
America is the land of plenty; a place of security and shelter for its citizens. Would we ever really need to use food storage here? Besides, I live in an area where we would never have a disaster where I would need to use Food Storage, Right? These are thought-provoking questions. Research shows that the average American household has less than a week’s supply of food on hand. This same statistic applies to most American supermarkets. Without being paranoid or panicked, there are many valid reasons to put extra food away that you might not have thought about. We are all somewhat vulnerable to events beyond our control. But most situations are probably closer to home: loss of power, unexpected or unplanned interruptions of life such as unemployment, loss of income due to illness or injury, or high medical bills due to an accident. Food storage is a form of insurance protecting your family from the unexpected.
Because Food Storage is an Investment, our goal at YourFoodStorage.com is to make Food Storage Affordable for everyone! To that end we have a Financing program that will allow you to buy today and make small monthly payments. To take advantage of our Financing Program today or read more information about how it works, click here.
Most local relief organizations will take approximately three days (72 hours) to get back on their feet to be able to help you. An emergency kit is a big step in the right direction. Doing your part by having food, water, and supplies for three days will help alleviate the pressure on relief agencies as well as minimize your own discomfort.
Preparedness is everyone's job. Not just government agencies, but all sectors of society--service providers, businesses, civic and volunteer groups, industry associations and neighborhood associations, as well as every individual citizen--should plan ahead for disasters.
Being prepared for the unexpected is wise. It provides confidence knowing your family is better prepared to be safe and secure. Families who are prepared can reduce fear, inconvenience, and losses that surround a family crisis or a natural disaster.
Eat what you store, store what you eat"--it seems like such a simple concept, but when planning your food storage, it’s difficult to remember this, and even more difficult to apply it on a day-to-day basis.
Rotation is the key to a successful food storage program. There are several reasons you want to rotate your food storage:
All foods are subject to deterioration as time passes especially if they are subjected to heat. Chemical changes occur and cause foods to alter in texture, color, taste, and have a loss of vitamins and minerals. This is why it is so important to rotate regularly. All food is best used in five years. Minerals and carbohydrates can last indefinitely and can have crucial value in an emergency. Therefore, never throw old food storage out unless you have something to replace it.
If you buy food storage and do not intend to use it except during an emergency, you may not be using your money wisely. When you use your food storage it becomes an economical and practical way to grocery shop. Buying in bulk is less expensive than buying smaller quantities. For example, buying a 25 pound bag of sugar versus a 5 pound bag is cheaper per pound. Another way food storage is more economical is by buying wheat. Wheat is substantially less expensive than flour, and will store much longer.
Using your food storage takes knowledge and practice. You will want to learn what recipes work, which ones taste better, and work on making them before an emergency occurs. Challenge yourself to use your food storage weekly or daily. The more you use it, the more skilled you will become.
Food storage "technology" has come a long way. Now we enjoy scrambled eggs with bacon, that taste just like the real thing, and food storage can become enjoyable to eat and even easy to prepare. Just remember to always keep in mind the age-old philosophy "eat what you store, store what you eat" and your food storage will not only taste good in a crisis, but everyday too.
Make a list of the meals your family enjoys and purchase the freeze dried products that you will use to make those meals. For example, if your family eats potatoes regularly then you may want to prepare them as a potato casserole that is made with your food storage. Another, say your family likes cheese and broccoli, again periodically try a recipe (cheesy broccoli soup) using your food storage
This article is from FoodStorage.com I hope it helps to show the importance of having food storage.
Have a good week!
Why is Food Storage a Wise Investment?
Food storage becomes a wise investment for future stability and an even wiser investment if you practice storing what you use and using what you store. No one knows when some type of emergency will happen, whether it be man-made or natural. However, when these emergencies strike, the time to prepare has passed. Making food storage a life-style food storage, rather than a make-do food storage will help you maintain your investment. Food storage that matches your family’s lifestyle is food that more likely will be used. Using and rotating your food storage on a regular basis maintains the original investment and prevents it from being wasted.Because Food Storage is an Investment, our goal at YourFoodStorage.com is to make Food Storage Affordable for everyone! To that end we have a Financing program that will allow you to buy today and make small monthly payments. To take advantage of our Financing Program today or read more information about how it works, click here.
The Basics
Always start with storing the basics. Grains, legumes, dehydrated milk, sugar, salt, oil, and garden seeds have come to be known as the "basics." Do not underestimate the power these foods have, as they have been shown throughout history to sustain life. It is important to know how to prepare and use the basics, especially ways that your family will enjoy. If you are familiar with the food you have stored, you will be better prepared to use it during times of emergency.Confidence and Security
Having your food storage can help you have a greater degree of confidence and security. It is important to do your best to prepare your family to be able to eat no matter what happens to the national economy or your job in particular. This confidence in times of crisis can be a most precious commodity. An adequate food supply for your family is a major part of economic security, and possibly the key to survival.Self-Reliance and Interdependence
Food storage helps you become self-reliant as in the case of the first three days of an emergency or providing for your family when you lose your employment. It also helps you to be interdependent with others as you share during a crisis. Communities weather storms best when they share and work together. With food storage you are better prepared to endure times of adversity without becoming dependent upon the government. Your family’s way of life may be preserved with proper preparation. Self-reliance is often contingent upon a willingness to work. Work can become a source of happiness, and self-esteem, as well as prosperity. Storing, using and knowing how to produce and prepare food and other items that are essential for life create security and stability for you and your family. If a disaster does occur, and you were forced to temporarily change your normal life style, you could do so with minimum discomfort.Relief Organizations
Some people are apathetic about preparedness, often because they aren’t sure what to do or where to begin. They may become overwhelmed at the prospect of a crisis and the responsibility of self-reliance and become discouraged before they begin. Others are frustrated by contradictory advice, not sure whose ideas to follow. Still others do nothing, figuring that if trouble comes, an emergency disaster organization will rush to their rescue. A common misconception that can be refuted is that the government will immediately come to the rescue. Federal and state organizations perform marvelous service, but when a large population is relying solely upon them, it is virtually impossible to provide for specific or individual needs of everyone. The Federal Emergency Management Agency (FEMA) advises, "If a disaster threatens your community, local government and disaster-relief organizations will try to help you. But you need to be prepared as well. Local officials may be overwhelmed after a major disaster, and emergency response personnel may not be able to reach you right away. What you do to prepare can make a difference."Most local relief organizations will take approximately three days (72 hours) to get back on their feet to be able to help you. An emergency kit is a big step in the right direction. Doing your part by having food, water, and supplies for three days will help alleviate the pressure on relief agencies as well as minimize your own discomfort.
Preparedness is everyone's job. Not just government agencies, but all sectors of society--service providers, businesses, civic and volunteer groups, industry associations and neighborhood associations, as well as every individual citizen--should plan ahead for disasters.
Being prepared for the unexpected is wise. It provides confidence knowing your family is better prepared to be safe and secure. Families who are prepared can reduce fear, inconvenience, and losses that surround a family crisis or a natural disaster.
Eat what you store, store what you eat"--it seems like such a simple concept, but when planning your food storage, it’s difficult to remember this, and even more difficult to apply it on a day-to-day basis.
Eat What You Store
Having food storage is one thing, but using it is a completely different aspect. It’s easy to put food away in your cupboards and storage rooms, but the question is, can you use it? Do you know how to grind wheat into flour? Do you know how much Textured Vegetable Protein to use as a substitute for meat? Do you know how to incorporate dehydrated carrots into your favorite recipes? Do you know when to use whole egg mix or scrambled egg mix in your cooking? These are all questions we must learn the answers to by reading, asking people who have experience, and practice, practice, practice! You don’t want to wait until an emergency arises to learn how to use your food storage.Rotation is the key to a successful food storage program. There are several reasons you want to rotate your food storage:
- To prevent food spoiling.
- To minimize the deterioration of nutritive value and quality.
- To make the most of your money.
- To learn how to use your stored food so the lack of knowledge does not add to a stressful situation during an emergency.
- To adapt your body to your food storage.
All foods are subject to deterioration as time passes especially if they are subjected to heat. Chemical changes occur and cause foods to alter in texture, color, taste, and have a loss of vitamins and minerals. This is why it is so important to rotate regularly. All food is best used in five years. Minerals and carbohydrates can last indefinitely and can have crucial value in an emergency. Therefore, never throw old food storage out unless you have something to replace it.
If you buy food storage and do not intend to use it except during an emergency, you may not be using your money wisely. When you use your food storage it becomes an economical and practical way to grocery shop. Buying in bulk is less expensive than buying smaller quantities. For example, buying a 25 pound bag of sugar versus a 5 pound bag is cheaper per pound. Another way food storage is more economical is by buying wheat. Wheat is substantially less expensive than flour, and will store much longer.
Using your food storage takes knowledge and practice. You will want to learn what recipes work, which ones taste better, and work on making them before an emergency occurs. Challenge yourself to use your food storage weekly or daily. The more you use it, the more skilled you will become.
Store What You Eat
It is important to store the types of foods your family eats on a regular basis and the types of foods they enjoy. But maybe your family really enjoys lasagna or spaghetti so you may want to buy a lot of tomato powder. If your family likes to eat treats regularly you will want to be sure to store things such as baking chocolate, pudding, cake or brownie mixes, jello, and dried fruit so their diet will be normal when you have to exclusively use your food storage. On the other hand, if your family does not eat a lot of treats, you do not have to worry about storing as many of these things.Food storage "technology" has come a long way. Now we enjoy scrambled eggs with bacon, that taste just like the real thing, and food storage can become enjoyable to eat and even easy to prepare. Just remember to always keep in mind the age-old philosophy "eat what you store, store what you eat" and your food storage will not only taste good in a crisis, but everyday too.
Make a list of the meals your family enjoys and purchase the freeze dried products that you will use to make those meals. For example, if your family eats potatoes regularly then you may want to prepare them as a potato casserole that is made with your food storage. Another, say your family likes cheese and broccoli, again periodically try a recipe (cheesy broccoli soup) using your food storage
This article is from FoodStorage.com I hope it helps to show the importance of having food storage.
Have a good week!
Sunday, August 5, 2012
Why have food storage?
Why Food Storage?
Food Storage and Emergency Preparedness
From Rachel Bruner, former About.com Guide
Latter-day prophets have counseled us to build up a food storage and be prepared for emergencies, but why? Here are a few of the main reasons why we should have a food storage program.
1. Commandment from God
Through His prophets and apostles, God has commanded us to have a year's supply of food and other essentials in our food storage. Joseph Smith, the first prophet and president of the Church of Jesus Christ of Latter-day Saints recorded the following in the Doctrine and Covenants:
"The Church and its members are commanded by the Lord to be self-reliant and independent" (D&C 78:13-14).Spencer W. Kimball, 12th prophet, taught:
"The responsibility for each person's social, emotional, spiritual, physical, or economic well-being rests first upon himself, second upon his family, and third upon the Church if he is a faithful member thereof" ("Welfare Services: The Gospel in Action," General Conference, Oct. 1977, 76).L. Tom Perry said:
"Acquire and store a reserve of food and supplies that will sustain life. Obtain clothing and build a savings account on a sensible, well-planned basis that can serve well in times of emergency. As long as I can remember, we have been taught to prepare for the future and to obtain a year’s supply of necessities. I would guess that the years of plenty have almost universally caused us to set aside this counsel. I believe the time to disregard this counsel is over. With events in the world today, it must be considered with all seriousness" ("'If Ye Are Prepared Ye Shall Not Fear'" Ensign, Nov 1995, 35.)2. Necessary during Emergencies and Natural Disasters
Having a supply of essential foods, clothing, fuel, and water will help us during times of personal and natural disasters. We must be prepared for calamities that may come our way. Ezra Taft Benson, the 13th prophet, said:
"In section 1 of the great Doctrine and Covenants, a volume of modern scripture, we read these words: 'Prepare ye, prepare ye for that which is to come...' (D&C 1:12) Further in this same revelation are these warning words: 'I the Lord, knowing the calamity which should come upon the inhabitants of the earth....' (D&C 1:17)3. Gives Us Peace
"What are some of the calamities for which we are to prepare? In section 29 the Lord warns us of 'a great hailstorm sent forth to destroy the crops of the earth.' (D&C 29:16) In section 45 we read of 'an overflowing scourge; for a desolating sickness shall cover the land.' (D&C 45:31) In section 63 the Lord declares he has 'decreed wars upon the face of the earth....' (D&C 63:33)
"In Matthew, chapter 24, we learn of 'famines, and pestilences, and earthquakes....' (Matt. 24:7) The Lord declared that these and other calamities shall occur. These particular prophecies seem not to be conditional. The Lord, with his foreknowledge, knows that they will happen. Some will come about through man’s manipulations; others through the forces of nature and nature’s God, but that they will come seems certain. Prophecy is but history in reverse—a divine disclosure of future events" ("Prepare Ye," Ensign, Jan. 1974, 68).
When we are prepared we don't have to worry about "what if's" because we'll have our food storage and emergency preparedness ready. The Lord said:
"If ye are prepared ye shall not fear" (D&C 38:30).Having what we need and knowing what to do in the event of an emergency or other calamity can bring us peace and help us overcome fear.
4. Teaches us Basic Food Preparation
Building up a food storage helps us learn how to prepare and use basic foods. Because many items in a food storage only last a certain amount of time it is important to rotate the food by using older items and replacing those items with new ones. When we do this we can learn to use our food storage which in turn will prepare us to know how to use our food storage in the case of an emergency.
Spiked Watermelon Salad (gluten free!)

This is an adults-only dessert (unless your kids are over the drinking age!)
Ingredients:
1 medium watermelon, cut into 1" cubes
1 cup lemon juice
1/4 cup sugar
1/2 cup vodka
6 Tbsp fruity liquer (ie. pomegranate, crème de cassis, melon)
1/4 cup fresh mint, chopped
Candied Pecans
1/2 cup pecans
2 Tbsp sugar
1 Tbsp vegetable oil
Directions:
In a large bowl mix lemon and sugar together until dissolved. Add in alchohol, then watermelon cubes. Light toss, cover and refrigerate for 1 hour (anything longer than 2 hrs and the melon will soak up too much alcohol).
To make candied pecans; in a skillet toast pecans until just before browned. Add oil and sugar, and stir continuously until sugar is dissolved (about 3-5 minutes). Let cool.
To assemble; drain watermelon and put into serving dishes. Top with mint and pecans.
Potato and Bacon Strata
(Gluten Free)

This dish is great as a side dish or a main dish when served with salad.
Ingredients:
4 large potatoes, thinly sliced
2 large onions, thinly sliced
6 slices bacon
2 large eggs
1 cup milk
1/2 cup Fresh Italian Parsley
Salt and pepper to taste
1 cup grate sharp cheddar cheese
Directions:
Slice potatoes using a mandolin (1/8-1/4" thick), and soak in water for 15-30 minutes to remove a lot of the starch (drain and refill with water once). After soaking (takes the 'gumminess' out of them), drain well.
Slice bacon into 1/4" pieces and cook until crisp. Slice onions using a mandolin (1/8-1/4" thick) and fry with 2 Tbsp oil until carmelized (turns golden).
Grease a 10 inch pie plate or casserole dish. Spread a layer of potatoes, then onions, bacon and some leaves of the parsley, then season with salt and pepper. Repeat layers 2 more times or until all ingredients are used up (make sure the last layer is a potato).
Whisk together the egg and milk and pour mixture over potatoes. Cover and bake at 375°F for 45 minutes (remove cover for last 10 minutes of baking). Remove, add grated cheese and broil until cheese is melted.
Sunday, July 22, 2012
Food Storage recipes this week!
Strawberry Shortcake Scones Gluten Free
 9
Sweet buttermilk scones are the perfect base for a delicious strawberry shortcake. Sprinkle the tops of the scones with decorative sugar for a beautiful glaze.
Ingredients:
SCONES
1 cup rice flour
1 cup buttermilk
3/4 cup cornstarch
1/2 cup potato starch
1/4 cup butter
1/4 cup tapioca flour
1 tbsp bean flour
2 1/2 tsp xanthan gum
2 1/2 tsp baking powder
1 1/2 tbsp sugar
1/2 tsp salt
STRAWBERRIES
2 pints fresh strawberries, washed, hulled, and sliced
1/4 cup sugar
TOPPING
1 cup heavy whipping cream
2 to 3 tablespoons powdered sugar
Directions:
STAWBERRIES
In a medium bowl, combine the sliced strawberries with 1/4 cup sugar. Cover and refrigerate.
SCONES
Preheat your oven to 400°F. Lightly grease a scone pan or cookie sheet.
Thoroughly mix all the scone ingredients into a large bowl and blend well.
By a tablespoons at a time, drop this onto a lightly greased baking sheet. Form gently into scones shapes.
For glaze, whisk 1 egg with 2 tablespoons of cream or milk. Brush scones with the glaze mixture. Bake for 15 to 18 minutes, or until lightly browned. A toothpick inserted into the center of a scone should come out clean. Cool on racks.
Meanwhile, beat the 1 cup of heavy cream until the cream begins to stiffen; beat in powdered sugar until the mixture holds peaks.
Split scones and spoon strawberries over the bottom. Put the top of the scone on the strawberries and top with whipped cream and a few strawberry slices.
9Sweet buttermilk scones are the perfect base for a delicious strawberry shortcake. Sprinkle the tops of the scones with decorative sugar for a beautiful glaze.
Ingredients:
SCONES
1 cup rice flour
1 cup buttermilk
3/4 cup cornstarch
1/2 cup potato starch
1/4 cup butter
1/4 cup tapioca flour
1 tbsp bean flour
2 1/2 tsp xanthan gum
2 1/2 tsp baking powder
1 1/2 tbsp sugar
1/2 tsp salt
STRAWBERRIES
2 pints fresh strawberries, washed, hulled, and sliced
1/4 cup sugar
TOPPING
1 cup heavy whipping cream
2 to 3 tablespoons powdered sugar
Directions:
STAWBERRIES
In a medium bowl, combine the sliced strawberries with 1/4 cup sugar. Cover and refrigerate.
SCONES
Preheat your oven to 400°F. Lightly grease a scone pan or cookie sheet.
Thoroughly mix all the scone ingredients into a large bowl and blend well.
By a tablespoons at a time, drop this onto a lightly greased baking sheet. Form gently into scones shapes.
For glaze, whisk 1 egg with 2 tablespoons of cream or milk. Brush scones with the glaze mixture. Bake for 15 to 18 minutes, or until lightly browned. A toothpick inserted into the center of a scone should come out clean. Cool on racks.
Meanwhile, beat the 1 cup of heavy cream until the cream begins to stiffen; beat in powdered sugar until the mixture holds peaks.
Split scones and spoon strawberries over the bottom. Put the top of the scone on the strawberries and top with whipped cream and a few strawberry slices.
Creamy Herb Salad Dressing - gluten free Easy to whip up - just dump all ingredients together and shake. Ingredients: 1/2 cup mayonnaise 1/3 cup white vinegar 1 tsp vegetable oil 2 Tbsp corn syrup 2 Tbsp Parmesan cheese 2 Tbsp Romano cheese 1/4 tsp garlic salt 1/2 tsp Italian seasoning 1/2 tsp parsley 1 Tbsp lemon juice 1/2-1 tsp salt Directions: Whisk all ingredients together and serve. Can be stored in a sealed jar for 4-5 days in the fridge. |
Creamy Potato Salad Gluten Free  Using flavored dressing/cream cheese really gives this potato salad a boost (just check the label to ensure its gluten-free). Ingredients: 3 lbs baby red potatoes, quartered 1/4 cup Italian dressing (any GF flavor you like) 8 oz. creamy/cream cheese chip dip (any GF flavor you like-although stick with the same type as the dressing you choose) 1/4 cup Parmesan cheese, shredded 1 1/2 cups cherry or grape tomatoes, halved 2 stalks celery, sliced 2 Tbsp fresh basil, finely chopped Directions: Boil potatoes until soft, then drain and put in a bowl with dressing. Refrigerate for an hour to allow the potatoes to soak up the flavor of the dressing. Once potatoes are cool, gently toss all remaining ingredients together and serve. |
Ultimate Meatloaf (not gluten free!) Ingredients: 1 1/2 lb lean ground beef 1/2 c. crushed Ritz crackers 3/4 c. shredded cheddar cheese 1 oz. pkg. dry onion soup mix 1/2 qt. of lentil sprouts, pureed 2 eggs, beaten (or 2 T. powdered eggs 1/4 C. Water) 1/4 c. ketchup 2 T. Worcestershire sauce Directions: Preheat oven to 350 degrees. Place the ground beef, crushed Ritz, cheddar cheese, and onion soup mix in a large bowl and mix until well combined. Puree the lentil sprouts (I put them in my food processor with the eggs to try to get them extra smooth). Whisk the pureed sprouts, eggs, ketchup, and Worcestershire sauce in a separate bowl until smooth. Add to the meat mixture and mix until evenly combined. Put in a 9×9 pan, cover with foil, and bake for 45 minutes to an hour. When top/edges look nice and crispy check the middle to make sure it’s cooked all the way. Chicken Tortellini Soup Recipe (not gluten free)Ingredients:1 12.5 oz can of chicken (or 1 pint of home-canned chicken) 1/4 c. dehydrated celery 2 T. dehydrated onions 2 1/2 c. water 8 c. chicken broth (or water mixed with chicken boullion) 1/2 tsp. celery seed 1/2 tsp. basil 1/2 tsp. garlic salt 1 tsp. salt Sprinkle of red pepper flakes (optional) 12 oz package of Barilla Tortellini (yes they are shelf stable!) Directions: Bring the water and chicken broth to a boil. Add spices. Add chicken (cut it up small if you like smaller chunks). Add dehydrated celery and onions. Add tortellini after it returns to a boil. Cook according to your package directions (probably about 10-12 minutes). Enjoy! 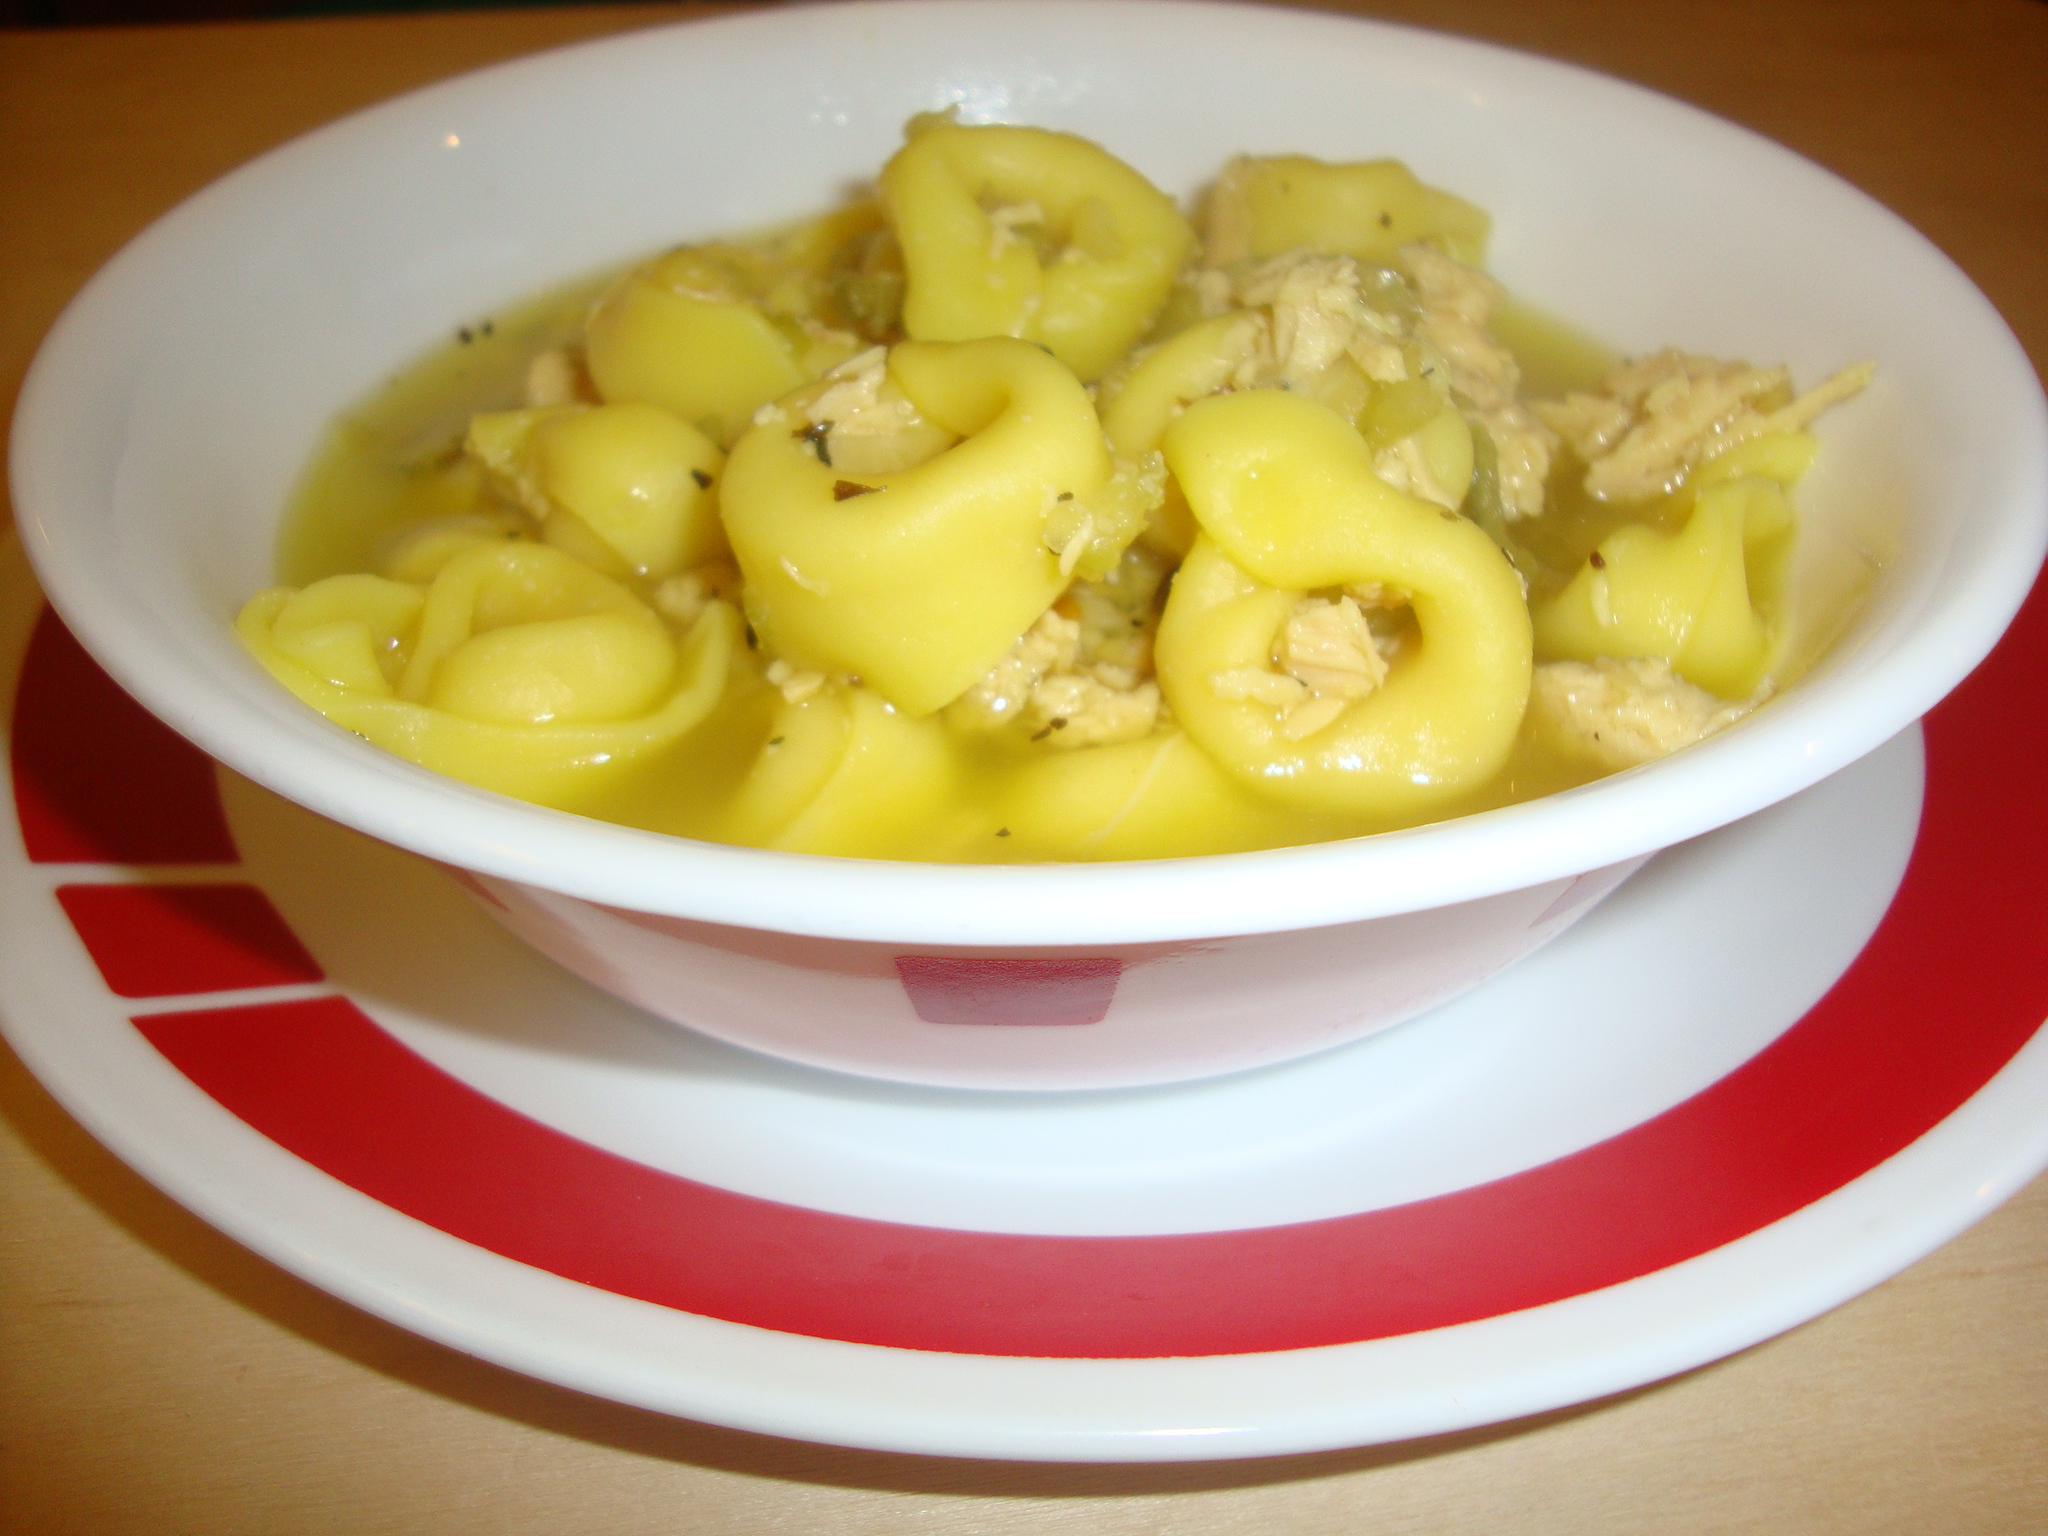
I know it's way hot outside but this recipe looked so yummie I had to share it! This kind of soup is Dan's favorite and mine so once it's cooler outside I will give it a try. I hope everyone has a great week. Stay cool outside!
|
Sunday, July 15, 2012
Five Overlooked Items to Include in your Food Storage
Five Overlooked Items to Include in Food Storage
by Miriam CaldwellHere is a list of five overlooked items to include in your food storage.
1) Salt is on most lists that have been recommended, but many lists neglect the need to store pepper and other spices. You may want to include cinnamon, chili powder, and other common spices that you use in your everyday cooking. You can buy bulk spices that will last for about year at Sam's Club or Costco.
3) Other items, which may be considered luxury items, include nuts, and chocolate chips. You may also want to include coconut on this list. These items are often used to dress up baked goods. I also use nuts in salads and other recipes to add protein, and as a fairly healthy snack.
4) If you have pets you will want to consider storing a good supply of food and water for them as well. It would be awful to watch your pets suffer or to give them away because you couldn't afford to continue to feed them.
5) You may want to save enough money and set it aside for the sole purpose of eating out once a month. This can help to reduce the stress during a time when you are relying on your food storage. It may also help your family if they are adjusting to eating all of their meals at home.
Recipe time!
Watermelon, Feta & Mint Salad (Gluten Free)

Perfect for summertime!
Ingredients:
1 medium seedless watermelon, chilled & chopped into 1" pieces
1/2 cup extra virgin olive oil
3 limes, juiced (+ zest from 2 limes)
1 1/2 tsp salt
3/4 tsp black pepper
1 cup fresh mint leaves, finely chopped
1 1/2 cups crumbled feta cheese
Directions:
For dressing, whisk together the oil, lime juice, zest and seasonings. Set aside.
In a large bowl, add watermelon, mint and feta. Pour dressing over and lightly toss. The dressing will cause the watermelon to release it's juices, so be sure to use a slotted spoon to serve.
Note: Prepare this salad just before serving
Gluten-Free Corn, Mango and Black Bean Salsa
MAKES 6 TO 7 CUPS

2-3 ears corn, cut corn off the cob
1 medium-size mango, cut into small dice
1½ cups black beans, cooked or canned, rinsed and drained
½ small red onion, minced
1 small red bell pepper, seeded and minced
1-3 small jalapeño peppers, minced
2 tablespoons lime juice
¼-½ bunch fresh cilantro, minced
Salt and pepper, to taste
1. Mix all the ingredients together until well blended. Adjust the seasoning with salt and pepper, to taste.
2. Cover and refrigerate for at least 1 hour before serving.
Each cup contains 113 calories, 1g total fat, 0g saturated fat, 0g trans fat, 0mg cholesterol, 207mg sodium, 24g carbohydrate, 6g fiber, 5g protein
Recipe reprinted with permission from Kitchen on Fire! by Olivier Said and Chef Mike C. Courtesy of DaCapo Lifelong Books.Have a great week. Stay cool! It's hot out there!
Sunday, July 8, 2012
126 day dinner menu
In talking with one of my friends the other day, we decided the hardest part of food storage or being prepared for an emergency is menu planning. So I came across this menu that gives you ideas for 126 dinner menus. When you are in a crisis and you need to use your food storage 100% the best plan is to have your menus ready. This will also help you when you are at the store and there are sales that can help you save money. Plus out your menus and pick up what you can!
I have put a couple recipes at the end of my post. They are gluten free so enjoy them!
Lasagna
Salad
French bread
Claypot Chicken
Curried rice
California blend Veggies
Fish and Chips
Coleslaw
Quiche Lorraine
Green Beans
Creamy Herb rice
Porcupine Meat Balls
Carrots
Mash Potatoes
Cream Cheese Chicken
Pasta
Broccoli
Left over Day
2nd pan of lasagna
Split Pea Soup
fresh rolls
Chicken Broccoli Braid
Dilly Lemon Rice Blend
Beef Teriyaki
Rice
Asian Blend veggies
Zippy Corn Chowder
Wheat thins
Roast Turkey
Dressing
Sweet Potato whip
Green Beans
Pot Stickers
Veggie Fried Rice
Left over Day
Roast Turkey
Chicken Risotto
Corn
Carrots
Vegetable Soup
fresh rolls
Swiss Steak
Mash Potatoes and gravy
Green Beans
Grilled Hawaiian Chicken
Chicken Tarragon Rice
Baked Sweet Potatoes
Home Made Tomato soup
Cheese Straw crackers
Salmon Croquettes
Scallop Potatoes
Broc. Caulif. blend
Left over Day
Soup Day!
Ham
Potato Casserole
Cranberry sauce
Green Bean Casserole
Creole Soup Pot
Fresh Rolls
Chicken and Biscuits
Fresh Salads
BBQ Beef Sandwiches
Potato Planks
Broc. Rice Casserole
Shell Roni Dinner
Colorful Chicken 'N Squash Soup
Cheesy Biscuits
Left over Day
Lots to choose from this week!
Ham, BBQ Beef Sandwiches, Colorful Chicken 'N Squash Soup
Turkey Soup
Small garden salad
fresh rolls
Tuna Tetrazini
Peas
Carrots
Meal in one Potatoes
Broccoli Cauliflower mix with cheese
White Beans
pan fries
Peas & Carrots
Corn Muffins
Ham & Cheese Ring
Broccoli
Meat Loaf
Baked Potatoes
Green Beans
Left over Day
Make Mom's left over Navy Bean Soup to go with Meat loaf
Roast Chicken
Mash Potatoes and Gravy
Glazed Carrots
Hot Dogs
Chips
Veggie tray with dip
Sweet & Sour Meat Balls
Rice
Asian Blend veggies
Enchilada Pie
Corn
Spanish Kick Rice
Minestrone Soup
Fresh Rolls
Spicy Crispy Chicken
Corn
Potato Planks
Left over Day
do enchilada Pie as 2 – 9” pans and have one today!
Spaghetti
French Bread
Salad
Sweet & Sour Chicken
Rice
Calif. Blend veggies
Turkey Supreme Sandwiches
Green Beans
Pizza
Salad
Salad Bar
Spicy Peanut Chicken
Butter Noodles
California blend Veggies
Left over Day
Spaghetti
French Bread
Salad
Roast with veggies
Fresh Rolls
Taco Baked Chicken
Mexi-pasta salad
Corn
Spicy Szechuan Noodles
Farm blend Veggies
Chicken Noodle Soup
Crackers
Broccoli Cheese Soup
Fresh Rolls
Italian Chicken
Baked Potatoes
Green Beans
Chicken Tarragon Rice Blend
Left over Day
Broccoli Soup & Extra pan of Taco Baked Chicken
Quick & Easy Chicken Meal
Fresh salad
Pepper Steak
Rice
Vegetable mix
Chicken Fajitas
Spanish Kick Rice
Broccoli with Cheese
Vegetable Fried Rice
Spicy Chicken Egg Rolls
Rice
Dutch Oven Enchilada Pie
Salad
Left over Day
Egg Rolls
Turkey Pot Pie
Breakfast for dinner
Chili
Chicken Parmesan
Baked Potato
Carrots
Welsh Rabbit
Salad
BBQ Chicken
Potato Planks
Corn
Left over Day
Chili
Tamale Pie
corn
Spanish Kick Rice
Chicken Paprika's
Rice
baked sweet Potato
Barley Chicken Soup
Fresh Rolls
7 bean soup
Fresh Rolls
Hamburgers
French Fries
Pasta Salad
Taiwanese Dumplings
Rice
Salad
Left over Day
Taiwanese Dumplings & Bean Soup
Crockpot Chicken Dinner
Fresh Fish Fry
Coleslaw
Pan fries
hush puppies
French Sweet & Sour Pork
Rice
Farm Mix Veggies
Thai Chicken
Curried Rice
California blend veggies
Beef Stew
Fresh Rolls
Turkey Calzones
Sw. Potato Whip
Green Beans
Left over Day
Beef Stew
Chili Mac
Corn
Chicken Crescents
Potato Casserole
Carrots
Fondue
Grilled Ham & Cheese Sandwiches
Soup
Kabobs
Chicken Tarragon Rice
Chicken Pot Pie
Left over Day
Chicken Crescents
Dutch Oven jambalaya
fresh rolls
Sloppy Joes
Sw. Pot. Fries
Green Beans
Rosemary Ranch Kabobs
Creamy Herb Rice
7 Can Taco Soup
Fresh Rolls
Turkey Noodles
Beef Stroganoff
Noodles
Salad
Left over Day
Turkey Noodle Soup
Broiled Flounder or Whiting
Baked Sw. Potato
Peas & Carrots
English Muffin Pizzas
Salads
Taco Salads
Grilled Hunan Chicken
Broccoli
Curried Rice
Chili Dogs
Chips
Green Bean casserole
Pinto Beans
Pan fries
hot buns
Carrots
Left over Day
Pinto Beans
Rosemary Lemon Chicken
Dilly Lemon Rice
Baked winter Squash
Turkey Stuffed Crescents
Squash whip
Cranberry Sauce
Baked Spaghetti
Salad
Stuffed Pork Chops
Scallop Potatoes
Green Beans
Steaks
Grilled veggies
Baked Potatoes
Chicken Gumbo Soup
Fresh Rolls
Left over Day
Soup and Crescents
Tacos
Re-fried Beans
Corn
Spanish Kick Rice
Fried Chicken
Mash Pot/gravy
Green Beans
Shrimp Fried Rice
Bacon Potato Chowder
fresh rolls
Beef Fajitas
Spanish kick rice
Grilled Veggies
Sweet Potato Turkey Croquettes
Green beans
Left over Day
Make extra Fried Chicken
Lee's Chicken Noodle Casserole
Miller's Dutch Oven Chicken
Dutch Oven Potatoes
Making Do Casserole
Tator Tot Casserole
Baked Potato Bar
Pasta Bean Soup
Left over Day:
pasta Bean Soup
Chocolate Chip Cookies - Gluten Free

A classic chocolate cookie tender and loaded with chocolate chips.
Ingredients:
3/4 cup butter
1 1/4 cups light brown sugar
1/4 cup granulated white sugar
2 tsp vanilla
2 eggs
1 Tbsp milk
1/2 cup + 2 tablespoons brown rice flour
1/2 cup + 2 tablespoons white rice flour
1/2 cup tapioca flour
1/2 cup cornstarch
1 tsp xanthan gum
1 tsp baking soda
1 1/2 tsp baking powder
1 tsp salt
1 ¼ cup mini chocolate chips
Directions:
In a large bowl, cream butter and sugars. Add eggs one at a time, then add milk and vanilla.
Whisk together dry ingredients in another bowl.
Add dry ingredients to wet, and mix just until incorporated. Stir in the chocolate chips.
Drop cookie dough by tablespoons onto a greased baking sheet. Bake at 375°F for 8 to 10 minutes, or until cookies are golden brown.
Creamy Orange Popsicles
Gluten Free
| Ingredients: 1 cup frozen orange juice concentrate, thawed 2 cups full-fat yogurt (plain or vanilla flavored) 1/3 cup sugar (can substitute 3 Tbsp agave syrop) 2 tsp vanilla extract Directions: In a saucepan, stir juice and sugar together over med-low heat until sugar is dissolved (about 2 mintues). Then pour into a bowl (with lip) and allow to cool for 5 mintues. Add remaining ingredeints and stir well. Pour into popsicle molds and freeze until firm (about 3 hours). | ||
|

Subscribe to:
Posts (Atom)