Sunday, April 28, 2013

"A year's supply of food storage is beneficial in several ways:

1. It provides peace of mind as we obey the counsel to store.

2. It helps ensure survival in case of personal or natural disaster.

3. It strengthens skills in preparing and using basic foods" ("Home Storage: Build on the Basics," Ensign, June 1989, 40).


Crispy Noodle Prawn Twists  Gluten Free

Crispy Noodle Prawn Twists

Ingredients:
1/4 pkg rice vermicelli noodles
10-15 large prawns or shrimp, peeled & de-veined
Peanut or canola oil, for deep frying

Directions:

Place dry noodles in a pot of boiled water. Let sit for 4-5 minutes, stirring occasionally, until soft. Lift out strands of noodles and lay on a clean towel, to remove excess moisture.

Taking a few strands at a time, wrap noodles tightly around prawns. Using towel, blot excess moisture off wrapped prawn.

Depending what size pot you are using, oil should be at least 2 inches deep. Heat oil over medium-high heat.  Once oil  has reached 350°F, using chopsticks, gently place 1 wrapped prawn in hot oil (have lid ready to deflect any splatters from you). Once noodles are golden, flip and cook other side. These will cook quickly - 60 seconds or so. Cook only 1 prawn first to determine your cook time. Then continue cooking the remaining prawns (up to 3-4 at a time).

After cooked, drain excess oil off on paper towels, then serve with plum sauce.

Plum Sauce  gluten free

Plum Sauce
Great dipping sauce for crispy chicken strips.

Ingredients:
Variation 1
1 lb (1 can) purple plums in heavy syrup
1/4 cup brown sugar
1/4 cup lemon juice
1 tbsp chilli sauce
1/2 tsp ground ginger powder
1/4 tsp garlic powder
1/4 tsp onion powder

Variation 2:
3 lbs red or purple plums, halved and pitted
1 cup onions, chopped
1 cup water
1 tsp ginger, minced
1 clove garlic, minced
3/4 cup sugar
1/2 cup white, rice or apple cider vinegar
1 tsp ground coriander
1/2 tsp salt
1/4-1/2 tsp cinnamon
1/8 tsp cayenne pepper
1/8-1/4 tsp ground cloves

Plum Sauce

Directions:
Variation 1:
Puree plums and syrup in a food processor or blender.
Pour puree into a saucepan and mix with remaining ingredients.  Let simmer for about 30 minutes, until thickened.
Allow to cool, then keep refrigerated in a sealed container.

Variation 2:
In large heavy saucepan, bring plums, onions, water, ginger and garlic to boil over medium heat. Cover and lower heat to simmer, stirring occasionally, until plums and onions are very tender, about 30 minutes.

Place a large sieve over a large bowl, and pour mixture into sieve. Using a potato masher, or the bottom of a cup, press the mixture through until you have extracted as much of the liquid as you can.

Pour liquid in bowl into a clean pot and add remaining ingredients. Taste, and adjust any spices as necessary. Bring to boil, stirring occasionally, then reduce heat and simmer until mixture has thickened, about 45 minutes.

Allow to cool, then keep refrigerated in a sealed container. Or can fill hot sauce into canning jars, seal, and process in a boiling water bath for 30 minutes.

WHOLE WHEAT ANGEL FOOD CAKE

Make this classic dessert entirely from your pantry food storage!

Ingredients
  • 1½ C. powdered sugar
  • 1 C.cake flour (or ¾ C. whole wheat flour + ¼ C. cornstarch)
  • 1½ C. egg whites (12) (1/2 C. dry egg white powder + 1½ C. water)
  • 1½ t. cream of tartar
  • 1 C. granulated sugar
  • 2 t. vanilla
  • ¼ t. salt


Instructions
  1. Move oven rack to lowest position. Heat oven to 375ºF.
  2. Pulse in blender powdered sugar and flour; set aside. Beat egg whites and cream of tartar in large bowl with electric mixer on medium speed until foamy. Beat in granulated sugar, 2 tablespoons at a time, on high speed, adding vanilla, and salt with the last addition of sugar. Continue beating until stiff and glossy meringue forms. Do not underbeat.
  3. Sprinkle sugar-flour mixture, ¼ cup at a time, over meringue, folding in just until sugar-flour mixture disappears. Push batter into ungreased angel food cake pan (tube pan), 10×4 inches. Cut gently through batter with metal spatula.
  4. Bake 30 to 35 minutes or until cracks feel dry and top springs back when touched lightly. Immediately turn pan upside down onto heatproof funnel or bottle. Let hang about 2 hours or until cake is completely cool. Loosen side of cake with knife or long, metal spatula; remove from pan.


Top Ten Ways to Keep Your Food Storage Safe

Food storage is a great way to prepare your family for emergencies. However, bacteria and other contaminants can invade your emergency food and render it useless. Here is a list of the top ten ways to keep your food storage safe and secure!
1. Before canning, make sure everything is clean! Many people can their own fruits and vegetables. This is a great practice for you and your family, just make sure you thoroughly clean off the produce and canning jars before starting. This may require rinsing in a water/bleach solution or boiling.
2. While canning, refrigerate the produce you aren’t ready for yet. If you plan on canning 10 lbs. of strawberries, it will take a while to get all of them done. Instead of leaving all 10 lbs. on the counter while working, put the fruit-in-waiting back in the refrigerator. This is very important for fruit has been cut, because it is more prone for bacteria. Refrigeration will help keep your fruit fresh until you’re ready for it.
3. Weevils? Freeze that flour! Ever heard of weevils? These pesky bugs will hatch in your flour and invade all of your other grains too! When you purchase any form of grain, make sure that you freeze it for 4 to 7 days before putting it in your storage room.
4. Store plenty of water. When planning your food storage, make sure that you have enough water for drinking, food preparation, and general hygiene purposes. You can do this with a combination of water barrels and filters. Water storage should also been taken into consideration when purchasing food storage. For example, freeze-dried food requires substantially less water than dehydrated foods, or traditional foods like rice, beans and wheat.
5. No more expired food, rotate it out. If a portion of your food storage consists of canned goods from the grocery store, make sure to put recently purchased items in the back so that the oldest items get used first. This prevents you from having to throw out expired food.
6. Have a balance of food groups and nutrients. Have you ever tried eating just noodles and bread for a week? It gets boring real quick, and you are more likely to get sick when you don’t eat a balanced diet. When planning your food storage, try to have a good balance of fruits and vegetables with your grains. You can do this by storing canned goods, freeze-dried foods, and/or canning your own foods.
7. Do you know what you have? Take inventory regularly. This allows you to keep track of what you need and helps you watch out for expired foods. If you keep an accurate inventory, finding expired foods can be completely avoided.
8. Include comfort foods. I know this sounds silly, but in an emergency you and your family will be stressed. Having a tasty piece of strawberry shortcake (or whatever your family’s favorite dessert is) will help ease the tension of survival.
9. Use a proper long-term storage container. Leaving food in the bag it came in, or not lining storage containers with plastic can make them more susceptible to moisture and other contaminants.
10. Use oxygen absorbers appropriately. These are great for preserving foods! Make sure they are put in all of your dry food storage containers.

by Alyssa Staehli
 

Sunday, April 21, 2013

4 Simply Steps to Food Storage

"As long as I can remember, we have been taught to prepare for the future and to obtain a year’s supply of necessities. . . . I believe the time to disregard this counsel is over. With the events in the world today, it must be considered with all seriousness. . . . Create a plan if you don't already have one, or update your present plan . . . We are not in a situation that requires panic buying, but we do need to be careful in purchasing and rotating the storage that we're putting away." (L. Tom Perry, in Conference Report, Oct. 1995, 47; or Ensign, Nov. 1995, 36).

Grilled Shrimp & Lime Quesadillas gluten free

Grilled Shrimp & Lime Quesadillas
Grilled shrimp with lime and smoky paprika gives a new flavor to quesadillas.
Ingredients:
1 1/2 tsp paprika
1 tsp onion powder
1/2 tsp garlic powder
1/2 tsp salt
1/4 tsp pepper
1 lb large shrimp, shelled and deveined
1 lime, zested & juiced
2 tomatoes, diced
Handful fresh cilantro, chopped
1 avocado, diced
4 scallions, finely diced
2 cups Monteray Jack cheese, shredded
8 corn tortillas, warmed

Directions:
In a dish combine first 5 spices. Sprinkle over shrimp until coated (reserve spice mixture). Put shrimp on skewers and grill until cooked. Remove from skewer, chop, then place in a bowl with the lime zest and juice. Toss to coast, set aside.

Combine diced tomatoes in a bowl with reserved spice mixture. Toss to coat, set aside.

To build quesadillas, layer a tortilla with the shrimp, tomatoes, some cilantro, avocado and cheese. Top with another tortilla and spray lightly with cooking spray. Gently place quesadilla onto a greased skillet, flip once tortilla starts to brown (or can use an indoor panini/grill press).

Serve with sour cream and salsa if you desire.


Cucumber Salad With Lemon & Basil  gluten free

Cucumber Salad With Lemon & Basil

Fresh basil, cucumbers, cherry tomatoes with a hint of lemon - simply delicious. 

Ingredients:
4 English cucumbers, cut into 1/2" slices, seeded
1 cup cherry or grape tomatoes, whole
1/4 cup olive oil
2 tsp lemon zest
1/4 cup lemon juice
1/2 cup fresh basil, torn
Salt & pepper to taste

Directions:
Prepare cucumbers and tomatoes (seeding the cucumbers and keeping the tomatoes whole prevents their juices from diluting the dressing). Chiffonade basil, then cut again to make smaller pieces.

Whisk together all dressing ingredients (and basil), then pour over veggies. Refrigerate for at least 30 mintues, to allow the cucumbers to get flavored with the dressing.

**Note: To chiffonade basil: stack leaves together, roll tightly (lenthwise for long strips, or widthwise for shorter strips), then thinly slice with a sharp knife. Refer to pictures below.

Southwest Cheddar Cheese Soup
Time: 30 minutes, start to finish :)
Yield: 6 servings

4 medium-sized russet potatoes
3 C water
3 chicken bullion cubes (or 3 t bullion granules)
1 onion, chopped
1 C carrots, chopped
1 C green pepper, chopped
1/3 C butter
1/3 C flour
4 C velveeta cheese, cubed
2 T salsa

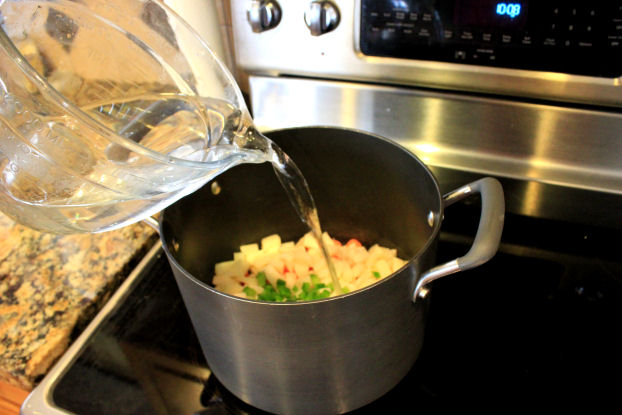
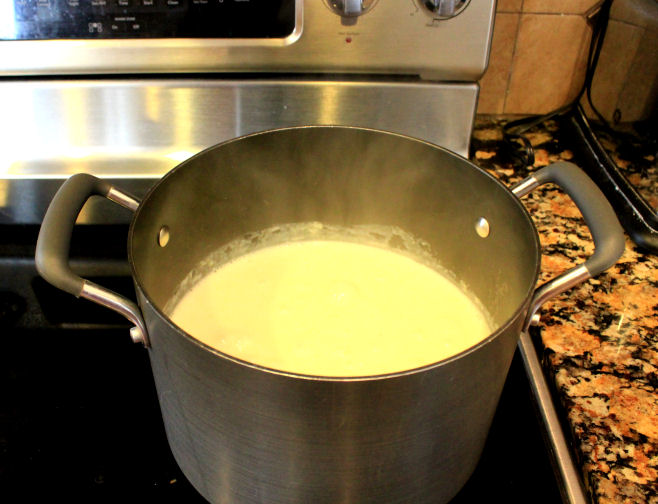
1. Chop up the potatoes, onion, carrots and green pepper. Toss them into a big soup pot and pour 3 cups of water over the top. The water should cover the veggies up with about half an inch of water remaining on top.

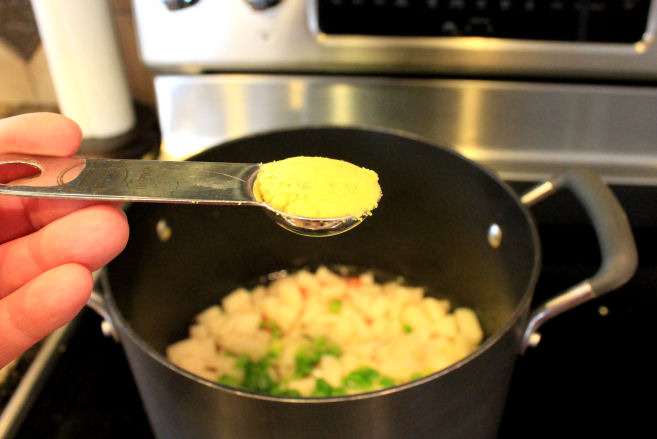
2. Add 3 chicken bullion cubes or 3 teaspoons of bullion granules to the pot. Give it a nice stir to incorporate. Turn the heat to medium high and let the veggies cook until they are fork tender.

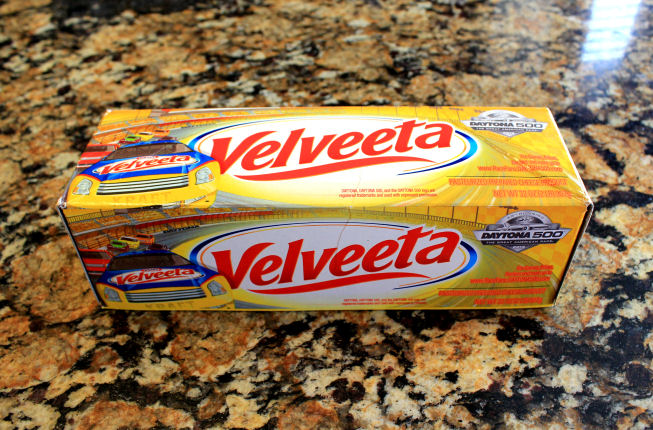
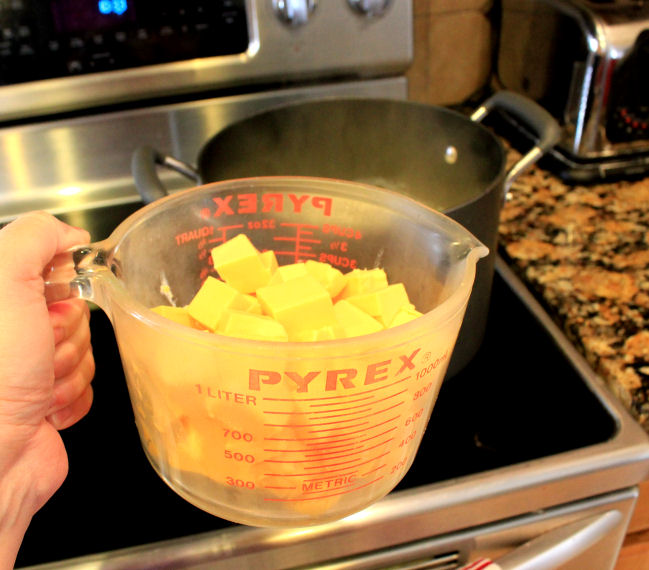
3. While your veggies cook, find yourself some velveeta cheese. You will need just a little bit more than half of a 2 pound block.

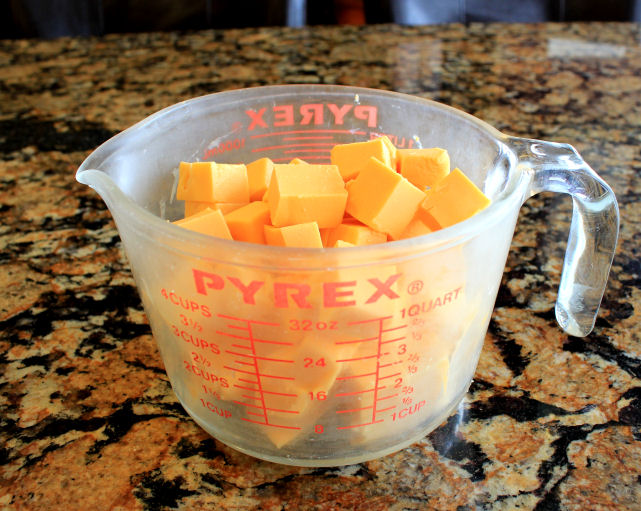
Or in other words, 4 cups of velveeta cheese cubed up nicely. Open up that package and cut up the cheese with a sharp knife.

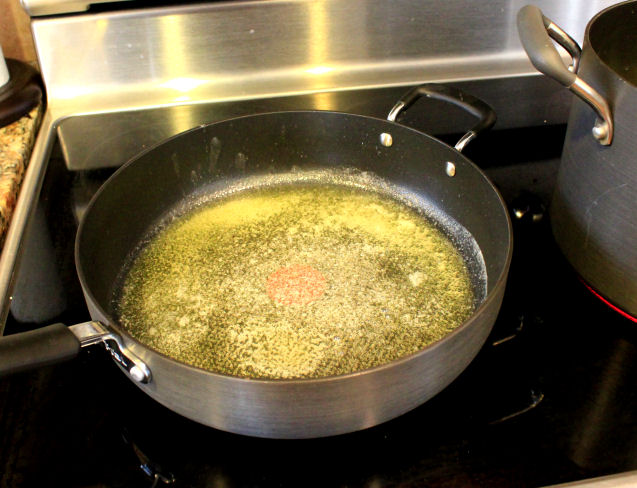
4. In a skillet (or medium-sized sauce pan) melt 1/3 cup of butter over medium high heat.

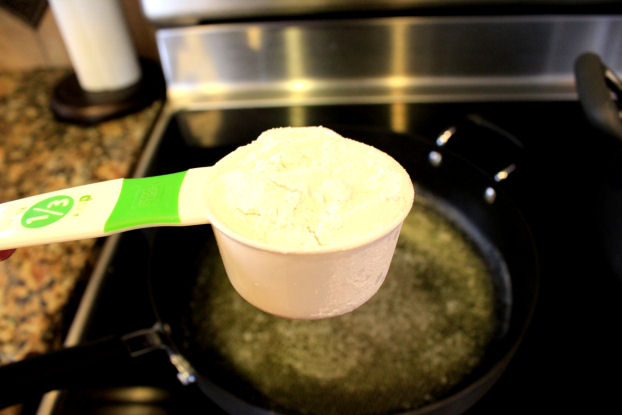
5. Add 1/3 cup flour

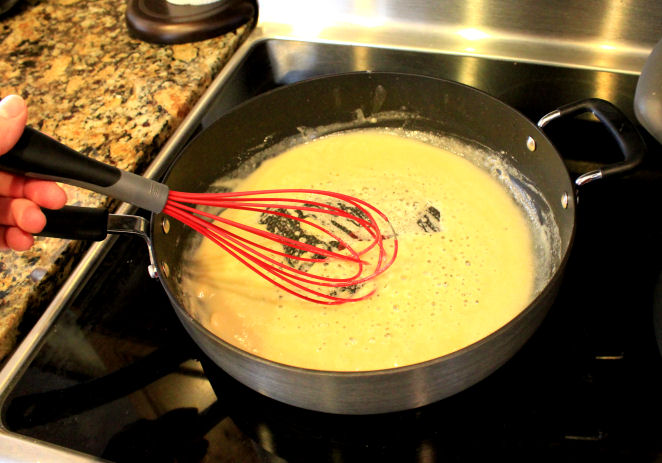
and immediately whisk it around to form a thick paste.

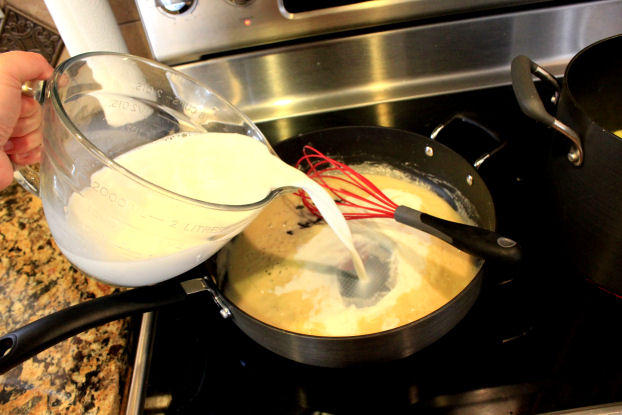
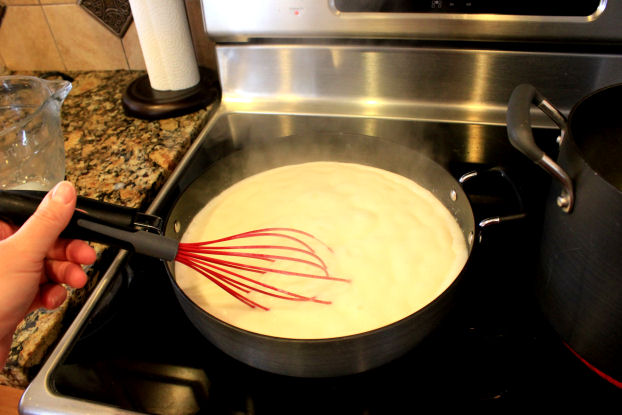
6. Pour in 3 1/2 cups of milk

and whisk it around to combine. Keep stirring it and watch for it to get nice and bubbly and thick. Should take just a few minutes.

7. When your veggies are cooked through, add the thickened butter and milk mixture to the soup pot. (Don’t drain any of the liquid the veggies were cooking in). Give it all a nice stir.

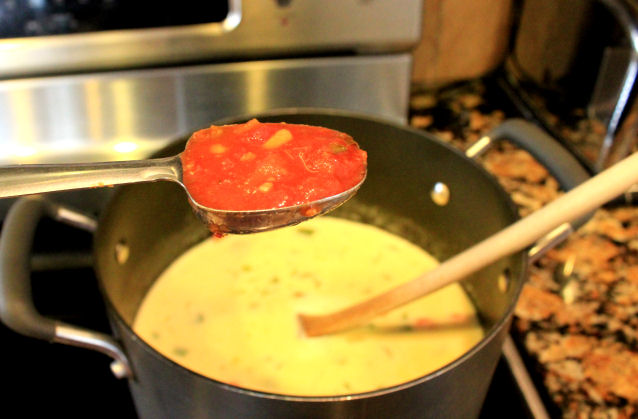
8. Add your velveeta cheese

and 2 tablespoons of salsa. (Feel free to add a little bit more, if you enjoy that kind of thing). Stir it well to combine. The cheese will melt quite quickly. When it has been incorporated into the soup remove the pot from the heat, serve and enjoy.


Apricot Cobbler Recipe

INGREDIENTS

1/2 C
Sugar
1 Tbsp
Cornstarch
4 C
Freeze Dried Apricot Dices
1 C
Dehydrated Buttermilk Powder
1/4 Cup
Dehydrated Fat-Free Milk
1/4 C
Chopped Nuts
1 Tbsp
Sugar
1 Tbsp
Melted Butter or Clarified Butter

PREPARATION
1. Mix 1/2 cup sugar and cornstarch in a 2-quart saucepan. Stir in apricots and water. Heat to boiling, stirring constantly. Boil and stir one minute.
2. Pour into ungreased 1-1/2 quart casserole dish.
3. Stir together remaining ingredients unto a soft dough forms. Drop dough by 6 tablespoonfuls onto hot apricot mixture.
4. Bake at 425°F for 15 minutes or until golden brown.


Four simple steps to planning food storage

1. Decide how much food you want to store. Set a goal to get a two-week supply of food then work up to a month supply.
2. Think about storable foods that you like and purchase them.
3. Look for favorite family recipes and other delicious food storage recipes that can be made with stored foods.
4. Create a menu for a week with your favorite food storage recipes. Multiply ingredients by two to plan your food storage for two weeks.
 

Tuesday, April 16, 2013

"Consider the important (food storage) program which we must never forget nor put in the background. As we become more affluent and our bank accounts enlarge, there comes a feeling of security, and we feel sometimes that we do not need the supply that has been suggested by the Brethren. . . . We must remember that conditions could change and a year’s supply of basic commodities could be very much appreciated by us or others. So we would do well to listen to what we have been told and to follow it explicitly" (Spencer W. Kimball, in Conference Report, Apr. 1976, 170; or Ensign, May 1976, 124).

Croutons  gluten free

Croutons
Crunchy and filled with flavor, these croutons are perfect in salads or stuffings.
Ingredients:
6-8 slices GF bread (fresh or day old), cut into 3/4-1" cubes
3 Tbsp olive oil or melted butter
1 tsp garlic powder
1/2 tsp garlic salt
1 tsp dried parsley

Directions:
On a rimmed baking sheet place bread cubes. Drizzle oil over, then sprinkle with seasonings. Using your hands, toss everything together until evenly coated.

Spread out into a single layer and bake at 400°F for 10-15 minutes, or until bottoms are golden brown. Turn broiler on, and broil until tops are golden brown and crouton is crunchy.

Allow to cool and store in an airtight container.


Taco Salad in Tortilla Bowls  gluten free

Taco Salad in Tortilla BowlsIngredients:

Taco Bowls:

6 - 6” corn tortillas
Cooking Spray
Salt

Taco Salad Filling Suggestions:
Chilli flavored ground beef
Lettuce
Tomatoes
Black beans
Cheddar cheese
Avocado
Sour cream
Salsa

Directions:
Sprinkle each tortilla lightly with water and stack them on a plate. Cover with another plate turned upside down, and microwave for 45 seconds.

Spray each side of a tortilla lightly with cooking spray, sprinkle with salt then place in an upside down muffin tin - in the space between 4 muffin cups, creating a bowl (see picture 2). Repeat with remaining tortillas, then bake at 375°F for 10 minutes.

Turn off oven, flip tortillas over (see picture 3), then let sit in oven for another 20 minutes to completely crisp up.


Food Storage Sour Cream Pound Cake


Food Storage Sour Cream Pound Cake Recipe
Recipe type: Dessert
Prep time:  15 mins
Cook time:  1 hour
Total time:  1 hour 15 mins


This recipe is so great for food storage….and strawberries!
Ingredients
  • 1 C. butter (1 C. white bean puree)
  • 2¼ C. sugar
  • 6 eggs (1/3 C. dry egg powder + ⅔ C. water)
  • 3 C. flour (1 C. whole wheat flour and 2 C. all-purpose flour)
  • ½ t. salt
  • ¼ t. soda
  • 1 C. sour cream (1 C. food storage yogurt or 1 C. dry sour cream powder + ½ C. water)
  • 1½ t. vanilla
Instructions
  1. Pre-heat oven to 350 degrees. Cream butter until soft. Add sugar gradually, beating until light and fluffy. (If you’re using beans, simply beat the puree and sugar together) Add eggs, one at a time, beating thoroughly after each. (If you’re using powdered eggs, just put in the powder and water and mix) Mix together flour, salt and soda; add to batter alternately with sour cream, beating until smooth. Add vanilla. Prepare cake pan by coating generously with non-stick spray, then sprinkling with granulated sugar; or grease pan heavily. Pour batter into prepared pan. Bake for 1 hour or until done. Cool cake for 10 minutes; remove from pan.

WHOLE WHEAT ANGEL FOOD CAKE

Food Storage Whole Wheat Angel Food Cake Recipe
Recipe type: Dessert
Prep time:  30 mins
Cook time:  30 mins
Total time:  1 hour

Serves: 12
 
Make this classic dessert entirely from your pantry food storage!
Ingredients
  • 1½ C. powdered sugar
  • 1 C.cake flour (or ¾ C. whole wheat flour + ¼ C. cornstarch)
  • 1½ C. egg whites (12) (1/2 C. dry egg white powder + 1½ C. water)
  • 1½ t. cream of tartar
  • 1 C. granulated sugar
  • 2 t. vanilla
  • ¼ t. salt

Instructions
  1. Move oven rack to lowest position. Heat oven to 375ºF.
  2. Pulse in blender powdered sugar and flour; set aside. Beat egg whites and cream of tartar in large bowl with electric mixer on medium speed until foamy. Beat in granulated sugar, 2 tablespoons at a time, on high speed, adding vanilla, and salt with the last addition of sugar. Continue beating until stiff and glossy meringue forms. Do not underbeat.
  3. Sprinkle sugar-flour mixture, ¼ cup at a time, over meringue, folding in just until sugar-flour mixture disappears. Push batter into ungreased angel food cake pan (tube pan), 10×4 inches. Cut gently through batter with metal spatula.
  4. Bake 30 to 35 minutes or until cracks feel dry and top springs back when touched lightly. Immediately turn pan upside down onto heatproof funnel or bottle. Let hang about 2 hours or until cake is completely cool. Loosen side of cake with knife or long, metal spatula; remove from pan.
 

Tuesday, April 9, 2013

Food Storage

"Recent surveys of Church members have shown a serious erosion in the number of families who have a year’s supply of life’s necessities. Most members plan to do it. Too few have begun. . . . It is our sacred duty to care for our families, including our extended families" (Thomas S. Monson, Ensign, Sept. 1986, 4; emphasis in original).

Parmesan-Crusted Chicken Strips  gluten free

Parmesan-Crusted Chicken Strips
Crunchy coated chicken strips flavored with Parmesan and Dijon.
Ingredients:
4 chicken breasts, sliced into strips
2 Tbsp Dijon mustard
1 tsp thyme
1/2 tsp salt
1/4 tsp pepper
1/4-1/2 tsp chilli powder or cayenne pepper
3/4 cup GF corn flakes, crushed
3/4 cup Parmesan cheese, dry-finely grated style

Directions:
In a shallow dish, mix together mustard, and spices. In another dish, mix together the corn flake crumbs and cheese.

Coat the strips in the mustard mix, then dredge into the crumb mixture, turning until fully coated.

Place strips on a rack over a foil lined baking sheet. Lightly spray with some cooking oil spray, then bake at 450°F for 15-20 minutes or until fully cooked.


Mashed Potato Souffle  gluten free

Mashed Potato Souffle

These potatoes are so light and fluffy, you better make extra - since everyone will want seconds!

Ingredients:
3 Tbsp butter or margarine
3 lbs Russet potatoes, peeled & boiled
3 egg yolks
1 1/4 cup milk or milk alternative
1 1/2 cup Gruyere or Jarlsburg cheese, grated
Salt to taste


Directions:
Mash potatoes, then add butter. Cool slightly then mix in yolks, milk and 1 1/4 cups of the cheese. Salt to taste.

Spread into buttered baking dish, and top with remaining cheese (don't pile potatoes too close to dish edges, as it will rise a few inches as it bakes), and bake at 400°F for 30 minutes.

Whole Wheat Herbed Rolls


Ingredients:
2 packages (1/4 ounce each) active dry yeast
2-3/4 cups warm water (110° to 115°), divided
1/3 cup vegetable oil (or 1/2 C. bean puree)
1/4 cup honey or molasses
1 tablespoon salt
2 teaspoons garlic
2 teaspoons dried thyme
2 teaspoons dried basil
1 teaspoon onion powder
1 egg, beaten (1 T. dry egg powder with NO water)4 cups whole wheat flour
4 to 4-1/2 cups all-purpose flour
Method:
1. In a large bowl, dissolve yeast in 1/2 cup warm water. Add the oil, honey, salt, seasonings, egg, whole wheat flour and remaining water. Beat until smooth. Stir in enough all-purpose flour to form a soft dough.
2. Turn onto a floured surface; knead until smooth and elastic, 6-8 minutes (or use a kitchen mixer). Place in a greased bowl, turning once to grease top. Cover and let rise in a warm place until doubled, about 1 hour.
3. Punch dough down. Turn onto a lightly floured surface; divide into three portions. Divide each into 16 pieces. Shape each into rolls. Cover and let rise until doubled, 20-25 minutes.
4. Bake at 375° for 12-15 minutes or until tops are golden brown. Remove from pans to wire racks. Yield: 4 dozen


Food Storage Yogurt

What you’ll need for food storage yogurt with powdered milk:

  • 2-quarts pasteurized milk (cream, whole, low fat, or skim) — for food storage purposes, we’ll use powdered milk. For non-instant milk you’ll need, 1 1/2 c. dry milk powder and 2 quarts water. If you’re using instant milk you’ll need, 3 c. dry milk powder and 2 quarts water.
  • Additional nonfat dry milk powder (for extra milk proteins) — Use 1 1/3-cup powder when using non instant powdered milk, or use 2 2/3-cup powder when using instant powdered milk. The higher the milk solids the firmer the yogurt will be.
  • Commercial, unflavored, cultured yogurt — Use 1/2-cup. Be sure the product label indicates that it contains a live culture. Also note the content of the culture. L. bulgaricus and S. thermophilus are required in yogurt, but some manufacturers may in addition add L. acidophilus and/or B. bifidum. The latter two are used for slight variations in flavor, but more commonly for health reasons attributed to these organisms. All culture variations will make a successful yogurt. I like the Mountain High Yoghurt as my starter.
  • (Optional) 2 to 4 tablespoons sugar or honey.

Instructions for your food storage yogurt:

  1. Mix your powdered milk (all of it-both the milk to make the initial 2 quarts of milk and the additional milk).
  2. In a 4-5 qt. slow cooker, place milk and sugar or honey, if you are using it, cover and cook on low for 2 1/2 hours.
  3. After the 2 1/2 hours, unplug the slow cooker and let it sit for 3 hours.
  4. After the 3 hours, remove 2 cups of milk (you may notice a skin of sorts on your milk in the slow cooker, go ahead and remove that with a spoon and discard) and stir in the 1/2 cup of yogurt in a separate bowl. Add the yogurt mixture to the remaining milk and stir. (If you want to check your milk temperature, you can use a candy thermometer and make sure it’s between 112 and 117 degrees F. Put the lid back on the slow cooker and wrap in a large and thick bath towel and let sit (unplugged) for an additional 8 hours.
  5. After the 8 hours, unwrap and uncover the slow cooker. SCOOP (DO NOT STIR) the yogurt into clean containers and refrigerate – chill before serving.
(This recipe was adapted from National Center for Home Preservation and the method of cooking the slow cooker was approved by the man who wrote that article…as long as it doesn’t curdle-if yours curdles throw it out!)


Sunday, March 31, 2013

Learn to use what you store.

Learn to Use What You Store
"Every father and mother are the family’s storekeepers. They should store whatever their own family would like to have in the case of an emergency. . . . Some have said, “We have followed this counsel in the past and have never had need to use our year’s supply, so we have difficulty keeping this in mind as a major priority.” Perhaps following this counsel could be the reason why they have not needed to use their reserve. By continued rotation of the supply it can be kept usable with no waste" (James E. Faust, in Conference Report, Apr. 1986, 26; or Ensign, May 1986, 22).


Easter Egg Lunch Box - gluten free

Easter Egg Lunch Box


Fillable colored plastic eggs

Snack Ideas:
Grapes
Berries
Nuts (avoid peanuts, due to school restrictions)
Seeds
GF crackers
GF cereal
GF granola bars, cut into cubes
Cheese cubes (if you include a mini ice pack in the lunch box)
GF Easter candy

Scalloped Potatoes with Butternut Squash gluten free

Scalloped Potatoes with Butternut Squash
Butternut squash adds a great color and flavor to these potatoes.
Ingredients:
1 cup leeks, white parts thinly sliced
2 Tbsp butter or margarine
1/2 cup cream (or milk alternative mixed with 2 Tbsp rice flour)
1 cup GF chicken broth
1 Tbsp thyme
1-2 garlic, minced
Salt & pepper
1/4 tsp nutmeg
2 Yukon Gold potatoes, peeled
1/2 butternut squash, peeled & seeded
1 1/4 cups sharp cheddar cheese, optional

Directions:
Saute leeks in butter for about 4 minutes. Add cream, broth and seasonings, and bring to a boil. Turn heat down, and let simmer for 5 minutes.

Thinly slice (1/8") potatoes and squash, and layer into a greased casserole dish. Pour hot liquid over potatoes, cover and bake at 350°F for 45 minutes until soft.

If desired, sprinkle cheese on top and place back in oven until cheese is melted.
Let cool for 20 minutes before serving (allows liquid to thicken).


BUNNY BUNS FOOD STORAGE STYLE


1 package active dry yeast (2 1/4 t. yeast)
1/4 cup warm water
1 cup milk, warmed not quite to boiling (3 T. non instant milk powder OR 1/3 c. instant milk powder + 1 C. water-I added my water to the 1/4 c. water mentioned above for dissolving my east)
1/3 cup sugar
1/2 cup shortening
1 teaspoon salt
2 eggs, beaten (2 T. dry egg powder and NO WATER)
1/4 cup orange juice
2 tablespoons grated orange peel
5 1/2 cups flour, sifted (I used 3/4 c. whole WHITE wheat flour and the rest bread flour)

Plain Glaze: 2 cups powdered sugar, 1/4 cup hot water, 1 teaspoon butter
Orange Glaze: 2 cups powdered sugar, 1/4 c. orange juice, 1 teaspoon butter, and 1 t. grated orange peel

1. Sprinkle yeast in the warm water and set aside.
2. In another bowl, blend milk, sugar, shortening, and salt. Cool until lukewarm, then add eggs, water with yeast, orange juice, and orange peel.
3. Stir in flour a few cups at a time to make a soft dough. Let stand for 10 minutes.
4. Knead dough 5–10 minutes on a lightly floured surface until dough is smooth and elastic. Place it in a lightly greased bowl, turning once to grease surface. Cover bowl with a clean towel and put it in a warm place. Let dough rise for 2 hours, or until double in size. Punch dough down and let stand for 10 minutes.
5. On a lightly floured surface, roll dough into a rectangle 1/2 inch thick. Cut dough into strips 1/2 inch wide and 14 inches long. Roll between hands into rounded snake shapes. Cut one strip into pieces 1/2 inch long, and roll into balls.
6. Place one long piece of dough on a greased cookie sheet. Place one end of the strip over the other to make a loop; bring the end that is underneath up and cross it over the other end. Place a ball of dough on top of the bottom loop.
7. Cover bunnies and let rise in a warm place for 45–60 minutes, until nearly double in size. Bake at 375ºF (190ºC) for 12–15 minutes.
8. For the glaze, stir powdered sugar, water, and butter together. Frost bunnies with the glaze while they are still warm.

Best Coconut Macaroon Recipe


FOOD STORAGE MACAROONS


Directions
  1. Preheat oven to 350 degrees F. Line cookie sheets with parchment paper or aluminum foil.
  2. In a large bowl, stir together the flour, coconut and salt. Stir in the sweetened condensed milk and vanilla using your hands until well blended. Use an ice cream scoop to drop dough onto the prepared cookie sheets. Cookies should be about golf ball size.
  3. Bake for 12 to 15 minutes in the preheated oven, until coconut is toasted.
  4. Melt chocolate and drizzle over top and top with Christmas sprinkles


Sunday, March 24, 2013

Recipes, simple steps

"A year's supply of food storage is beneficial in several ways:

1. It provides peace of mind as we obey the counsel to store.

2. It helps ensure survival in case of personal or natural disaster.

3. It strengthens skills in preparing and using basic foods" ("Home Storage: Build on the Basics," Ensign, June 1989, 40).


Deviled Eggs with Avocado & Bacon  gluten free

Deviled Eggs with Avocado & Bacon
Deviled eggs can be filled and topped with whatever flavorings you like!
Ingredients:
6 eggs, hard boiled
2-4 Tbsp mayonnaise, to taste
1-2 tsp Dijon mustard, to taste
1/4-1/2 tsp paprika, to taste
Salt and pepper

Additional Flavor Suggestions
2 Tbsp goat cheese or 1 Tbsp crumbled blue cheese or 2 slices finely diced ham + 1 finely diced dill pickle

Topping Suggestions
Avocado slices (dip in lemon juice to prevent browning)
Chopped cooked bacon
Paprika

Directions:
Once eggs are hard boiled (about 14 minutes), allow to cool completely. Cold eggs will shrink away from the shells, making them easier to peel.

Slice in half lengthwise, remove yolks into bowl. Add all ingredients, and combine using an electric mixer until smooth and creamy. Taste, then adjust the seasonings and add any flavorings you like.

Place mixture into a plastic bag, and snip tip off with scissors (or use pinking shears for a rosette-style piped looked).

Gently squeeze filling into each cooked egg half. Garnish with any toppings you'd like.

PORCUPINE MEATBALLS

Porcupine Meatballs

1 1/2 lbs. Hamburger
2/3 Cup Rice, uncooked
1 tsp. Salt
1/2 tsp. Pepper
2 tsp. Minced Onion, dry
Combine above ingredients & form into small balls

1 Can Tomato Soup
1/2 Cup Water
Mix & Heat the soup and water in the Pressure Cooker.
Drop meat balls into hot soup mixture.
Close cover securely with pressure regulator on top.
Cook 10 minutes at 15 lbs pressure.
Let pressure drop of its own accord.


PorcupineMeatballs


Strawberry Shortcake for Valentine's Day

Strawberry Shortcake for Valentine's Day
Instead of the usual square cut pieces of cake, use some fun shaped mini cake molds.  Then you can assemble stunning looking individual strawberry shortcakes.
Ingredients:
Yellow Cake Recipe or GF cake mix
Lemon Glaze, optional
Strawberries, sliced
Whipped cream

Directions:

Prepare cake according to directions. Let cool.

If desired, prepare lemon glaze
 and pour over cakes. Let sit at room temperature until glaze is set (about 30 minutes).

Slice strawberries and arrange over individual cakes, along with a dollop of whipped cream.

6 Simple Techniques to Organize your food storage


Store Items in the Right Spot
Be Practical
Rotate and Resupply
Organize According To Your Taste
Don’t Forget About Water
Get Extra Storage When Needed

Sunday, March 10, 2013

Recipes and Menus

"Perhaps if we think . . . of what it would take to keep us alive in case we didn’t have anything else to eat, that . . . would be very easy to put in storage for a year . . . just enough to keep us alive if we didn’t have anything else to eat" (Harold B. Lee, quoted in Ezra Taft Benson, "Prepare Ye," Ensign, Jan. 1974, 81).


taken from Everyday Food Storage


Spaghetti Sauce

2 T olive or vegetable oil
1 C fresh or 1/4 C dry onion chopped (1 med to large onion)
2 small green bell pepper, chopped (1/2 C)
2 large cloves garlic, minced or finely chopped
2 cans (14 ½ oz.) diced tomatoes, undrained
3-4 cans (8 oz.) tomato sauce
2 T chopped fresh or 2 tsp dried basil leaves
1 T chopped fresh or 1 tsp dried oregano leaves
½ tsp. salt
¼ tsp. pepper
Saucepan on the Stove Directions:Heat oil in 3-quart saucepan over medium heat. Cook onion, bell pepper and garlic in oil 2 minutes, stirring occasionally.
Stir in remaining ingredients, . Heat to boiling; reduce heat. Cover and simmer 45 minutes
Use sauce immediately, or cover and refrigerate up to 2 weeks or freeze up to 1 year.
Slow Cooker Directions:Omit the oil (unless you are using olive oil for flavor)
Mix the remaining ingredients together in 3 ½-6 quart slow cooker.
Cover and cook 6-8 hours.
Serving with:1 lb. cooked ground beef, Meatballs, or Italian Sausage
1 to 1-1/2 lb Spaghetti pasta, cooked
Tossed salad
Time saving Tip: When you buy hamburger or ground italian sausage cook it before you put it 1 lb. packages in the freezer. That way it’s one mess but you’ve cooked the hamburger for multiple meals in advance. No need to thaw before you add it to the spaghetti sauce, if you let it simmer, it thaws in the sauce. EASY!!!

Homemade French Bread

French Bread 3-4 Loaves
2 T. yeast
2 1/2 c. warm water
7 c. flour
2 T. sugar
1 T. salt (remember this is for 3-4 loaves…so it’s not really alot)
Dissolve yeast in water. Then add sugar, salt and 2 c. flour. Beat. Add rest of flour and knead on floured board (or in standing kitchen mixer) for about 5 minutes. Let rise about 30-45 minutes. Grease 1-2 cookie sheets and sprinkle lightly with corn meal. Punch down bread and knead one minute. Divide into thirds or fourths. Let rest 10 minutes. Roll each piece into ropes as long as the cookie sheet. Place on cookie sheet being sure there is ample space between each rope or loaf. make several evenly spaced shallow cuts diagonally in the top of each loaf; brush with water or egg wash, then brush again and sprinkle with sesame seeds. Let raise until double (about 30 minutes). Place pan of hot water on lower shelf of oven. Bake at 450 for 10 minutes and then reduce heat to 350 for 20-30 minutes or until bread gives a hollow sound when tapped. Remove from pans and cool and wrap in plastic bags. NOTE: This is EXTREMELY delicious warm and the next day but after that it starts to dry out and isn’t very tasty.

Quinoa-Crusted Chicken   gluten free

Quinoa-Crusted Chicken
Crunchy and full of flavor, this quinoa coated chicken is a home run.
Ingredients:
1 cup cooked quinoa
4 chicken breasts
1/3 cup dijon mustard
2 tsp thyme
Salt and pepper

Directions:
Prepare quinoa, drain then spread out on a parchment lined baking sheet. Bake at 300°F for 20-30 minutes until lightly toasted. Let cool, then break up any clumps using your fingers. Place into a shallow dish and toss with some salt and pepper.

In another shallow dish, mix mustard and thyme. Lightly coat chicken with mustard, then dip in quinoa. Turning and pressing in quinoa until completely coated.

Place on baking sheet, spray lightly with some cooking spray, then bake at 425°F for 20 minutes or until thoroughly cooked.
Quinoa-Crusted Chicken Quinoa-Crusted Chicken


How To...Prepare Quinoa

Gluten Free

How To...Prepare Quinoa

Quinoa (pronounced KEEN-WA), is a seed with a nutty flavor. Quinoa flour is used in making pasta and a variety of baked goods such as pancakes, bread, muffins, and crackers.

Ingredients:
1 cup (250 ml) Quinoa
2 cups water


Directions:
Before cooking, rinse the seeds in a sieve to remove their bitter resin-like coating, called saponin. Quinoa is rinsed before it is packaged and sold, but it is best to rinse again to remove any of the powdery residue that may remain on the seeds.

For every one cup of quinoa, bring two cups of water to a boil (just like rice). If you prefer your food more al dente, then use just 1.5 cups of water.

Cover the boiling quinoa and reduce to a simmer. Cook for 12-15 minutes, or until the germ separates from the seed. The cooked germ looks like a tiny curl (like the ring around Saturn).

Let quinoa stand for about 3 minutes to enable it to reach complete fluffiness.


90 DINNER MENUS6x Clam Chowder 19 oz., bread/butter
6x Easy Chicken Stew, bread/butter
6x Vegetable Soup 19 oz., bread/butter
6x Chicken, Vegetable, Pasta Soup 19 oz., saltine crackers
6x Spaghetti w/homemade sauce, vegetable, milk
3x Spaghetti w/jar sauce, vegetable, water
6x Quick Beef Chili w/corn *73 Biscuits
3x Pineapple Chicken *92, rice
3x Italian Pasta Salad *67, Biscuits
3x Chicken & Rice Casserole, Biscuits
3x Tuna w/ Egg Noodles, canned corn, milk
3x Chicken w/ Egg Noodles, canned corn, milk
3x Chicken a la King *94, rice, canned green beans
3x Creamy Chicken and green beans *160, mashed potatoes
3x Tuna, Noodles and peas, canned pears
3x Teriyaki Pineapple Beef, rice w/broth
3x Bisquick Vegetable pot pie, canned peaches, milk
3x Barbecue Beef Casserole *160, canned peaches
3x BBQ chicken on hamburger buns, canned peaches milk
3x Sloppy Joe's with canned meat on hamburger buns, applesauce
3x Enchilada Casserole w/corn, canned peaches
3x Beef Nacho Casserole, Spanish rice *98
3x Meat and gravy on mashed potatoes *88, canned green beans, milk

Sunday, March 3, 2013

Master Menus

"Be prepared in all things against the day when tribulations and desolations are sent forth upon the wicked" (Doctrine and Covenants 29:8 )

"We encourage you to follow this counsel with the assurance that a people prepared through obedience to the commandments of God need not fear" (First Presidency letter, 24 June 1988).

Asian Chicken Salad with Orange Supremes  gluten free

Asian Chicken Salad with Orange Supremes

Fresh orange segments (supremes) and sesame ginger dressing elevate this salad to new tastes.

Ingredients:
Chicken:
2 chicken breasts
1/3 cup sesame seeds
1/3 cup GF corn flakes, crushed
1/2 tsp salt
1 egg
2 tsp oil

Dressing:
2 Tbsp brown sugar
2 tsp GF soy sauce
1 Tbsp sesame oil, optional
1/4 tsp fresh ginger, grated
3 Tbsp vinegar (white, apple cider, or rice)
1/4 cup vegetable oil

Salad:
Mixed greens
Orange Supremes
Toasted* sesame seeds, optional
Sliced Almonds


Directions:
Combine sesame seeds and corn flake crumbs in a shallow dish with the salt. In another shallow dish beat the egg until smooth. Dip chicken in the egg, then coat both sides with crumb mixture.


Cream of Chicken Condensed Soup


1 C. Magic Mix
3/4 C. Chicken Broth (either from a can, bouillion, or liquid from canned chicken)
1 t. Dry Parsley
Dash of Onion Salt

Mix together with wire whisk over medium heat, stirring constantly. Bring to a boil and remove from heat.

Condensed Cream of Celery Soup

1 C. Magic Mix
¾ C. Water from Cooking Celery
1 C. Chopped Celery, cooked and drained (I use dehydrated celery and use the water left over from hydrating the celery as my water)
Pinch of Celery Seed
1 t. Dry Parsley Flakes (optional)

Combine magic mix and water from cooking celery. Stir constantly over medium-high heat until it thickens. Add in celery, celery salt and parsley. Use in any recipe calling for canned Cream of Celery soup.

Condensed Cream of Mushroom Soup

1 C. Magic Mix
1 4.5 oz. can Mushroom pieces and stems (SAVE THE WATER!)
1/4 C. Water
Dash of Onion Salt

1-2 drops Kitchen Bouqet,optional (check the previous video to see what this is)
Combine all ingredients over medium heat. Stir constantly until mixture begins to bubble and thicken. Remove from heat immediately.

Magic Mix

Ingredients: 2 1/3 C. Powdered Milk 1 C. All Purpose Flour (Yes, use All Purpose) 1 C. (2 sticks) Margarine (***HAS TO BE REAL MARGARINE, NOT SPREAD***) or Butter, at room temperature Combine dry milk, flour and margarine/butter into a large bowl.

Mix until it looks like corn meal. (You may want to start off slow and work up to the fastest setting so that it doesn’t blow powder all over)

Keep mix tightly covered in the refrigerator

Sunday, February 24, 2013

Food Storage


30 Minute Breadsticks OR No-Fail Deep Dish Pizza Crust

(If it is too thick for your family, you can either half the recipe or put one full recipe onto two cookie sheets)

2 1/2 C. Medium Hot Water
5 tsp. SAF Instant Yeast*
2 Tbsp. Sugar
3 Tbsp. Oil
1 tsp. Salt
6 C. Flour (you can do half all-purpose and half white wheat or 100% whole wheat)
1/2 Cube of Butter

Directions:
1. Pour medium hot water in mixing bowl. Sprinkle yeast on top and allow to dissolve.
2. Add sugar, salt, and oil. Gradually add approximately 6 cups of flour.
3. Melt 1-2 cubes butter on cookie sheet in oven as it is heating to 400 degrees and melt in oven. 4. Place dough on cookie sheet and press to fill pan, make sure butter gets on top of the dough.
5. Allow to double in size (About 10-15 minutes)
6. Cook for 10 to 12 minutes or until desired browning is accomplished.
7. Cut into strips or top with favorite pizza toppings.

* When using regular yeast change amount to 2 Tbsp.


Hearty Chicken Chipotle Soup Recipe!


IMG_1126(1)

1 large onion, chopped
4 garlic cloves, minced
4 cups reduced-sodium chicken broth
2 cans (15 ounces each) pinto beans or black beans, rinsed and drained
2 cans (14-1/2 ounces each) fire-roasted diced tomatoes, undrained
2 cans (15 ounces each) corn
2 chipotle peppers in adobo sauce, seeded and minced
2 teaspoons adobo sauce (the sauce comes with the chipotle peppers)
1 teaspoon ground cumin
1/4 teaspoon pepper
2 (12 ounces each) cans chicken
1/2 cup fat-free sour cream
1/4 cup minced fresh cilantro

Directions

In a slow cooker add garlic, onions, broth, beans, tomatoes, corn, chipotle peppers, adobo sauce, chicken, cumin and pepper. Cook on low 8 hours or high 4 hours.
Garnish with sour cream; sprinkle with cilantro.

Carrot & Ginger Soup  gluten free

Carrot & Ginger Soup

You will get your daily servings of vegetables in this flavor packed soup.

Ingredients:
2 tsp oil
1-2 cloves garlic, minced
1 onion, chopped
1 tsp coriander (cilantro)
1/2 tsp cumin
1/4 tsp curry
1/4 tsp pepper
4 cups carrots, chopped
2 Tbsp ginger, minced
3 cups chicken stock
2 cups milk or cream (or milk alternative thickened with 1 Tbsp starch of your choice)
Salt to taste


Directions:
In a stock pot, sauté garlic and onions with oil for 1 minute. Add spices and continue cooking until onions are soft. Add carrots, ginger and stock and simmer until carrots are tender.

Remove from heat and puree using an immersion blender, food processor or blender. Return to pot and add milk, then season to taste with salt.

Serve with a dollop of sour cream if you like.


I have copied the link to LDS.org  for food storage for the church.  Please click on the link and check it out if you would like to order something from the church for your food storage this is the spot!

http://store.lds.org/webapp/wcs/stores/servlet/Category3_715839595_10557_21158_-1_N_image_0


They have a really great start kit that isn't too expensive - it's $31.00.

Starter Kit
The starter kit contains recipes, instructional pamphlets, visual aids for teaching family home storage principles, and one can each of flour, red wheat, white wheat, rice, pinto beans, and oats. A case contains 28 lbs. of product. Food items cannot be shipped to addresses outside the United States

"Perhaps if we think . . . of what it would take to keep us alive in case we didn’t have anything else to eat, that . . . would be very easy to put in storage for a year . . . just enough to keep us alive if we didn’t have anything else to eat" (Harold B. Lee, quoted in Ezra Taft Benson, "Prepare Ye," Ensign, Jan. 1974, 81).

"We suggest that members concentrate on essential foods that sustain life" (First Presidency letter, 24 June 1988).

Sunday, February 17, 2013

A few menu ideas and some receipes


Through His prophets and apostles, God has commanded us to have a year's supply of food and other essentials in our food storage. Joseph Smith, the first prophet and president of the Church of Jesus Christ of Latter-day Saints recorded the following in the Doctrine and Covenants:
"The Church and its members are commanded by the Lord to be self-reliant and independent" (D&C 78:13-14).


 Prep time: 10 mins
Cook time: 10 mins
Total time: 20 mins
 
These delicious cookies will have everyone asking for more…food storage and all!
Ingredients
  • 1 C. Butter or Margarine, softened
  • ¾ C. White Sugar
  • 1 C. Brown Sugar
  • 2 Eggs (2 T. dry powdered eggs + ¼ C. Water)
  • 1 tsp. Vanilla
  • 3 C. Wheat Flour
  • ¾ tsp. Salt
  • ¾ tsp. Baking Soda
  • 1 (12-ounce) bag Chocolate Chips
Instructions
  1. Cream together butter, sugars, eggs, and vanilla.
  2. In a separate bowl sift together flour, salt, and baking soda.
  3. Add to creamed mixture and beat well.
  4. Stir in chocolate chips.
  5. Drop onto greased cookie sheet by heaping tablespoons.
  6. Bake at 350 for 8-10 minutes until lightly browned.
Mexican Hot Chocolate   gluten free

Mexican Hot Chocolate

Thick, rich and the chocolatiest hot chocolate you've ever tasted. A truly decadant experience!

Ingredients:
2 1/2 - 3 cups low fat evaporated milk
1 tsp cinnamon
1/2 tsp vanilla
1/4 tsp nutmeg
1/8-1/2 tsp cayenne pepper (to taste)
3/4 cup GF semi-sweet chocolate chips


Directions:
In a saucepan over low heat, combine all ingredients (start with 2 1/2 cups evaporated milk) stirring until melted.

Continue warming (do not let boil), until mixture thickens and all ingredients have completely dissolved (dip a spoon into the saucepan and let mixture drip off - any undissolved ingredients will show on the spoon). Stir often. If too thick, add more milk until you get the consistancy you want.


Posted: 06 Feb 2013 04:19 AM PST

cinnamon rolls

Sour Cream Buns (adapted from Better Homes and Gardens)
  • 1 package active dry yeast
  • 1/4 cup warm water (105 degrees F to 115 degrees F)
  • 1 8 ounce carton dairy sour cream (1 C. dry powdered sour cream and 3 T. water)
  • 3 tablespoons granulated sugar
  • 2 tablespoons oil
  • 1 teaspoon salt
  • 1/8 teaspoon baking soda
  • 1 egg, slightly beaten (1 T. dry egg powder + NO water-I don’t add the water for the eggs when dealing with dough)
  • 3 – 3 1/4 cups all-purpose flour (half whole wheat and half BREAD flour works AWESOME!)
  • 2 tablespoons butter, softened
  • 1/3 cup packed brown sugar
  • 1 tablespoon ground cinnamon
  • 3/4 cup powdered sugar
  • 2 – 4 teaspoons water
In a large bowl dissolve yeast in warm water.
2. In a small saucepan combine sour cream, granulated sugar, shortening, and salt. Heat and stir over medium-low heat until warm (105 degrees F to 115 degrees F) and shortening is melted. Stir in baking soda. Stir sour cream mixture and egg into yeast. Stir in as much of the flour as you can with a wooden spoon.
3. Turn dough out onto a lightly floured surface; knead in enough of the remaining flour to make a moderately soft dough ( 3 to 5 minutes total). Cover and let rest for 5 minutes.
4. Grease twelve 2-1/2 inch muffin cups; set aside. On a lightly floured surface roll dough into an 18×12-inch rectangle; spread with softened butter. Combine brown sugar and cinnamon; sprinkle evenly over dough. Roll up, starting from long side; seal seam. Slice into twelve 1-1/2-inch-wide pieces. Place each bun, cut side down, in a prepared muffin cup. Cover and let rise in a warm place until 1/4 to 1/2 inch above tops of cups (45 minutes).
5. Preheat oven to 400 degrees F. Bake buns in the preheated oven about 15 minutes or until golden brown. Remove from pans. Combine powdered sugar and enough water to make an icing of drizzling consistency; drizzle over buns. Serve warm.

90 BREAKFAST MENUS
3 x Oatmeal Chocolate Chip muffins*, water
3 x Pumpkin chocolate chip muffins*, water
6 x Apple Muffins*, water
12 x Wheat Waffles*, water
12 x Pancakes with pancake mix, butter/syrup milk
24 x Oatmeal w/raisins, water
30 x Cold cereal, powdered milk, water

Sunday, February 3, 2013

A year's supply of food storage.

A year’s supply of food storage is beneficial in several ways:
1. It provides peace of mind as we obey the counsel to store.
2. It helps ensure survival in case of personal or natural disaster.
3. It strengthens skills in preparing and using basic foods.
“Home Storage: Build on the Basics,” Ensign, Jun 1989, 39


Beware of those end of isle displays!
taken from Everyday Food Storage.

Some grocery stores actually cater everything around the “Grab and Go” shopper. The type that needs to get in and get out and doesn’t care about the cost. These end of aisle displays are meant for convenience in shopping. The same Oreo and milk grocery store by me always has milk, eggs, and butter by the cash registers. It’s brilliant, it saves you time, possibly reminds you of something you forgot and it removes the products from the competitor products so you can’t make a good judgment on whether it’s the cheapest option for you!

Chocolate Cake (Flourless)
gluten free

Chocolate Cake (Flourless)

This cake is dense and moist from the chickpeas. Can also be made dairy and egg free.

Ingredients:
1 1/2 cup GF chocolate chips*
19 oz canned chickpeas, drained and rinsed
4 eggs or egg substitute**
1/2 tsp baking powder
1 cup sugar

Directions:

In a small bowl, melt the chocolate chips in the microwave (or in a double broiler on the stove).

Combine the beans and eggs in a blender or processor, then add sugar, baking powder and melted chocolate.

Blend until smooth.

Turn into a nonstick single-layer cake pan. Bake at 350°F for 45 min. or until a knife in the center comes out clean.


*Chocolate Chips: for dairy free version, Trader Joe’s semi-sweet chocolate chips, Enjoy Life Chocolate Chips, and Sunspire Chocolate Dream Semi-Sweet Baking Chips are availble. If you can't find those brands, you can always use chocolate chunks/squares and break them up. Obviously, milk chocolate is not dairy-free, but good quality dark chocolate should only contain cocoa butter, cocoa liquor, lecithin, and sugar.

**Egg Substitute: 1 cup liquid egg substitute (i.e. Egg Beaters) or 6 tsp Ener-G Egg Replacer + 1/2 cup water (once batter is mixed, if it is too thick add 1/2 cup more water)


Lemonade
gluten free
Lemonade

Fresh lemons, and the best part - no sugar (or artificial sweetener) added!
Ingredients:
4-5 lemons
1 Litre (4 cups) unsweetened apple juice

Directions:
Juice lemons and combine with apple juice - that's it!
Lemonade


Thai Peanut Chicken Noodle Salad
1 C. Asian Sesame Dressing (I use Ken’s Steakhouse light version)
2 Tbsp. soy sauce
2 cooked boneless skinless chicken breasts, cut into chunks
2 Tbsp. crunchy peanut butter
2 Tbsp. honey
1/2 tsp. crushed red pepper
1 pkg. (1 lb.) thin spaghetti
4 green onions, sliced
1 cup chopped cilantro
Directions
Cook spaghetti as directed on package. Toss cooked chicken chunks with 1/4 c. Asian Sesame Dressing. Mix remaining dressing mixture, peanut butter, honey and crushed red pepper.
Drain spaghetti. Add to chicken mixture with peanut butter mixture and all remaining ingredients; mix lightly. Serve warm or chill in fridge for 4 hours before serving.
Not gluten free!!