Wednesday, March 30, 2011

Week 12 & 13

Week 12: RICE Secure 10, 15, 20 lbs. White stores best but is not as nutritious. I find brown gets bugs. Counts towards grain total.
Brown and white rices store very differently. Brown rice is only expected to store for 6 months under average conditions. This is because of the essential fatty acids in brown rice. These oils quickly go rancid as they oxidize. It will store much longer if refrigerated. White rice has the outer shell removed along with those fats. Because of this, white rice isn't nearly as good for you, but will store longer. Hermetically sealed in the absence of oxygen, plan on a storage life for white rice of 8-10 years at a stable temperature of 70 degrees F. It should keep proportionately longer if stored at cooler temperatures. Stored in the absence of oxygen, brown rice will last longer than if it was stored in air. Plan on 1 to 2 years. It is very important to store brown rice as cool as possible, for if you can get the temperature down another ten degrees, it will double the storage life again.
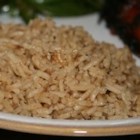
Brown Rice

Ingredients

  • 1 1/2 cups uncooked long-grain white rice
  • 1 (14 ounce) can beef broth
  • 1 (10.5 ounce) can condensed French onion soup
  • 1/4 cup butter, melted
  • 1 tablespoon Worcestershire sauce
  • 1 tablespoon dried basil leaves

Directions

  1. Preheat oven to 350 degrees F (175 degrees C).
  2. In a 2 quart casserole dish combine rice, broth, soup, butter, Worcestershire sauce and basil.
  3. Bake covered for 1 hour, stirring once after 30 minutes.
This is way yummie - you can add cooked chicken that has been chopped.  Makes a great main dish.
Brown Rice Recipe


Week 13: FIRST AID Gauze patches, swabs, cotton balls, first aid tape etc. Old fashioned Kotex is good for wounds. Sanitary napkins with adhesive do not store well.


  • 1
    Take the large or medium sized plastic container with the locking lid and remove the lid. This is going to be your first aid kit container.

  • 2
    Next, put a strip of tape on the small tupperware containers and take a marker and write on the tape which first aid items that are going to be in that certain container.

  • 3
    Next, take one of the small square tupperware containers and fill it up with band aids and place it inside of the first aid kit container.

  • 4
    Next, take another container and fill it up with bandages, gauze, gauze pads and tape and place it in the first aid kit container.

  • 5
    Next, take another small plastic container and fill it up with antibiotic ointment and antibiotic wipes and place it in the first aid kit container.

  • 6
    Next, fill another small container with OTC medicines such as advil, asprin and tylenol and place it inside of the first aid kit container.

  • 7
    Take another small container and put the heat wraps and cold packs inside of the container and place it inside of the first aid kit container.

  • 8
    Next, put any other first aid items that you can think of in more of the small containers and place them inside of the first aid kit container.

  • 9
    Lastly, make sure that all of the small first aid containers are neatly set into the bigger first aid container. Put the locking lid on the first aid container and store it where you want it. You now have a fully stocked homemade first aid kit


  • Have a great week and enjoy the sun!

    Wednesday, March 16, 2011

    A review with something new!

    This week I thought I would review what we have done already this year!  Plus give you the next step!


    Week 1:   Nuts
    Week 2:   Cleaning Supplies
    Week 3:   Medicine Chest
    Week 4:   First Aid Supplies
    Week 5:   Peanut Butter
    Week 6:   Personnal Products
    Week 7:   Solid Shortening
    Week 8:   Juices
    Week 9:   Personal Grooming
    Week 10: Mixes Cakes


    Week 11: SPICES AND HERBS Think of what you use most often. Salt (NOT Plain you need the iodized kind) pepper, cinnamon, bay leaves. Look for bargains.  I have noticed that many of the local stores are having specials on their spices.  They are wanting us to get ready for Springtime!  So what the sales ads, plus the in store offers.  

    Check out this web site! 
    http://www.wholespice.com/category.asp?catid=4  They have a lot of great spices, plus they will be packed nice and tight and sealed to last. 


    Check out this web site before you purchase any of your spices or herbs.  They have several coupons you might want to use.
    http://www.couponcodes4u.com/deals-specials/Curts+Spices/0

    Just a short post this week.  I hope everyone has a great week! 

    Tuesday, March 8, 2011

    Week 10 of our step by step of building our food storage!

    Hello!

    I hope this email finds everyone having a great week!  It's testing week at school so super busy but as always fun! 

    Week 10: MIXES Cakes, pancakes, muffins, Bisquick etc. Bisquick stores best in the freezer or it gets bugs. You need an annual total of 300 lbs of grain products per person.

    I tend to watch for sells on muffin box mixes.  When my kids were little they loved the blueberry muffin box mix.  Sometimes you can find them for 3 boxes for a $1.00. You can find the box mixes on sale at Smith's or Walmart 10 boxes for $10.00.  I also use Bisquick for many of my cookies and baking needs.  I tend to purchase it at Costco, it's a larger box and I love the recipes on the back of the box!  Just remember to watch those expiration dates and to rotate them.

    Here are a couple of recipes for pancakes. You should have several if not all of these items in your food storage or your basic food supply. 


    Easy Pancakes

    • 1 cup all-purpose flour
    • 2 tablespoons white sugar
    • 2 tablespoons baking powder
    • 1 teaspoon salt
    • 1 egg, beaten
    • 1 cup milk
    • 2 tablespoons vegetable oil

    Directions

    1. In a large bowl, mix flour, sugar, baking powder and salt. Make a well in the center, and pour in milk, egg and oil. Mix until smooth.
    2. Heat a lightly oiled griddle or frying pan over medium high heat. Pour or scoop the batter onto the griddle, using approximately 1/4 cup for each pancake. Brown on both sides and serve hot.
    Chocolate Chip Pancakes & Syrup


  • 2 cups all-purpose flour


  • 1/4 cup sugar


  • 2 tablespoons baking powder


  • 1 teaspoon salt


  • 2 eggs


  • 1 1/2 cups milk


  • 1/4 cup vegetable oil


  • 1/2 cup miniature chocolate chips


  • CINNAMON HONEY SYRUP:


  • 1 cup honey


  • 1/2 cup butter or margarine, cubed


  • 1 teaspoon ground cinnamon


  • Directions

    1. In a bowl, combine the flour, sugar, baking powder and salt. Combine eggs, milk and oil; add to dry ingredients and mix well. Stir in chocolate chips. Pour the batter by 1/4 cupfuls onto a lightly greased hot griddle. Turn when bubbles form on top; cook until second side is golden brown. Keep warm.
    2. Combine the syrup ingredients in a 2-cup microwave-safe bowl. Microwave, uncovered, on high until butter is melted and syrup is hot, stirring occasionally. Serve with pancakes.
    Bananas Pancakes


  • 1 cup all-purpose flour


  • 1 tablespoon white sugar


  • 2 teaspoons baking powder


  • 1/4 teaspoon salt


  • 1 egg, beaten


  • 1 cup milk


  • 2 tablespoons vegetable oil


  • 2 ripe bananas, mashed


  • Directions

    1. Combine flour, white sugar, baking powder and salt. In a separate bowl, mix together egg, milk, vegetable oil and bananas.
    2. Stir flour mixture into banana mixture; batter will be slightly lumpy.
    3. Heat a lightly oiled griddle or frying pan over medium high heat. Pour or scoop the batter onto the griddle, using approximately 1/4 cup for each pancake. Cook until pancakes are golden brown on both sides; serve hot.
    Here are some fun homemade syrup's you might want to try.

    Buttermilk syrup 


  • 1 1/2 cups white sugar


  • 3/4 cup buttermilk


  • 1/2 cup butter


  • 2 tablespoons corn syrup


  • 1 teaspoon baking soda


  • 2 teaspoons vanilla extract


  • Directions

    1. In a saucepan, stir together the sugar, buttermilk, butter, corn syrup, and baking soda. Bring to a boil, and cook for 7 minutes. Remove from the heat, and stir in the vanilla.
    Vanilla Honey Simple Syrup


  • 2 teaspoons milk


  • 2 teaspoons vanilla extract


  • 1 tablespoon honey


  • 2 teaspoons butter


  • Directions

    1. Combine the milk and vanilla extract in a bowl.
    2. Heat the honey and butter together in a microwave-safe bowl in the microwave for 30 seconds; stir into the milk mixture. Allow to cool completely before use. Chill in refrigerator if too hot.
    And some Muffin receipes......


    Blueberry Muffins


  • 1 1/2 cups all-purpose flour


  • 3/4 cup white sugar


  • 1/2 teaspoon salt


  • 2 teaspoons baking powder


  • 1/3 cup vegetable oil


  • 1 egg


  • 1/3 cup milk


  • 1 cup fresh blueberries


  • 1/2 cup white sugar


  • 1/3 cup all-purpose flour


  • 1/4 cup butter, cubed


  • 1 1/2 teaspoons ground cinnamon


  • Directions

    1. Preheat oven to 400 degrees F (200 degrees C). Grease muffin cups or line with muffin liners.
    2. Combine 1 1/2 cups flour, 3/4 cup sugar, salt and baking powder. Place vegetable oil into a 1 cup measuring cup; add the egg and enough milk to fill the cup. Mix this with flour mixture. Fold in blueberries. Fill muffin cups right to the top, and sprinkle with crumb topping mixture.
    3. To Make Crumb Topping: Mix together 1/2 cup sugar, 1/3 cup flour, 1/4 cup butter, and 1 1/2 teaspoons cinnamon. Mix with fork, and sprinkle over muffins before baking.
    4. Bake for 20 to 25 minutes in the preheated oven, or until done.
    Bran Muffins
    2 cups of bran.
    1 ¼ cups of skimmed milk.
    1 cup of raisins.
    1 cup of flour.
    ½ cup of molasses.
    ¼ cup of cornmeal.
    1 teaspoon of baking soda.
    1 teaspoon of salt.
    2 medium eggs, beaten.
    2 cups of sifted flour.
    1 cup of milk.
    ½ cup of peanut butter.
    ¼ cup of sugar.
    2 tablespoons of butter, melted.
    3 teaspoons of baking powder.
    1 teaspoon of salt.

    Instructions:

    Mix together all of the ingredients.

    Pour into lightly greased muffin tins, about two-thirds full.

    Bake 350°F (175°C) for 25 minutes.

    Peanut Butter Muffins

      Instructions:

      Sift together the flour, sugar, baking power and salt. Add the peanut butter and mix throroughly. Combine the eggs and milk, then pour into the mixture. Add the butter and stir until mixture is moistened. Fill greased muffin pans about two-thirds full and bake at 400°F (200°C) for 25 minutes.
      And cake recipes......
      Banana Cake
      • 1 cup White Sugar
      • 1/2 cup Butter (unsalted)
      • 11/2 cup All Purpose Flour
      • 1 tsp. Vanilla Extract
      • 4tbsp Buttermilk
      • 1tsp Baking Soda
      • 3 Mashed Bananas
      • 1 cup Chopped Nuts (walnut)
      • 1 pinch Salt
      • 2 Eggs
      Method
      • Pre-heat oven at 350 degree Fahrenheit (175 degree Celsius).
      • Grease and flour the cake pan.
      • Mix flour, baking soda and salt together in a small bowl.
      • Separate the egg and keep aside.
      • Mix cream, butter and sugar together. Add egg yolks and vanilla extract, while beating well.
      • Now mix in the mashed bananas. Add flour mixture alternately with the buttermilk to the creamed mixture. Mix only to combine all the ingredients. Do not mix too much.
      • Stir in the nuts.
      • Beat the egg whites until stiff.
      • Mix the batter in the egg whites.
      • Pour the batter into the pan.
      • Bake at 350-degree Fahrenheit for around 30 minutes.
      • Test the cake using a toothpick. If it comes out clean without sticking, it means cake is done
      • Remove from oven and cool it.
      Apple Cake - yummie!
      1cup Gold Medal® all-purpose flour
      1/2cup sugar
      1teaspoon baking powder
      1/2teaspoon salt
      1/2teaspoon ground cinnamon
      1/4teaspoon ground nutmeg
      1/4cup canola or soybean oil
      1teaspoon vanilla
      1egg, beaten
      2cups coarsely chopped peeled apples (2 medium)
      1.Heat oven to 350°F. Grease bottom and side of 8- or 9-inch round cake pan with shortening; lightly flour.
      2.In large bowl, mix flour, sugar, baking powder, salt, cinnamon and nutmeg until well blended. Stir in oil, vanilla and egg until flour mixture is moistened. Stir in apples. Batter will be very thick and chunky. Spread in pan.
      3.Bake 45 to 55 minutes or until toothpick inserted in center comes out clean. Cool 10 minutes; remove from pan to cooling rack. Serve warm.

    Tuesday, March 1, 2011

    Week 7 & Week 8

    I am so very sorry about last week and not being able to send out an email.  My computer is still not working correctly.  I have added more memory, debugged it and it's still not it's normal fast self.  So I will keep trying to work on it. 

    So let's get started! 

    This is week - 8 of the new year.  I need to get you all caught on to week 8 so I am giving you week 7 and week 8! 

    Week 7 - Solid Shortening - this is less expensive than oil.  You will need 12 lbs per person.  Be sure and rotate.  This will last several years.

    Shelf-life, every manufacturer stamps its shortening with a use-by date. Crisco, the leading brand, says its shortening is good unopened for two years from the date of manufacture. Once opened, it suggests you use the remainder of the can within a year, and suggests you mark the can with the date you first use it, so you can keep track of the year. How you store the shortening has a lot of bearing on its shelf life. The manufacturer suggest a cool, dry place, away from sources of heat (stove, dishwasher, and refrigerator). In general, you do not keep vegetable shortening in the refrigerator, as it gets too hard and you will probably need to allow it to come to room temperature again before you use it.  "Fresh" and "good" are somewhat relative terms. If you store shortening near a source of heat or keep it past its use-by date, it will eventually begin to turn tan and may develop a slightly off odor or taste. But it will still be safe.


    Week 8 - Juices - avoid watered products.  Be sure and get pure 100% juice. (Lemon, orange, pineapple, etc.)

    The best storage containers to store your juice
    containers.jpg (61568 bytes)I would recommend using glass containers to store your juice.  I generally use wide mouth mason jars, either 16 or 32 ounces.  You can also use 8 ounce mason jars, amber jars or bottles.  I also like to recycle glass bottles, and will reuse glass mineral water bottles to store juice.   I prefer to use "wide mouth" jars vs. bottles, since juices do tend to stain, and cleaning a bottle with a narrow opening can be difficult.   I would also recommend using a stainless steel lined thermos or stainless steel water bottle.     One of the things to remember when selecting a container to store your juice is to choose a container that is small enough for a "single serving".  A single serving is one that you will open, and drink all at once, and not seal it and save it for later.  You might need to store your juice in multiple containers and bring 3 containers with you to work for each "juice break".  The best container to store your juice is a glass container that holds as much as you can drink in a single serving.

    The best way to store juice.

    The best way to store juice is in an air-free environment.  Air is one of the primary factors that will cause degradation of the juice.   After you juice and have your juice is in its catch container, you will need to pour it into your storage container.  You can pre freeze (or chill) the storage container to help keep the juice cold.  When you fill your storage container, be sure to fill it to the brim, and maybe even overfill it a little before putting on the lid on the container. (You can add purified water if you do not have enough juice to completly fill the container)  This is to minimize the air that is contained inside the container along with the juice.  It is this air that causes some degradation of the juice.  Even better yet, if you have a way you can remove the air from the juice container.  Remember to keep your juice COLD.
     
    Other hints and tips and to store   your juice longer.
    • Juice an extra lemon into your juice for the citric acid that may help preserve the juice.
    • Start out with the cold produce, to ensure your juice is cold.
    • Use organic produce.  In general organic produce has more nutrition that non-organic produce.
    Freezing Juice for longer storage
    If you must store your juice for long-term storage, one way it can be done is how people have been preserving fresh-made apple cider for many years.. they freeze it..    Of course, this should only be used as a last option and is not reccomended. 
    • Freeze Juice in Ice Cube Trays for longer storage. (the freezer causes more degredation than the fridge, so only do if necessary)
    • Freeze larger volumes of juice is plastic "milk-type" jugs or plastic "water bottles".  Defront and consume the whole juice after its defrosted.
    (Taken from an artile by John Kohler)

    Here are a few juice ideas to try!  I haven't yet but they sound pretty good!  Enjoy!
     
    Sunshine Cocktail
    • 2 apples
    • 4-6 strawberries
    Carrot/Apple Juice
    • 6 carrots
    • 2 apples
    AAA Juice
    • 6 carrots
    • 1 apple
    • 2 stalks of celery
    • ½ handful of wheatgrass
    • ½ handful of parsley
    • ½ beet
    Passion Cocktail
    • 4 strawberries
    • 1 large chuck pineapple
    • 1 bunch black grapes