Tuesday, June 28, 2011

Week 26: BEDDING plus a 4th of July cheesecake

Week 26 Bedding - watch for all those white sales and buy a new thermo blanket.

If you can a sleeping bag per person would be awesome, but blankets and sheets at least 2 per person work great also.  That way if one set gets soiled you have the other one to use.

Thermo blanket - Amazon has great prices on thermo blankets right now you can purchase 4 thermo blankets in one package for $13.93.  That's a great price!

As a side note Amazon also has an emergency sleeping bag for $6.95.  They have reflective blankets too!

I wanted to share one of my favorite receipts for the 4th of July.  It's called a Flag Cheese Cake.  Here are the directions if you would like to try it!  Happy 4th of July everyone!


4 cups fresh strawberries, divided
1-1/2 cups  boiling water
2 pkg. (3 oz. each) JELL-O Strawberry Flavor Gelatin
  Ice cubes
1 cup cold water
1 pkg.  (10.75 oz.) prepared pound cake, cut into 10 slices
1-1/3 cups blueberries, divided
2 pkg.  (8 oz. each) PHILADELPHIA Cream Cheese, softened
1/4 cup sugar
1 tub  (8 oz.) COOL WHIP Whipped Topping, thawed
SLICE 1 cup strawberries; halve remaining strawberries. Set aside. Add boiling water to gelatin mixes in large bowl; stir 2 min. until completely dissolved. Add ice to cold water to measure 2 cups. Add to gelatin; stir until ice is completely melted. Refrigerate 5 min. or until slightly thickened.
MEANWHILE, line bottom of 13x9-inch dish with cake. Add sliced strawberries and 1 cup blueberries to thickened gelatin; stir gently. Spoon over cake. Refrigerate 4 hours or until gelatin is firm.
BEAT cream cheese and sugar in large bowl with whisk until well blended. Stir in COOL WHIP; spread over gelatin. Arrange strawberry halves on cream cheese mixture to resemble stripes of flag. Add remaining blueberries for stars.
Tuesday, June 21, 2011

Week 25 Condiments

Week 25: CONDIMENTS Mustard, catsup, mayo, relish, Worcestershire.


So here’s what to do. Compile a list of the condiments your family uses and then watch for them to go on sale and pick up a few bottles. Keep a little inventory list of what you have and mark off when you use one up so you can remember to replace it next time it’s on sale. Here is a list of ideas to get you started:
ketchup
mustard
relish
mayonnaise
peanut butter
barbecue sauce
soy sauce
worcestershire sauce
teriyaki sauce
olive oil
vinegar
horseradish
cranberry sauce
applesauce
hot sauce/chili sauce
taco seasoning
Have fun with these items and be sure and get creative!
Last week at church I was asked to provide an inventory sheet for food storage.  This is what I have found for you!
Go to dealstomeal.com inventory list and you will find a great tool to inventory your food storage.  I will print this for you and have it at church not this Sunday but next Sunday.  We will be out of town visiting our grands in California!  Have a great warm summer week! 


Thursday, June 16, 2011

Week 24 Paper Products

Week 24: PAPER PRODUCTS Paper towels, Aluminum foil, garbage bags, freezer bags, etc.


Purchase non-food items such as toothpaste, deodorant, female products, diapers, Paper plates, plastic utensils, etc. are helpful to avoid wasting water washing dishes.


  • Store a year’s supply of all household items that you normally buy at the grocery store
  • Build up your supply by buying these items in large quantities when they are on sale, then only replace your stores when they go on sale again
  • Make sure you store the things particular to your family’s needs, my list might not include everything that YOU normally use
  • Don’t be afraid to use creative storage ideas for these items. A huge supply of toilet paper could go in a garage, attic, etc.
Things to consider storing:

  • Toilet Paper - 24 rolls per person per year.  
  • Paper Towels - most people use 1.5 rolls per week per family = 78 rolls per yr
  • Feminine Products - varies on needs
  • Diapers/Wet Wipes = 70 diapers a week for a newborn = 3640 per yr
  • Kleenex - 1 per week = 52 boxes
  • Paper Plates/Plastic Utensils/Napkins (can save on water in an emergency) - varies
  • Freezer bags - this depends I tend to use more freezer bags then I do aluminum foil so I would need more than normal. - For a box of 24 bags I would need at least one per month so 12 boxes.
  • Garbage bags - we use two different types at our house - one for the inside of the house and a different kind for the out side of the house.  So for inside the house I usually buy the bulk bags at Costco -  100 per box. Takes us about 3 months to go thru them.  So this would depend on how many people you have in your household.  For my husband and I we would need about 4 boxes per year for the inside bags.  The outside bags have 80 bags per box, for us we go thru about 1 box every 6 months so two boxes would work for us.
  • Aluminum foil - like I said before I don't use much of this so for our family I would a box of the 150 feet from Costco will last us about 6 months so I would say 2 boxes for us.
This was a tough week.  So much of the paper products depend on your family size.  I had to take a month and write down everything I used to come up with some of this.  So take some time and think about what your needs are as a family and what works best for your family.  

Remember the best items for your food storage are the items that are on sale.  Don't go over your budget for your food storage so a little at a time works the best!  


Monday, June 6, 2011

Week 23 Cheese - whole 5lbs or grated and freeze for casserole

Week 23 - Cheese - How long can we store it?  How do I store my favorite cheese?

So here’s the good news.  You CAN have your favorite cheese on hand, even in an emergency, and even though no stores are open and you have no access to electricity.  All you have to do is buy the hard blocks of cheese that you want now in order to have them  stored for up to the next 25 years.  Cheese wax prevents your cheese from developing mold or bacteria and it keeps the moisture in.  Simply use a combination of dipping and brushing with a natural boar’s hair brush to apply the melted cheese wax liberally to your block of cheese, let it harden, and then, VOILA – you’ve got your wish.  Cheese treated with cheese wax will store for up to 25 years at a mild to cool temperature.  Sure, it will continue to age.  But it sure won’t get moldy!  (And even if it does in parts, you can simply cut off that part, and re-wax over it.) Be sure that you select block sizes of cheese that you and your family can easily consume within a 3 to 5 day period in order to avoid it going bad once you’ve cut into it.

A couple of tips you should know though.
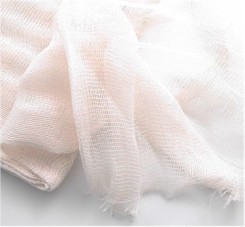
  1. cheeseclothDon’t use paraffin wax.  It tends to crack.  Cheese wax warms slower and heats to a higher temperature and thus plies better to your cheese shapes and sizes.  Cheese wax is also less crumbly and you can use less of it than paraffin. Remember, it’s reusable too!
  2. I have yet to find a hard cheese that I can’t wax.  So long as it’s hard enough to be in a solid block, you can wax it.
  3. You don’t need cheesecloth, but if you desire to use it prior to your wax layers, it may be helpful getting the wax off.  I haven’t had any problems without it though.
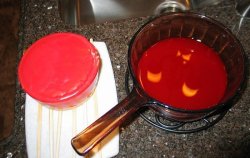
  4. It’s best to melt the cheese wax in a double boiler as opposed to direct heat. Any pan you use to melt your cheesewax in will be your designated cheese wax pan. They are impossible to get clean afterwards. So be forewarned.
  5. cheese-wax-double-broilers1The less you handle the cheese with your hands the better. Use food handling gloves.
  6. Dip the cheese in for about 5 seconds, then bring it out and HOLD it there for about 90 seconds. Do 3 layers of dipping and then one layer of brushing.  (Using the natural boar’s hair brush)  The reason why you want to use this kind of brush specifically is because other brushes will apply the cheese wax too thick, or with crevices, etc.  This kind of brush is perfect for cheese waxing.
  7. You don’t need to use food-grade labels for your cheese, however, it’s smart to use a label on the outside of your cheese just prior to the last wax layer.  That way you don’t have to worry about it falling off.  Be sure to label not only the kind of cheese it is, but when it was waxed as well.
  8. Don’t store your waxed cheese in additional containers.  Just stack them on top of like cheeses and let them breathe.  I like to hang them from the ceiling in a “fishing net” kind of contraption. Cheese wax can be found multiple places online or in your local health food stores.  I also recommend that you use red or black cheesewax as it will prevent more light from getting int. You should also have no problem finding a boar bristle brush either.  
  9. Be sure to check for pockets or crevices that didn’t get sealed.  Four total thin layers of wax is a good practice.  There’s no need to do more coats than that.
  10. The cheese surface should be clean and dry prior to waxing.
  11. If your 2nd and 3rd coats are applied while the prior coat is still just a bit warm you will get a better adhesion.
  12. Cheese wax can be re-used several times.  You can simply wash it in warm water, let it dry and then re-melt it.  So when you remove cheese wax from your cheeses, you can simply reheat and reapply the wax.  Simply heat the cheese wax to about 200 degrees F.  This will also ensure that you’re not transferring any bacteria or unnecessary moisture to your new cheese–even when you’re putting it on your cheese which is cooler.
  13. You do not need to filter the cheese wax after you melt it.  So don’t worry about that step.
  14. Your first coat will have some unevenness to it.  Don’t worry.  The 2nd and 3rd coat will even it out just fine.
  15. Cheese will respond to gravity. So using cheesewax vs. paraffin is important as it’s more pliable. I periodically turn my cheese in view of the gravitational pull.

Once you get the hang of this cheese waxing stuff you can progress to making your own cheese from powdered milk in any flavor you decide!  Yummy!

cheese-wax-waxTaken from prepardnesspro.com