Tuesday, May 31, 2011

Week 22 Safety Week

Safety week - A length of cord or twine.  Light rope. Flashlight and batteries (dated)

I have found a way cool flashlight that doesn't use batteries.  It's called a Shaker Flashlight!! 

NEVER USE BATTERIES AGAIN!
No batteries or bulbs required
Simply shake for 30 seconds and you will have up to 10 minutes of light
Super bright LED light and magnifying lens
Rechargeable capacitor
Water & weather resistant
Floats on water
Highly durable
Light visible for up to 1 mile
An absolute must have for the house, boat, car, cabin, camper, trailer, tent, hiking, and emergency kit
10" long x 2" diameter


Emergency Light -016-ShakerLights-Layered_Web.jpg 


Light sticks are another source of light that will give you about 30 minutes of light.  Be sure and check the expiration dates when storing them!


10 - 12 hour Yellow light sticks. Phthalate free, SurvivalKitsOnline lightsticks are made in the USA by Cyalume are individually wrapped and have the UPC code 852845001144 on each Yellow lightstick wrapper. The lightsitcks sold by Survivalkitsonline are MADE in the USA. BEWARE OF IMITATIONS. Other lightsticks do not last the full 12 hours.  You can find these on the Amazon.com web site.  They will usually store for about 6 months.


Adding rope and/or a small amount of twine to your food storage is a must have.  Fishing wire is great to have also.  You never know when you might need a little rope or twine.  There are so many uses for them I can't list them. 


This essential tool will always surprise you with how many ways it can be used, including securing equipment, making traps and shelter construction. There are many types of rope and cordage out there, but most experts agree that for a lighter load and superior versatility the best all-around cordage is the military-brand 550 parachute cord, which gets its name from its 550-pound test strength. This legendary cordage is woven from seven strands of white nylon that can also be unraveled and used as heavy thread or string, making it an ideal multipurpose survival tool. 550 cord is too slender to be used as climbing rope, but there's no reason you can't include some dry-treated, non-stretch nylon rope in your survival kit as long as you're willing to accept a bulkier load. While we're in this category, do yourself a favor -- pack a spool of snare wire and a small reel of fishing line with a hook.

Monday, May 23, 2011

Week 20 & 21

Week 20: JELLO - Jello gelatin
Gelatin for food storage? You have got to be kidding me. Why would I need Jello in my food storage? I never eat that stuff on a regular basis anyways, definitely something I can live without in a disaster situation, right? I figure we’ll research it out just to be sure, so I’m not missing something. [off to do some internet researching...]

Nutritional Value: (found on eHow.com)
Calories
1. Most varieties of regular JELL-O gelatin contain 80 calories per serving, but most flavors of sugar-free JELL-O gelatin contain 10 calories per serving.
Fat
2. Both regular and sugar-free varieties of JELL-O gelatin are fat-free. Do not confuse JELL-O gelatin with JELL-O pudding, which does contain fat.
Carbohydrates/Sugars
3. Most varieties of regular JELL-O gelatin contain 19 grams of carbohydrates, all of which come from sugar. Sugar-free JELL-O gelatin, on the other hand, does not contain any carbs.
Sodium
4. Most varieties of regular JELL-O gelatin contain about 80 milligrams of sodium. Most types of sugar-free JELL-O gelatin contain between 45 and 55 milligrams of sodium.
Protein
5. Most varieties of regular JELL-O gelatin contain 2 grams of protein, while most varieties of sugar-free JELL-O gelatin contain only 1 gram of protein.
Other Nutrients
6. JELL-O gelatin does not contain a significant amount of any other nutrients, such as calcium, vitamin A, vitamin C, or iron, when prepared as directed on the package.
So it turns out that gelatin IS something you need in your short/long term food storage. You can make a lot of things with flavored gelatin besides standard Jell O. (who knew?)
You can make:  jams and jellies,all kinds of salads, popsicles, candy and cookies!

Storage:
Unprepared gelatin has an indefinite shelf-life as long as it is wrapped airtight and stored in a cool, dry place. #10 cans of gelatin work perfectly for this. To make it easier to rotate through your opened #10 cans, because no one makes that much Jello at one time, just use clear jars with labels.

Tips: (found on About.com)

  • To avoid clumping, dry unflavored gelatin should be mixed with a little cold water first for 3 to 5 minutes to moisten and separate before adding hot water.
  • To suspend fruits, meats, or vegetables in gelatin, chill until it is the consistency of cold egg whites. Then mix in the additions and chill until completely set.
  • Two hours of chilling should be enough for standard clear molds, while it may take up to 4 hours for those with additions. Layered gelatins will take longer, since each layer must be individually chilled and firmed before adding the next layer.
  • Do not bring gelatin mixtures to a full boil or you risk losing its thickening properties.

Week 21: GARDEN SEEDS Radishes are great in an emergency. They grow fast, full of vitamins and minerals, and full of water.

Here is an address of seed company that will send you their catalog free if you send a self addressed envelope with a couple of stamps. Territorial Seeds P.O. Box 157 Cottage Grove Ore. 97424 They have the kind of seed you can store. Or check out http://www.johnnyseeds.com/.

How to store the seeds!

Try to keep the seeds dry and cool; humidity and warmth will shorten their viability. The refrigerator is a very good place to keep seed--but away from the freezer section. Place the seed or seed packets in a plastic food storage bag or plastic film canister or a Mason jar with tight fitting lid. You can wrap the seed in facial tissue and put a couple of teaspoons of powdered milk in the storage container and that will keep the seed dry for 6 months (or a packet of slica gel). When you are ready to plant, let the seeds warm in their packets to room temperature so that moisture in the air does not condense on the seeds (which would cause them to stick togehter). Most--but not all--vegetable seed is viable for three years.

Here are some examples of what seeds to store in your food storage and why they will be good for you! (Taken from Emergency Garden Foods)


Berries
Berries are a great source of potassium that can assist you in blood pressure control. They are a perfect weight-loss food. Berries have natural fructose sugar that satisfies your longing for sweets and enough fiber so you absorb fewer calories than you eat.
Blackberries have 74 calories per cup, blueberries 81, raspberries 60, and strawberries 45. So use your imagination and enjoy the berry of your choice.

Broccoli
Broccoli is America’s favorite vegetable, according to a recent poll. No wonder. A cup of cooked broccoli has a mere 44 calories. It delivers a staggering nutritional payload and is considered the number one cancer-fighting vegetable. It has no fat, loads of fiber, cancer fighting chemicals called indoles, carotene, 21 times the RDA of vitamin C and calcium.


Cabbage
This staple is a true wonder food. It retains all its nutritional goodness no matter how long you cook it. There are only 33 calories in a cup of cooked shredded cabbage, and eating cabbage raw, cooked, as sauerkraut, or coleslaw only once a week is enough to protect against colon cancer. And it may be a longevity-enhancing food. Surveys show that people who eat a lot of it have the least colon cancer and the lowest death rates overall.


Carrots
What emergency garden food list of health-promoting, fat-fighting foods would be complete without this orange favorite? A medium-sized carrot carries about 55 calories and is a nutritional powerhouse. The orange color comes from beta carotene, a powerful cancer-preventing nutrient (pro-vitamin A).

Greens
We’re talking collard, chicory, beet, kale, mustard, swiss chard and turnip greens. They all belong to the same family as spinach, and that’s one of the super-stars. No matter how hard you try, you can’t load a cup of plain cooked greens with any more than 50 calories.

They’re full of fiber, loaded with vitamins A and C, and free of fat. You can use them in salads, soups, casseroles or any dish where you would normally use spinach.

Lettuce
People think lettuce is nutritionally worthless, but nothing could be farther from the truth. It provides a lot of filling bulk for so few calories, 10 calories per cup of raw romaine.. And it’s full of vitamin C, too.
In planting your emergency garden foods, go beyond iceberg lettuce try: Boston, bibb and cos varieties or watercress, arugula, radicchio, dandelion greens, purslane and even parsley for extra nutrition and to liven up your salads.

Melons
Here’s great taste and great nutrition in a low-calorie package! They have some of the highest fiber content of any food and are delicious. Throw in handsome quantities of vitamins A and C plus a whopping 547 mgs of potassium in that cup of cantaloupe, and you have a fat-burning health food beyond compare. The calories in one cup of melon balls is: cantaloupe 62 calories, casaba 44 calories, honeydew 62 calories, and watermelon 49 calories.

Peppers
All varieties of peppers are astonishingly rich in vitamins A and C, abundant in calcium, phosphorus, iron and magnesium, high in fiber, free of fat, low in sodium and have just 24 calories per cup. Most salsa recipes call for four to eight chilies – that’s not a lot.

All varieties; bell peppers, sweet peppers, and hot peppers store very well when dried in a food dehydrator. They can be added to your favorite recipes or ground-up for your own supply of flavorful seasonings.

Potatoes
An excellent staple food to add to your emergency garden foods list. A great source of fiber and potassium, they lower cholesterol and protect against strokes and heart disease. Did you know: preparation and toppings methods are the only thing "fattening" about a potato? Potatoes have 0.6 calories per gram or about 85 calories per potato.

Spinach
Popeye really knew what he was talking about, spinach has the ability to lower cholesterol, rev up the metabolism and burn away fat. Rich in iron, beta carotene and vitamins C and E, it supplies most of the nutrients you need.


Squash
Zucchini, Butternut, Winter squash - All are very low in saturated fat, good source of vitamins A, C, E, B6, Thiamine, Niacin, Calcium and Magnesium. Acorn, butternut and other varieties of winter squash are loaded with health-promoting beta-carotene, potassium and vitamin C. Most squash varieties supply only 42 calories per cup. Roasted squash and pumpkin seeds are a very delicious and healthy snack.


Sweet Potatoes
Their creamy orange flesh is one of the best sources of vitamin A you can consume. You can make a meal out of them and not worry about gaining a pound, each sweet potato has about 103 calories.

Tomatoes
Last on our emergency garden foods list, but certainly not least! These garden delights are low in fat and sodium, high in potassium and rich in fiber. A medium tomato (2.5” diameter) has only about 25 calories.

Monday, May 9, 2011

Week 19 - Soup - dry or canned

Week 19: SOUP Dry or canned soup, don't forget crackers.

I thought I would start with a soup base - here is an idea for a cream base soup.

Just by having this basic recipe for cream soup base your are able to make endless types of soups by adding one or two ingredients. Great for families who have picky eaters or just want a variety of soups to choose from. By adding either broccoli, cauliflower or jalapeno you will have a nice variety to serve to your friends and family.
 

Instructions

things you'll need:

  • one stick of butter
  • 1/2 cup all purpose flour
  • 2 cups chicken stock
  • 2 cups whole milk
    • 1
      Melt the stick of butter in a large pot and add 1/2 cup flour slowly until thick and bubbly.
    • 2
      Slowly add 2 cups of chicken stock to butter/flour mixture until well mixed.
    • 3
      Warm the 2 cups of milk and slowly add to butter/flour/stock mixture and simmer until thick and creamy.
    • 4
      * To make jalapeno soup add 10 fresh jalapenos sliced and 1/2 carrot grated and simmer until the vegetables break down, and then add 1 cup of cheddar cheese.
      * To make broccoli soup add 1 cup of chopped broccoli and 1/2 carrot grated and simmer until the vegetables break down, and then add 1 cup of cheddar cheese.
      * To make cauliflower soup add 1 cup of chopped cauliflower and 1/2 carrot grated and simmer until the vegetables break down, and then add 1 cup of cheddar cheese.
      * Let the soup stand for 10 minutes before serving.
      * If the soup is too thick add a little milk.
      * If the soup is too thin add some instant potatoes to thicken
If you go to the link below you will find great prices on soups ready to store for your food storage.  They are having a great sale right now so if you can take a moment and check it out!

http://beprepared.com/product.asp?pn=FS%20C140


Don't forget your crackers to go with your soups! 

Go to wdrake.com (Walter Drake) and you will find some way cool cracker keepers!   For under $5.00!
I like to buy the larger packages at Costco for my crackers.  But once they are opened I for sure need a good storage keeper for them.  Crackers will only storage in the purchased package for about 6 months so be sure and watch the expiration date.

Tuesday, May 3, 2011

Week 18- Flour 50lbs per person!

Week 18: FLOUR 50 lbs per person (put in freezer or it will get bugs) Be sure and rotate. Counts towards grain requirement.

How many times have you reached into your cupboard only to find that the flour you bought last month is crawling with weevils or smells rancid? Proper preparation and storage of flour will help prevent bug infestations and make your flour last for up to 7 months.

 Store Flour

Here's How:

  1. Put flour in strong, food grade plastic bag. If the flour bag is packaged in paper, put the whole bag inside a food grade plastic bag.
  2. Remove excess air from bag.
  3. Freeze flour for two days, 48 hours, to kill off weevils or insect eggs in the flour.
  4. Store flour in a food grade plastic container with tight fitting lid. Keep in cool, dark place to prevent insects from getting at the flour and to prevent sunlight from spoiling the flour.

Tips:

  1. Keeping flour in the refrigerator will prevent spoiling.
  2. Keep your storage area clean to prevent insect infestation.
  3. Multiple 5 pound bags of flour can be frozen individually and stored in a food grade plastic tub with tight-fitting lid.

    How to Grind Flour at Home

  • Choose the grain you want to grind into flour. Pick wheat grains, quinoa or any other variety that you prefer.
  • 2
    Place the seeds in a large colander. Rinse with running cold water to remove the powdery coating from the seeds that if not washed properly can impart a bitter taste in the flour. Use your hands to gently rub the seeds.
  • 3
    Transfer the seeds to a wire mesh strainer to remove any extra water. Spread the seeds on paper towels to absorb the remaining moisture.
  • 4
    Spread the seeds on baking sheets and let air dry completely. Place the sheets in a dry area with plenty of air circulation.

Grinding

  • 1
    Use a mortar and pestle to manually grind dry grain seeds. This method is time consuming but is among the best ways to obtain the finest quality flour. Add a small amount of seeds to the mortar at a time and crush them with a pestle in a rhythmic motion. Press the seeds against the sides of the mortar to break the grain. Continue until the seeds are finely grounded into the consistency of flour.
  • 2
    Choose a manual or electrical coffee mill to grind the flour easily. Put the grain in the mill and press the electric mill's start button or move the crank of the manual mill in a circular motion. Set the grinding level in the electrical appliance according to your preference.
  • 3
    Try a manual seed grinder. Attach the grinder to your counter top with its fitted clamp. Place an empty bowl beneath the seed grinder and pour seeds into the open mouth of the appliance. Move the handle in a circular motion to grind the grain into fine quality flour.
  • 4
    Work with an electric seed grinder. Add the grain to the compartment. Use the lid to control the movement of the blade and grind coarse or fine flour. To get a very fine flour, let the blade spin until the flour resembles a powder

Sunday, April 24, 2011

Week 17!! Ready Dinners

Week 17: READY DINNERS Ravioli, Pasta, Oriental, Boxed, Canned, Frozen. Buy what your family will eat.
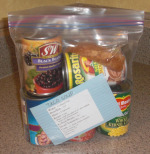
Meals Ready to Eat in a Bag
Puting together a supply of meals ready to eat, it seems overwhelming to me. I needed a plan. So I broke this project down into steps. Here's what I came up with:

  1. Pick out 2 weeks of recipes. Use easy meals your family eats now.
  2. Convert each meal to “non-perishable” foods. If you use fresh chicken, use canned. Fresh or frozen corn, use canned. 
  3. Write each converted recipe on a 3 X 5 card. Run each card off 6 times.
  4. Times each ingredient by 6 and write how much or how many you need on a shopping list. If you are able to do this you will have a 12 week supply of food.
  5. Go shopping!!! Remember to take some help! You can do this in one big trip if you have the money, or gather the supplies over the next few months.
Recipes to help you with the exciting plan!

Beef Pot Pie
Canned Roast Beef
one 12oz can x 6 = 6 cans
Canned Mixed Vegetables
(Veg-All brand good) 15 oz can x 6 = 12 cans
Beef Gravy Mix
to directions with water) 1 pkg x 6 = 6 pkg
(make according -Frozen Pie Crust
(Pillsbury) unroll & place on top of pie;
cut slits. Can also use a bottom crust.
Cream of Vegetable
Soup
Frozen California Blend
Simmer frozen veggies 10 min in a little water.
two 16oz pkgs x 6 = 12 pkgs
Powdered Milk
(made up with water, 1 ½ c./qt = 9 c. pwdr)
Make a roué
Butter
2 qt x 6 = 12 qt.:1/2 cube x 6 = 3/4 lbs.
Flour, Salt and Pepper
Cheese
_Taco Soup_
Water
Bouillon
Miso
Beans(black, small red, pinto or 4 c. pre-cooked,
frozen and thawed beans)
Refried Beans
Diced Tomatoes,
Corn, Taco Seasoning, 2 T x 6 = 12 T
Chili Powder, 2 t x 6 = 4 T
Cilantro, ½ c. x 6 = 3 c.
_Green Bean Casserole_
Mix together & warm through:
Rice,
CofMushroom Soup
Season Salt
Rosemary Garlic Salt
Cheese, (or 1 c. cheese blend powder)
Stir in
Green Beans, frozen(or 1 can green beans, drained and rinsed)
Top with:
1c. uncooked or 3 c. cooked x6 = 6 c., 1can x6=6 cans, ½ t. x 6 = 1 T, 1 t. x 6 = 2 Tgrated 1 c. x 6 = 6 c., 1 c. x 6 = 6 c.Cheese, grated, 1 c. x6 = 6 c.
, 4 c. heat to boil, 1 ½ T x 6 = 9 T, 2 T (optional) x 6 = 12 T, 2 cans x 6 = 12 cans, 1 can x 6 = 6 cans1 can x 6 = 6 cans2 c. (fresh, frozen, canned) x 6 = 12 c.
(sprinkle on top) 2 c. x 6 = 12 c.
1 x 6 = 3 pkg
2 c. x 6 = 12 cups


Tuesday, April 19, 2011

Week 15 & 16 Dry Milk and Sewing kits

Week 15: DRY MILK 40 oz. will make 5 gallons . Get what you family needs. 100 lbs per person per year. Stores well.

Powdered Milk is available in two common forms: Instant Non-Fat Dry Milk Powder and Regular Non-Fat Dry Milk Powder. Regular dry milk is sometimes referred to as “Non-Instant”. It doesn’t dissolve as readily as instant milk powder and is a bit more troublesome to locate. Dry whole milk powder is available too. It doesn’t last as long as non-fat dry milk because the fat in it can go rancid over time. When it is fresh however, it has a very pleasing flavor. Dry whole milk can be difficult to find. You can buy it in small tins in the ethnic section of a large grocery store. It costs a little more than instant non-fat dry milk, but it’s good to have on hand, for young children especially.

Once reconstituted, powdered milk tastes a lot better than it used to. If you haven’t tried it in the past few years, it’s worth another taste. When mixed correctly and chilled overnight, it has a pleasant, sweet flavor that tastes especially good with homemade cookies. Reconstituted milk doesn’t taste the same as fresh whole milk. If you are already used to skim milk though, you won’t notice much difference in the flavor of reconstituted milk. In cooking, powdered milk performs flawlessly. It can be substituted for fresh milk in almost any recipe with excellent results. Many budget conscious women cook with powdered milk exclusively. This is smart use of resources because the results are so good.

Here are a couple recipes you for to try!

Overnight Buttermilk: To make your own buttermilk, you have to start off with 1/2-cup of fresh, store-bought buttermilk and a quart (4-cups) of reconstituted milk. Combine the fresh buttermilk and reconstituted milk in a pitcher or jar. Mix it really well. Allow it to stand at room temperature overnight, or for about 8 hours. The milk will have thickened up and cultured into regular buttermilk. Refrigerate or chill and use anywhere fresh buttermilk is called for.

Quick Whipped Topping: This recipe is best made if you have electricity. Put 1/2-cup of water into a large bowl and place it in your freezer. When ice crystals form around the edges remove it from the freezer. Add 1/2-cup instant dry milk powder. Whip the mixture with electric beaters until it is light and fluffy. This will take a couple of minutes. Add 2-tablespoons sugar, 1-teaspoon of lemon juice, and 1/2-teaspoon of vanilla. Beat until thick enough to spoon like whipped topping. Use immediately.


Things to consider when buying dried milk:
1. It is best to buy dry milk fortified with vitamins A and D.
2. A claim of “No Preservatives” may be on the label to reassure customers, however,
added preservatives are not legal therefore no dried milk processed in the U.S. will
contain preservatives.
3. The label may say Grade A to indicate the quality of the milk used in the drying
process. Essentially all processing plants producing dried milk use Grade A milk
today.
4. “Extra Grade” on the label indicates that the processing plant has met certain criteria
and the milk is slightly lower in butterfat and moisture content, more soluble, contains
fewer bacteria, and contains fewer scorched particles.
5. The size of the container holding the dried milk should fit storage space considerations
and family need. Once a container is opened, the milk will not keep as long, therefore,
a very large container is not desirable for a household that consumes a small amount of
milk per week.
6. Type of package becomes important if the dried milk is to be stored for long periods of
time. The package should be water proof and impermeable to air. Plastic films are
good protection against oxygen over short periods of time, but not if the dried milk is
to be stored for more than a year.
7. Do not buy more dried milk than you would normally use in a reasonable time period.
8. Date the milk when you buy it.

Where can you buy dried milk?
Amazon.com
Costco
Sam's Club
Local geo store


Week 16: SEWING KIT Thread, pins, needles, buttons (cut off of old clothes) snaps, zippers, tape measure, scissors. Consider your family's needs.

Make a Mason Jar Sewing Kit!

1  Begin by taking apart the mason jar. Separate the lid's sealer and the screw on cap. On a piece of cardboard, trace the circumference of the sealer with a pencil. Add one inch to the diameter of the circle, and use a compass to draw a larger circle on a piece of cotton fabric.


2 Cut out both circles; the cardboard and the fabric. Stuff the quilt batting between the fabric and cardboard. Turn the screw cap upside down; apply hot glue to the inside edge of the rim. Press the assembled cushion into the lid until the cloth side protrudes in a smooth dome above the screw cap. The cardboard should be flush or even with the rim.


3 Put hot glue around the edge of the cardboard backing. Fold over excess fabric, and press down to adhere. Glue the top of the sealer to the fabric-covered cardboard for a neat finish. Allow this to dry completely before use.


4 Fill your mason jar sewing kit with spools of thread, needles, pins and pin cushions, or whatever you need to store.


How to Make a Mason Jar Sewing Kitthumbnail

Hand-Sewing Kit
  • Clover Glass Head Patchwork Pins--100 pieces + case
  • Pin box
  • Safety Pins
  • Thimble
  • 8" x 10" Drawstring Muslin Bag
  • Scissors
  • tape measure
  • buttons
  • seam ripper
  • thread
  • needles
Remember to put things in your sewing kit that you use on a regular basis.  Plus homemade sewing kits make great gifts!

Have a great week.  Bro. Stimpson stopped me at church on Sunday.  If you are interested in purchasing wheat in bulk please give him a call.  He has found a great deal on wheat!  Thank you Bro. Stimpson!

Sunday, April 3, 2011

Week 14 - Pasta!!

Week 14: PASTA 5 lbs. Get other kinds besides spaghetti. I have found that spaghetti does not store well. Counts towards grain total.

Why is American-made pasta the best you can buy?
American manufacturers have to follow strict ingredient and manufacturing standards that comply with stringent government regulations, so American-made pasta is the highest-quality pasta available. American-made pasta is enriched with iron, folic acid and other B-vitamins, making it one of the most healthful foods you can buy. American pasta plants are technologically advanced, with state-of-the-art equipment and highly skilled personnel.   Buy American!


How should I store pasta?

Uncooked Pasta
Store uncooked, dry pasta in your cupboard for up to one year. Keep in a cool, dry place. Follow the "first-in, first-out" rule: Use up packages you've had the longest before opening new packages.
Cooked Pasta
Refrigerate cooked pasta in an airtight container for 3 to 5 days. You may add a little oil (1-2 tsp. for each pound of cooked pasta) to help keep it from sticking. Because cooked pasta will continue to absorb flavors and oils from sauces, store cooked pasta separately from sauce.
Freezing Pasta
The best pasta shapes for freezing are those that are used in baked recipes, such as: lasagne, jumbo shells, ziti and manicotti. You'll have better results if you prepare the recipe and freeze it before baking. To bake, thaw the dish to room temperature and bake as the recipe directs.


Pasta and Meatballs for Kids


This tastes just like the canned version, but with more control over ingredients you can be sure of what your child is eating. Make a doubled batch and freeze to have on-hand for lunch when the kids are home for the summer.
Hands-On Time: 10 minutes
Ready In: 20 minutes
Yield: 6 servings
Cost Per Serving: 60 cents
Ingredients
    1 pound ground beef or turkey 1 large egg 1 slice bread 1 teaspoon salt 2 Tablespoons milk 1 cup small pasta, uncooked 1 can (10 3/4 ounces) condensed tomato soup 1/4 cup water 1/4 cup grated Parmesan cheese
Directions
  1. Set slice of bread in a medium bowl and pour milk over it to soften. Add ground meat, salt and egg and combine well.
  2. Form meat mixture into small meatballs - about 1/2 teaspoon each. Drop into boiling water and cook for 5 minutes. Drain and set aside.
  3. Cook pasta according to package directions and drain well. Set aside with meatballs.
  4. Combine soup, water and Parmesan and heat through. Add pasta and meatballs and serve.
Taco Lasagna

INGREDIENTS:

1 pound ground beef
1/2 cup chopped green pepper
1/2 cup chopped onion
2/3 cup water
1 envelope taco seasoning
1 can (15 ounce size) black beans, rinsed and drained
1 can (14-1/2 ounce size) Mexican diced tomatoes, undrained
6 flour tortillas (8 inch size)
1 can (16 ounce size) refried beans
3 cups shredded Mexican cheese blend

PREPARATION:

In a large skillet, cook the beef, green pepper and onion over medium heat until meat is no longer pink; drain. Add water and taco seasoning; bring to a boil. Reduce heat; simmer, uncovered, for 2 minutes. Stir in the black beans and tomatoes. Sim­ mer, uncovered, for 10 minutes.

Place two tortillas in a greased 13-in. x 9-in. x 2-in. baking dish. Spread with half of the refried beans and beef mixture; sprinkle with 1 cup cheese.

Repeat layers. Top with remaining tortillas and cheese. Cover and bake at 350F for 25-30 min­utes or until heated through and cheese is melted.


How much cooked pasta does one pound of dry pasta make?
It depends on which shape you're cooking, but you'll get a pretty close idea from this chart:

Type of pastaUncooked weight= Cooked amount
Small to medium pasta shapes
(Elbow Macaroni, Medium Shells, Rotini, Twists, Spirals,
Wagon Wheels, Bow Ties, Mostaccioli, Penne, Radiatore, Rigatoni)
8 oz. uncooked=4 cups cooked
Long pasta shapes
(Spaghetti, Angel Hair, Linguine, Vermicelli, Fettuccine)
8 oz. uncooked or
1 1/2 inch diameter bunch
=4 cups cooked
Egg Noodles8 oz. uncooked=2 1/2 cups

Wednesday, March 30, 2011

Week 12 & 13

Week 12: RICE Secure 10, 15, 20 lbs. White stores best but is not as nutritious. I find brown gets bugs. Counts towards grain total.
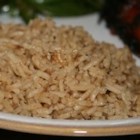
Brown and white rices store very differently. Brown rice is only expected to store for 6 months under average conditions. This is because of the essential fatty acids in brown rice. These oils quickly go rancid as they oxidize. It will store much longer if refrigerated. White rice has the outer shell removed along with those fats. Because of this, white rice isn't nearly as good for you, but will store longer. Hermetically sealed in the absence of oxygen, plan on a storage life for white rice of 8-10 years at a stable temperature of 70 degrees F. It should keep proportionately longer if stored at cooler temperatures. Stored in the absence of oxygen, brown rice will last longer than if it was stored in air. Plan on 1 to 2 years. It is very important to store brown rice as cool as possible, for if you can get the temperature down another ten degrees, it will double the storage life again.
Brown Rice

Ingredients

  • 1 1/2 cups uncooked long-grain white rice
  • 1 (14 ounce) can beef broth
  • 1 (10.5 ounce) can condensed French onion soup
  • 1/4 cup butter, melted
  • 1 tablespoon Worcestershire sauce
  • 1 tablespoon dried basil leaves

Directions

  1. Preheat oven to 350 degrees F (175 degrees C).
  2. In a 2 quart casserole dish combine rice, broth, soup, butter, Worcestershire sauce and basil.
  3. Bake covered for 1 hour, stirring once after 30 minutes.
This is way yummie - you can add cooked chicken that has been chopped.  Makes a great main dish.
Brown Rice Recipe


Week 13: FIRST AID Gauze patches, swabs, cotton balls, first aid tape etc. Old fashioned Kotex is good for wounds. Sanitary napkins with adhesive do not store well.


  • 1
    Take the large or medium sized plastic container with the locking lid and remove the lid. This is going to be your first aid kit container.

  • 2
    Next, put a strip of tape on the small tupperware containers and take a marker and write on the tape which first aid items that are going to be in that certain container.

  • 3
    Next, take one of the small square tupperware containers and fill it up with band aids and place it inside of the first aid kit container.

  • 4
    Next, take another container and fill it up with bandages, gauze, gauze pads and tape and place it in the first aid kit container.

  • 5
    Next, take another small plastic container and fill it up with antibiotic ointment and antibiotic wipes and place it in the first aid kit container.

  • 6
    Next, fill another small container with OTC medicines such as advil, asprin and tylenol and place it inside of the first aid kit container.

  • 7
    Take another small container and put the heat wraps and cold packs inside of the container and place it inside of the first aid kit container.

  • 8
    Next, put any other first aid items that you can think of in more of the small containers and place them inside of the first aid kit container.

  • 9
    Lastly, make sure that all of the small first aid containers are neatly set into the bigger first aid container. Put the locking lid on the first aid container and store it where you want it. You now have a fully stocked homemade first aid kit


  • Have a great week and enjoy the sun!

    Wednesday, March 16, 2011

    A review with something new!

    This week I thought I would review what we have done already this year!  Plus give you the next step!


    Week 1:   Nuts
    Week 2:   Cleaning Supplies
    Week 3:   Medicine Chest
    Week 4:   First Aid Supplies
    Week 5:   Peanut Butter
    Week 6:   Personnal Products
    Week 7:   Solid Shortening
    Week 8:   Juices
    Week 9:   Personal Grooming
    Week 10: Mixes Cakes


    Week 11: SPICES AND HERBS Think of what you use most often. Salt (NOT Plain you need the iodized kind) pepper, cinnamon, bay leaves. Look for bargains.  I have noticed that many of the local stores are having specials on their spices.  They are wanting us to get ready for Springtime!  So what the sales ads, plus the in store offers.  

    Check out this web site! 
    http://www.wholespice.com/category.asp?catid=4  They have a lot of great spices, plus they will be packed nice and tight and sealed to last. 


    Check out this web site before you purchase any of your spices or herbs.  They have several coupons you might want to use.
    http://www.couponcodes4u.com/deals-specials/Curts+Spices/0

    Just a short post this week.  I hope everyone has a great week! 

    Tuesday, March 8, 2011

    Week 10 of our step by step of building our food storage!

    Hello!

    I hope this email finds everyone having a great week!  It's testing week at school so super busy but as always fun! 

    Week 10: MIXES Cakes, pancakes, muffins, Bisquick etc. Bisquick stores best in the freezer or it gets bugs. You need an annual total of 300 lbs of grain products per person.

    I tend to watch for sells on muffin box mixes.  When my kids were little they loved the blueberry muffin box mix.  Sometimes you can find them for 3 boxes for a $1.00. You can find the box mixes on sale at Smith's or Walmart 10 boxes for $10.00.  I also use Bisquick for many of my cookies and baking needs.  I tend to purchase it at Costco, it's a larger box and I love the recipes on the back of the box!  Just remember to watch those expiration dates and to rotate them.

    Here are a couple of recipes for pancakes. You should have several if not all of these items in your food storage or your basic food supply. 


    Easy Pancakes

    • 1 cup all-purpose flour
    • 2 tablespoons white sugar
    • 2 tablespoons baking powder
    • 1 teaspoon salt
    • 1 egg, beaten
    • 1 cup milk
    • 2 tablespoons vegetable oil

    Directions

    1. In a large bowl, mix flour, sugar, baking powder and salt. Make a well in the center, and pour in milk, egg and oil. Mix until smooth.
    2. Heat a lightly oiled griddle or frying pan over medium high heat. Pour or scoop the batter onto the griddle, using approximately 1/4 cup for each pancake. Brown on both sides and serve hot.
    Chocolate Chip Pancakes & Syrup


  • 2 cups all-purpose flour


  • 1/4 cup sugar


  • 2 tablespoons baking powder


  • 1 teaspoon salt


  • 2 eggs


  • 1 1/2 cups milk


  • 1/4 cup vegetable oil


  • 1/2 cup miniature chocolate chips


  • CINNAMON HONEY SYRUP:


  • 1 cup honey


  • 1/2 cup butter or margarine, cubed


  • 1 teaspoon ground cinnamon


  • Directions

    1. In a bowl, combine the flour, sugar, baking powder and salt. Combine eggs, milk and oil; add to dry ingredients and mix well. Stir in chocolate chips. Pour the batter by 1/4 cupfuls onto a lightly greased hot griddle. Turn when bubbles form on top; cook until second side is golden brown. Keep warm.
    2. Combine the syrup ingredients in a 2-cup microwave-safe bowl. Microwave, uncovered, on high until butter is melted and syrup is hot, stirring occasionally. Serve with pancakes.
    Bananas Pancakes


  • 1 cup all-purpose flour


  • 1 tablespoon white sugar


  • 2 teaspoons baking powder


  • 1/4 teaspoon salt


  • 1 egg, beaten


  • 1 cup milk


  • 2 tablespoons vegetable oil


  • 2 ripe bananas, mashed


  • Directions

    1. Combine flour, white sugar, baking powder and salt. In a separate bowl, mix together egg, milk, vegetable oil and bananas.
    2. Stir flour mixture into banana mixture; batter will be slightly lumpy.
    3. Heat a lightly oiled griddle or frying pan over medium high heat. Pour or scoop the batter onto the griddle, using approximately 1/4 cup for each pancake. Cook until pancakes are golden brown on both sides; serve hot.
    Here are some fun homemade syrup's you might want to try.

    Buttermilk syrup 


  • 1 1/2 cups white sugar


  • 3/4 cup buttermilk


  • 1/2 cup butter


  • 2 tablespoons corn syrup


  • 1 teaspoon baking soda


  • 2 teaspoons vanilla extract


  • Directions

    1. In a saucepan, stir together the sugar, buttermilk, butter, corn syrup, and baking soda. Bring to a boil, and cook for 7 minutes. Remove from the heat, and stir in the vanilla.
    Vanilla Honey Simple Syrup


  • 2 teaspoons milk


  • 2 teaspoons vanilla extract


  • 1 tablespoon honey


  • 2 teaspoons butter


  • Directions

    1. Combine the milk and vanilla extract in a bowl.
    2. Heat the honey and butter together in a microwave-safe bowl in the microwave for 30 seconds; stir into the milk mixture. Allow to cool completely before use. Chill in refrigerator if too hot.
    And some Muffin receipes......


    Blueberry Muffins


  • 1 1/2 cups all-purpose flour


  • 3/4 cup white sugar


  • 1/2 teaspoon salt


  • 2 teaspoons baking powder


  • 1/3 cup vegetable oil


  • 1 egg


  • 1/3 cup milk


  • 1 cup fresh blueberries


  • 1/2 cup white sugar


  • 1/3 cup all-purpose flour


  • 1/4 cup butter, cubed


  • 1 1/2 teaspoons ground cinnamon


  • Directions

    1. Preheat oven to 400 degrees F (200 degrees C). Grease muffin cups or line with muffin liners.
    2. Combine 1 1/2 cups flour, 3/4 cup sugar, salt and baking powder. Place vegetable oil into a 1 cup measuring cup; add the egg and enough milk to fill the cup. Mix this with flour mixture. Fold in blueberries. Fill muffin cups right to the top, and sprinkle with crumb topping mixture.
    3. To Make Crumb Topping: Mix together 1/2 cup sugar, 1/3 cup flour, 1/4 cup butter, and 1 1/2 teaspoons cinnamon. Mix with fork, and sprinkle over muffins before baking.
    4. Bake for 20 to 25 minutes in the preheated oven, or until done.
    Bran Muffins
    2 cups of bran.
    1 ¼ cups of skimmed milk.
    1 cup of raisins.
    1 cup of flour.
    ½ cup of molasses.
    ¼ cup of cornmeal.
    1 teaspoon of baking soda.
    1 teaspoon of salt.
    2 medium eggs, beaten.
    2 cups of sifted flour.
    1 cup of milk.
    ½ cup of peanut butter.
    ¼ cup of sugar.
    2 tablespoons of butter, melted.
    3 teaspoons of baking powder.
    1 teaspoon of salt.

    Instructions:

    Mix together all of the ingredients.

    Pour into lightly greased muffin tins, about two-thirds full.

    Bake 350°F (175°C) for 25 minutes.

    Peanut Butter Muffins

      Instructions:

      Sift together the flour, sugar, baking power and salt. Add the peanut butter and mix throroughly. Combine the eggs and milk, then pour into the mixture. Add the butter and stir until mixture is moistened. Fill greased muffin pans about two-thirds full and bake at 400°F (200°C) for 25 minutes.
      And cake recipes......
      Banana Cake
      • 1 cup White Sugar
      • 1/2 cup Butter (unsalted)
      • 11/2 cup All Purpose Flour
      • 1 tsp. Vanilla Extract
      • 4tbsp Buttermilk
      • 1tsp Baking Soda
      • 3 Mashed Bananas
      • 1 cup Chopped Nuts (walnut)
      • 1 pinch Salt
      • 2 Eggs
      Method
      • Pre-heat oven at 350 degree Fahrenheit (175 degree Celsius).
      • Grease and flour the cake pan.
      • Mix flour, baking soda and salt together in a small bowl.
      • Separate the egg and keep aside.
      • Mix cream, butter and sugar together. Add egg yolks and vanilla extract, while beating well.
      • Now mix in the mashed bananas. Add flour mixture alternately with the buttermilk to the creamed mixture. Mix only to combine all the ingredients. Do not mix too much.
      • Stir in the nuts.
      • Beat the egg whites until stiff.
      • Mix the batter in the egg whites.
      • Pour the batter into the pan.
      • Bake at 350-degree Fahrenheit for around 30 minutes.
      • Test the cake using a toothpick. If it comes out clean without sticking, it means cake is done
      • Remove from oven and cool it.
      Apple Cake - yummie!
      1cup Gold Medal® all-purpose flour
      1/2cup sugar
      1teaspoon baking powder
      1/2teaspoon salt
      1/2teaspoon ground cinnamon
      1/4teaspoon ground nutmeg
      1/4cup canola or soybean oil
      1teaspoon vanilla
      1egg, beaten
      2cups coarsely chopped peeled apples (2 medium)
      1.Heat oven to 350°F. Grease bottom and side of 8- or 9-inch round cake pan with shortening; lightly flour.
      2.In large bowl, mix flour, sugar, baking powder, salt, cinnamon and nutmeg until well blended. Stir in oil, vanilla and egg until flour mixture is moistened. Stir in apples. Batter will be very thick and chunky. Spread in pan.
      3.Bake 45 to 55 minutes or until toothpick inserted in center comes out clean. Cool 10 minutes; remove from pan to cooling rack. Serve warm.

    Tuesday, March 1, 2011

    Week 7 & Week 8

    I am so very sorry about last week and not being able to send out an email.  My computer is still not working correctly.  I have added more memory, debugged it and it's still not it's normal fast self.  So I will keep trying to work on it. 

    So let's get started! 

    This is week - 8 of the new year.  I need to get you all caught on to week 8 so I am giving you week 7 and week 8! 

    Week 7 - Solid Shortening - this is less expensive than oil.  You will need 12 lbs per person.  Be sure and rotate.  This will last several years.

    Shelf-life, every manufacturer stamps its shortening with a use-by date. Crisco, the leading brand, says its shortening is good unopened for two years from the date of manufacture. Once opened, it suggests you use the remainder of the can within a year, and suggests you mark the can with the date you first use it, so you can keep track of the year. How you store the shortening has a lot of bearing on its shelf life. The manufacturer suggest a cool, dry place, away from sources of heat (stove, dishwasher, and refrigerator). In general, you do not keep vegetable shortening in the refrigerator, as it gets too hard and you will probably need to allow it to come to room temperature again before you use it.  "Fresh" and "good" are somewhat relative terms. If you store shortening near a source of heat or keep it past its use-by date, it will eventually begin to turn tan and may develop a slightly off odor or taste. But it will still be safe.


    Week 8 - Juices - avoid watered products.  Be sure and get pure 100% juice. (Lemon, orange, pineapple, etc.)

    The best storage containers to store your juice
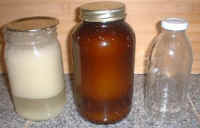
    containers.jpg (61568 bytes)I would recommend using glass containers to store your juice.  I generally use wide mouth mason jars, either 16 or 32 ounces.  You can also use 8 ounce mason jars, amber jars or bottles.  I also like to recycle glass bottles, and will reuse glass mineral water bottles to store juice.   I prefer to use "wide mouth" jars vs. bottles, since juices do tend to stain, and cleaning a bottle with a narrow opening can be difficult.   I would also recommend using a stainless steel lined thermos or stainless steel water bottle.     One of the things to remember when selecting a container to store your juice is to choose a container that is small enough for a "single serving".  A single serving is one that you will open, and drink all at once, and not seal it and save it for later.  You might need to store your juice in multiple containers and bring 3 containers with you to work for each "juice break".  The best container to store your juice is a glass container that holds as much as you can drink in a single serving.

    The best way to store juice.

    The best way to store juice is in an air-free environment.  Air is one of the primary factors that will cause degradation of the juice.   After you juice and have your juice is in its catch container, you will need to pour it into your storage container.  You can pre freeze (or chill) the storage container to help keep the juice cold.  When you fill your storage container, be sure to fill it to the brim, and maybe even overfill it a little before putting on the lid on the container. (You can add purified water if you do not have enough juice to completly fill the container)  This is to minimize the air that is contained inside the container along with the juice.  It is this air that causes some degradation of the juice.  Even better yet, if you have a way you can remove the air from the juice container.  Remember to keep your juice COLD.
     
    Other hints and tips and to store   your juice longer.
    • Juice an extra lemon into your juice for the citric acid that may help preserve the juice.
    • Start out with the cold produce, to ensure your juice is cold.
    • Use organic produce.  In general organic produce has more nutrition that non-organic produce.
    Freezing Juice for longer storage
    If you must store your juice for long-term storage, one way it can be done is how people have been preserving fresh-made apple cider for many years.. they freeze it..    Of course, this should only be used as a last option and is not reccomended. 
    • Freeze Juice in Ice Cube Trays for longer storage. (the freezer causes more degredation than the fridge, so only do if necessary)
    • Freeze larger volumes of juice is plastic "milk-type" jugs or plastic "water bottles".  Defront and consume the whole juice after its defrosted.
    (Taken from an artile by John Kohler)

    Here are a few juice ideas to try!  I haven't yet but they sound pretty good!  Enjoy!
     
    Sunshine Cocktail
    • 2 apples
    • 4-6 strawberries
    Carrot/Apple Juice
    • 6 carrots
    • 2 apples
    AAA Juice
    • 6 carrots
    • 1 apple
    • 2 stalks of celery
    • ½ handful of wheatgrass
    • ½ handful of parsley
    • ½ beet
    Passion Cocktail
    • 4 strawberries
    • 1 large chuck pineapple
    • 1 bunch black grapes

    Thursday, February 17, 2011

    Week 6 - of our block by block of building our food storage!

    Week 6 - PEANUT BUTTER -  10 lbs per person it keeps and stores for more than a year!
    There are several places to buy bulk peanut butter.  Amazon has Merckens Peanut Butter 25 lbs. for $75.15 and this is another one of those items I watch for sales on. 

    Why is peanut butter good for you:
    At least five major studies confirm that eating peanuts can lower risk for coronary heart disease. So it's no leap to think that peanut butter confers the same benefits. "Suffice it to say that eating peanut butter or peanuts has been associated with lower total cholesterol, lower ldl or 'bad' cholesterol, and lower triglycerides, all of which are associated with lower cardiovascular disease risk," says Richard Mattes, Ph.D., R.D., a professor of nutrition at Purdue University.


    It my search on the internet of cool things to share with you to try to help you with your food storage.  I came across a way cool receipe for Crock Pot Oatmeat!  My family loves oatmeal and on these cold winter snowy mornings it's the best.  So I thought I would share this with you.  Not sure whom or where the receipe came from so I can't take the credit.  But I can say for sure that it's yummie!

    Crock Pot Oatment  -

    1 cup steel cut oats
    1 cup dried cranberries
    1 cup dried figs(can put anything you want it here in place of the figs)
    4 cups water
    1/2 cups half and half

    In a slow cooker, combine all ingredients and set to low heat. Cover and let cook for 8 to 9 hours.

    Stir and remove to serving bowls. This method works best if started before you go to bed. This way your oatmeal will be finished by morning.  


    Since I am talking about a yummie breakfast of oatmeal.  I thought I might share so more breakfast menus.

    Breakfast for a Month

    Crock Pot Oatmeal - x4
    French Toast - x4
    Cinnamon Rolls and Sausage - x4
    Omelettes - x2
    Rice x2
    Breakfast Tart - x4
    Waffles or Pancakes - x4
    8 boxes of cereal
    Homemade McMuffins - x4

    Supply list for these breakfasts -

    3 lbs steel cut oats
    5 lbs bacon
    4 dozen eggs
    8 boxes of cereal
    4 english muffins
    1 box of bisquick
    raisins
    syrup

    I didn't put bread, flour, sugar, salt etc in my supply list because I have those things in my long term storage.  Several of these items can be made up ahead of time and stored for the month. 


    Monday, February 7, 2011

    Yay! I have my computer back!! Let's go with week 5 of our block by block food storage!

    Oh my goodness I am soooo glad to have my computer back!  I have missed my blogging!! 

    Let's get back on track now - here is step 5

    Week 5 - PERSONAL PRODUCTS Soap, Deodorant, toilet paper at least one roll per week. Shampoo, lotion, hand soap, 15 per person etc.  

    Wow, this is a fun week.  I have been trying to figure out how much deodorant I need per person. Not sure on this one.  But I will go for one stick of deodorant for every 3 months per person.  That means I will need 4 sticks for myself and 4 for my husband.  For a total of 8 for the year.  

    Toilet paper is easy one roll per week per family member. That means a total of 104 rolls of toilet paper for the year.

    Shampoo is pretty easy for my husband and I.  I like to buy the largest bottles I can find when it comes to shampoo  and creme rinse.  For us each bottle last about 5 months.  So I know that I will need 3 bottles of each for the year.  Thank goodness my husband doesn't have much hair!!  (That's a joke!) 


    Lotion I also get the large bottles.  Which means that I will need at least 15 bottles for myself and for my husband.  So 30 bottles.


     Hand soap - I like the bottled hand soap not the bars.

    Softsoap  Antibacterial Moisturizing Soap  1 Gallon
     At Costco you can find 1 gallon containers of hand soap.  They also have hand santizer that would be great to add to our personal products.  I have seen it in the individual envelopes and in the pump bottle. Plus they have the round tub of santizer wipes for hands and counters. 
    Purell® Sanitizing  Hand Wipes 100 ct  WrappedClorox  Disinfecting Wipes  Fresh Scent  1/75 ct

    Toliet paper - there are many many places to get toliet paper.  I tend to watch for those wonderful coupons and sales and stock up when I find them.  Please remember that in times of emergencies you might have to use a porta potty or an outhouse or you might have to go outside.  So I try to purchase only white paper to help with the going green for the earth.


    Just a short post this week.  I am so grateful to have my computer back and to be able to update my blog.
    I hope everyone has a great week!