Tuesday, August 9, 2011

Week 31: School supplies

SCHOOL SUPPLIES Back to School Sales. Paper , pencils, journals, envelopes, postage stamps, etc. (Great Stocking Stuffers)


This is a great time of year to stock up on the school supplies.  There are several reasons why it's good to have these things in your food storage.  In times of a crisis you might need to depend on paper and pencil for leaving notes and/or in times when money is short you will be able to pull the school supplies out of your storage and have what your child needs for school.


I like to watch the sales ads this time of year.  There are a ton of places that have school supplies on sale.  Target is a great place.  Plus Office Depot will have great sales on all the supplies you will need.  


Here are a couple recipes I thought you might like to try!


We have had our son (Rhett) and his girl friend visiting us the last couple of days.  Emily made the most wonderful cupcakes while she was here!  I thought I would share the recipe!  Thanks Emily!!  We love you!!


Lemonade Cupcakes


  • 1 (6 ounce) can frozen lemonade concentrate, thawed

  • 1 (18 1/4 ounce) box white cake mix

  • 1 (8 ounce) carton sour cream

  • ounces cream cheese, softened

  • eggs

  • 1 (12 ounce) can whipped cream cheese frosting


  • Directions:

    1. 1 Preheat oven to 350.
    2. 2 Remove 2 tablespoons lemonade concentrate from can and discard or reserve for other use.
    3. 3 Combine remaining concentrate, cake mix, sour cream, cream cheese and eggs in large bowl.
    4. 4 Beat with mixer until well blended.
    5. 5 Spoon batter into paper-lined muffin tins, filling 3/4 full.
    6. 6 Bake at 350 for 20 minutes or until cooked through.
    7. 7 Cool completely before frosting.

      For the icing - Emily used a ready made icing and added some of the lemonade!!  These were refreshing and yummy!  I hope you will enjoy them as much as we did!!

      I also thought I would share this Kraft foods salad - it's very light and great for the summer! 

      Watermelon Salad

      3 cups chopped watermelon (3/4-inch chunks)
      1 cup  chopped cucumbers (1/4-inch chunks)
      1/2 cup crumbled ATHENOS Mild Feta Cheese
      2 Tbsp.  chopped fresh mint
      2 Tbsp. KRAFT Balsamic Vinaigrette Dressing

      COMBINE ingredients.
      SERVE immediately.
      Enjoy - have a great week!


    Sunday, July 31, 2011

    Week 30 Canned Goods

    Week 30: Canned Goods

    I like to buy my canned goods from any place I see that they are on sell!  I like to buy in bulk too!  Be sure and rotate everything and watch those expiration dates!

    Commercially canned foods—the familiar items that we find on our grocery store shelves—usually come in either glass jars or tin cans. In my opinion canned foods, whether commercially prepared or canned at home, should make up the bulk of your food storage program. They are by far the least expensive option when it comes to food storage. They do not have to be refrigerated and they require minimal preparation before serving. Most can be eaten right from the can. Canned foods also contain a fair amount of water, which can come in handy in meeting your daily water needs. Due to their water content canned foods are heavy when compared to dehydrated foods, but you probably won't be hauling your home stash around anyway. Canned foods come in convenient sizes, so an opened can will probably be consumed without leaving leftovers which would require refrigeration. They also stack well making it easy for you to rotate your stores. You can gradually and economically build your home food storage stash by purchasing a few extra canned goods each time you buy your groceries or buy in bulk.


    Stash of canned foods


    I hope you enjoy your food storage and putting it together as much as I do!  Sorry about missing last week it was a very busy week.  With Megan Johnson having the baby and Dan was to have surgery on Thursday but because of his blood pressure they canceled the surgery.  Once we get his blood pressure under control we will go in for surgery.  Plus our Jennifer is in the hospital as I am typing this - our little granddaughter wants to come early but we will keep her with Jen for as long as we can! Whoa what a week!  

    Wednesday, July 20, 2011

    Week 28 -Canned Milk - Dry Milk

    Week 28 - Canned Milk -Dry Milk

    How to store -

    Dry milk may be stored up to one year at a temperature of seventy degrees Fahrenheit, or for two years at forty degrees. Storage areas for most foods should be cool, dark, dry, and ventilated. Noninstant milk retains its flavor and stores better than instant milk. If you purchase dry milk in fifty-pound bags, repackage it in smaller, moisture-proof containers of metal or glass that will hold one- to four-weeks’ supply. Five-gallon cans also make good storage containers if the lids fit tightly, keeping out insects and moisture. Milk will not keep as long at higher temperatures, so do not store it by the furnace or in a warm room. Dry milk in glass bottles should not be exposed to fluorescent lights, as they hasten rancidity.
    At forty degrees Fahrenheit and lower, canned evaporated milk will keep up to one year. Turn the cans (or the whole case) over each month. If the milk in a can appears lumpy and watery due to separation of solids, do not throw it away. Shake the can vigorously and it may become smooth again. (Canned milk gets a strong flavor and dark color during long periods of storage. Don’t use it if it has been stored much longer than a year and shows considerable quality loss.) (taken from the 1979 Ensign)

    Powdered milk, both instant and non instant, has a very long shelf life, 20 years, making it easy to store for longer term store, longer than the three month supply of the food in our General Store. Most of us recognize the need to have more than a three month supply as we may be supporting others with our storage or our disaster may last longer than three months as with an EMP attach or solar flare that takes out the electrical grid. Powdered milk can however, change flavor after a shorter period of time, about three years. This happens most often when it is stored at high temperatures or in a metal can. The taste change can be delayed by storing in the freezer. There is usually not a problem when stored in metal can until the can is opened and the milk is exposed to the air. I recommend once you open a can you store the milk in a plastic container. Milk is still safe to drink even if it tastes a little like the can. As with all food storage it is essential that you do rotate your milk and that you store it in a cool, dry area, just like all the foods in your General Store.

    There are two types of powdered milk.

    Non-Instant: This type of milk is harder to find in the grocery store because it is more difficult to reconstitute and consequently sells at a slower rate, thus it is not stocked. Non instant powdered milk can be found on internet sites and at the canneries sponsored by the LDS church.
    Non-instant nonfat powdered milk is made of fresh, pasteurized milk with the water and fat removed. Nutritionally, it includes all the same protein, calcium, and B vitamins found in fresh milk. It is less expensive than fresh milk and instant powdered milk. Non-instant powdered milk is more dense and powdery, and thus it requires less product to create the same amount of milk as the instant variety.
    Because the milk is processed less it does require more work to get it to reconstitute properly. It is best to reconstitute in warm water and to use a whisk to remove lumps. It is wonderful to use in baking but requires more whipping to get it to taste like "real" milk for drinking. Instant powdered milk does taste better for drinking but most of the reason is because it is more processed and thus contains more air, so whisk away!

    Instant: Instant powdered milk is also made from pasteurized milk with the water and fats removed. Both are made using a spray-drying process, but the instant variety has been further processing to aid in reconstituting with less effort.
    Instant powdered milk is available in nearly all grocery stores. The two disadvantages of instant are the higher initial cost and the added cost because more powder needs to be used in order to make the finished product.
    Again, it is better to store this powdered milk in a non metal container once it is opened. It purchasing in a box the milk should be removed and placed in a well sealed glass or plastic storage container. It can easily be reconstituted using cold water. Both instant and non instant varieties can be reconstituted and substituted for milk in any recipe
    Sixteen pounds of powdered milk per family member per year is equivalent to approximately one glass of milk a day. For children and pregnant or nursing mothers more should be allotted. If you are following Our General Store you will have the three month equivalent by the end of the year.

    For Non-Instant Powdered milk:


    Amount of Milk
    Water
    Powder
    1/4 cup
    1/4 cup
    2 teaspoons
    1/2 cup
    1/2 cup
    4 teaspoons
    1 cup
    7/8 cup
    3 tablespoons
    2 cups
    2 cups
    1/3 cup
    3 cups
    3 cups
    1/2 cup
    1 quart (4 cups)
    3-1/2 cups
    2/3 cup
    2 quarts
    8 cups
    1-1/3 cups
    1 gallon
    3-3/4 quarts
    2-2/3 cups


    Instant Powdered Milk


    Amount of Milk
    Water
    Powder
    1/4 cup
    1/4 cup
    2 teaspoons
    1/2 cup
    1/2 cup
    4 teaspoons
    1 cup
    1 cup
    1/3 cup
    1 quart (4 cups)
    3-3/4 cups
    1 1/3 cups
    2 quarts
    7 2/3 cups
    2 2/3 cups
    1 gallon
    15 1/2 cups
    5 1/3 cups

     (taken from Food Storage 101)

    Wednesday, July 13, 2011

    Week 28 WATER!!!!

    Week 28: WATER Fill those water jugs. Use plain Clorox not fresh scent.


    Store a 2 week’s supply of water (1 gallon per person per day). Buy 55 gallon barrels, get several 5-6 gallon jugs, or fill up empty soda/juice bottles. Make sure it is food grade plastic, but not milk jugs as they deteriorate too quickly!

    Key Points

    • Most sources recommend 1 gallon of water per person, PER day, for 3-14 days. Make sure to consider storing enough for pets as well.
    • Store water in “FOOD GRADE” or PETE plastic containers (stay away from milk jugs, but soda bottles are suitable).
    • Water storage boxes are another good option. Water is placed into mylar bags and then inserted into stackable cardboard boxes.
    • Store water away from too much light or heat.
    • Clean, sanitize, and rinse all containers prior to use.
    • Do not use containers previously used to store non-food products.
    • Store water in multiple sizes of containers to suit different emergency needs
    • Do not store water containers directly on concrete. Place on cardboard, wood pallets, or other materials.
    • Non-chlorinated water (most municipal water is chlorinated) should be treated with unscented liquid household chlorine bleach (5 to 6% sodium hypochlorite). See the chart below for appropriate amount to add to water.
    • Boiling is the safest way to clean water, however you can also use household liquid bleach to kill microorganisms.
    • Rotate your water storage at least once every year

    Diagrams/Charts

    Tuesday, July 5, 2011

    Week 27 Jams and Jellies

    Week 27 Jams and Jellies!  Sure-jell, Certo, Parafin, etc. or buy the jams and jellies.  Be sure you have a supply of canning jars.  Not the large mouth, and check to be sure check to make sure you have all the lids and seals.  Not sure how to tell you how much you will need per person with this week jams and jellies post.  It's pretty much up to you and your family.  So enjoy!

    This is what I have found out:

    The consensus is that an unopened jar of jelly, jam, or preserves has a shelf life of at least a year if kept in a cool,  dry place.  How long will it remain safe and appealing once it’s opened?  Answers vary from  1 to 12 months.  Why so much variation?  The  shelf life of the product is affected by many factors including these: the type of fruit, the amount of sugar and preservatives, whether it is a homemade or a store product.

    Jelly, Jam, and Preserves Shelf Life 


    Jellies, opened6-8 months
    Jellies, unopened1 year
    Jams, opened
    6-8 months
    Jams, unopened1 year


    Handling Tips: 
    Cover tightly.
    Refrigerate after opening.
    Examine an opened product frequently for signs of mold, yeast growth, off-odors, or off-colors. 
    An open jar of homemade jelly, jam, or preserves may last only about a month.
    Properly sealed homemade jams and jellies will last indefinitely, but the color of red fruits may darken and the flavor fade over time if no "artificial" flavors and colors are added. 
     
    Since strawberries are in season at this time I thought I would give you a good strawberry jam easy to make recipe.
    Gather everything you need to get started, including some helpers. Chop off the tops of the berries and any gross parts (2 quarts = 1 batch).  
     
    Chop up the berries. 
    Pour the beautiful chopped berries into a large pot and start cooking (if you like chunkier jam you can mash the berries with a potato masher first).
    Pour in 1/4 c. lemon juice (some recipes don’t call for this).
    Add the pectin. 
    Add 1/2 tsp. of butter to reduce the foaming.
    If you like smooth jam, puree it 
    While you wait for the strawberries to come to a boil, measure out 7 cups of sugar into a bowl. (Yes SEVEN!)
    Dump the whole bowl of sugar in at once. Bring back to a boil and stir for 1 minute while it boils.
    Meanwhile, sterilize your jar lids on the stove.
    Remove the pot from the stove and pour the delicious jam into sterilized jars. One batch makes about 4 small jars.
    Add the lids and rings and wait for them to pop to know they are sealed.
    While I didn’t include this part, you should make sure to water bath can your finished jars according to the directions on your pectin package or in your canning guide. This will make sure your jam is properly preserved for long term storage.  
     
    We have peaches coming in at our house!  Yum!  I can't wait for them to be ripe enough to eat and make jam out of.  So I thought I would share a peach jam recipe.
     

    Peach Preserves

     12 fresh peaches, pitted and chopped
     4 1/2 cups white sugar
    1 (2 ounce) package dry pectin

    Directions

    1. Crush 1 cup chopped peaches in the bottom of a large saucepan. Add remaining peaches, and set pan over medium-low heat. Bring to a low boil, and cook for about 20 minutes or until peaches become liquid (my family likes a few bits of peach left) .
    2. Pour peaches into a bowl, and then measure 6 cups back into the pan. Add sugar, and bring to a boil over medium heat. Gradually stir in dry pectin, and boil for 1 minute.
    3. Remove from heat after 1 minute, and transfer to sterilized jars. Process in hot water bath canner for 10 minutes. Let cool, and place on shelf.

    I like this recipe so much more - not so much sugar!  Plus it helps that I really enjoy peaches!!!


    Tuesday, June 28, 2011

    Week 26: BEDDING plus a 4th of July cheesecake

    Week 26 Bedding - watch for all those white sales and buy a new thermo blanket.

    If you can a sleeping bag per person would be awesome, but blankets and sheets at least 2 per person work great also.  That way if one set gets soiled you have the other one to use.

    Thermo blanket - Amazon has great prices on thermo blankets right now you can purchase 4 thermo blankets in one package for $13.93.  That's a great price!

    As a side note Amazon also has an emergency sleeping bag for $6.95.  They have reflective blankets too!

    I wanted to share one of my favorite receipts for the 4th of July.  It's called a Flag Cheese Cake.  Here are the directions if you would like to try it!  Happy 4th of July everyone!


    4 cups fresh strawberries, divided
    1-1/2 cups  boiling water
    2 pkg. (3 oz. each) JELL-O Strawberry Flavor Gelatin
      Ice cubes
    1 cup cold water
    1 pkg.  (10.75 oz.) prepared pound cake, cut into 10 slices
    1-1/3 cups blueberries, divided
    2 pkg.  (8 oz. each) PHILADELPHIA Cream Cheese, softened
    1/4 cup sugar
    1 tub  (8 oz.) COOL WHIP Whipped Topping, thawed
    SLICE 1 cup strawberries; halve remaining strawberries. Set aside. Add boiling water to gelatin mixes in large bowl; stir 2 min. until completely dissolved. Add ice to cold water to measure 2 cups. Add to gelatin; stir until ice is completely melted. Refrigerate 5 min. or until slightly thickened.
    MEANWHILE, line bottom of 13x9-inch dish with cake. Add sliced strawberries and 1 cup blueberries to thickened gelatin; stir gently. Spoon over cake. Refrigerate 4 hours or until gelatin is firm.
    BEAT cream cheese and sugar in large bowl with whisk until well blended. Stir in COOL WHIP; spread over gelatin. Arrange strawberry halves on cream cheese mixture to resemble stripes of flag. Add remaining blueberries for stars.

    Tuesday, June 21, 2011

    Week 25 Condiments

    Week 25: CONDIMENTS Mustard, catsup, mayo, relish, Worcestershire.


    So here’s what to do. Compile a list of the condiments your family uses and then watch for them to go on sale and pick up a few bottles. Keep a little inventory list of what you have and mark off when you use one up so you can remember to replace it next time it’s on sale. Here is a list of ideas to get you started:
    ketchup
    mustard
    relish
    mayonnaise
    peanut butter
    barbecue sauce
    soy sauce
    worcestershire sauce
    teriyaki sauce
    olive oil
    vinegar
    horseradish
    cranberry sauce
    applesauce
    hot sauce/chili sauce
    taco seasoning
    Have fun with these items and be sure and get creative!
    Last week at church I was asked to provide an inventory sheet for food storage.  This is what I have found for you!
    Go to dealstomeal.com inventory list and you will find a great tool to inventory your food storage.  I will print this for you and have it at church not this Sunday but next Sunday.  We will be out of town visiting our grands in California!  Have a great warm summer week! 


    Thursday, June 16, 2011

    Week 24 Paper Products

    Week 24: PAPER PRODUCTS Paper towels, Aluminum foil, garbage bags, freezer bags, etc.


    Purchase non-food items such as toothpaste, deodorant, female products, diapers, Paper plates, plastic utensils, etc. are helpful to avoid wasting water washing dishes.


    • Store a year’s supply of all household items that you normally buy at the grocery store
    • Build up your supply by buying these items in large quantities when they are on sale, then only replace your stores when they go on sale again
    • Make sure you store the things particular to your family’s needs, my list might not include everything that YOU normally use
    • Don’t be afraid to use creative storage ideas for these items. A huge supply of toilet paper could go in a garage, attic, etc.
    Things to consider storing:

    • Toilet Paper - 24 rolls per person per year.  
    • Paper Towels - most people use 1.5 rolls per week per family = 78 rolls per yr
    • Feminine Products - varies on needs
    • Diapers/Wet Wipes = 70 diapers a week for a newborn = 3640 per yr
    • Kleenex - 1 per week = 52 boxes
    • Paper Plates/Plastic Utensils/Napkins (can save on water in an emergency) - varies
    • Freezer bags - this depends I tend to use more freezer bags then I do aluminum foil so I would need more than normal. - For a box of 24 bags I would need at least one per month so 12 boxes.
    • Garbage bags - we use two different types at our house - one for the inside of the house and a different kind for the out side of the house.  So for inside the house I usually buy the bulk bags at Costco -  100 per box. Takes us about 3 months to go thru them.  So this would depend on how many people you have in your household.  For my husband and I we would need about 4 boxes per year for the inside bags.  The outside bags have 80 bags per box, for us we go thru about 1 box every 6 months so two boxes would work for us.
    • Aluminum foil - like I said before I don't use much of this so for our family I would a box of the 150 feet from Costco will last us about 6 months so I would say 2 boxes for us.
    This was a tough week.  So much of the paper products depend on your family size.  I had to take a month and write down everything I used to come up with some of this.  So take some time and think about what your needs are as a family and what works best for your family.  

    Remember the best items for your food storage are the items that are on sale.  Don't go over your budget for your food storage so a little at a time works the best!  


    Monday, June 6, 2011

    Week 23 Cheese - whole 5lbs or grated and freeze for casserole

    Week 23 - Cheese - How long can we store it?  How do I store my favorite cheese?

    So here’s the good news.  You CAN have your favorite cheese on hand, even in an emergency, and even though no stores are open and you have no access to electricity.  All you have to do is buy the hard blocks of cheese that you want now in order to have them  stored for up to the next 25 years.  Cheese wax prevents your cheese from developing mold or bacteria and it keeps the moisture in.  Simply use a combination of dipping and brushing with a natural boar’s hair brush to apply the melted cheese wax liberally to your block of cheese, let it harden, and then, VOILA – you’ve got your wish.  Cheese treated with cheese wax will store for up to 25 years at a mild to cool temperature.  Sure, it will continue to age.  But it sure won’t get moldy!  (And even if it does in parts, you can simply cut off that part, and re-wax over it.) Be sure that you select block sizes of cheese that you and your family can easily consume within a 3 to 5 day period in order to avoid it going bad once you’ve cut into it.

    A couple of tips you should know though.
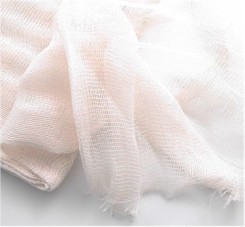
    1. cheeseclothDon’t use paraffin wax.  It tends to crack.  Cheese wax warms slower and heats to a higher temperature and thus plies better to your cheese shapes and sizes.  Cheese wax is also less crumbly and you can use less of it than paraffin. Remember, it’s reusable too!
    2. I have yet to find a hard cheese that I can’t wax.  So long as it’s hard enough to be in a solid block, you can wax it.
    3. You don’t need cheesecloth, but if you desire to use it prior to your wax layers, it may be helpful getting the wax off.  I haven’t had any problems without it though.
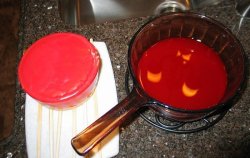
    4. It’s best to melt the cheese wax in a double boiler as opposed to direct heat. Any pan you use to melt your cheesewax in will be your designated cheese wax pan. They are impossible to get clean afterwards. So be forewarned.
    5. cheese-wax-double-broilers1The less you handle the cheese with your hands the better. Use food handling gloves.
    6. Dip the cheese in for about 5 seconds, then bring it out and HOLD it there for about 90 seconds. Do 3 layers of dipping and then one layer of brushing.  (Using the natural boar’s hair brush)  The reason why you want to use this kind of brush specifically is because other brushes will apply the cheese wax too thick, or with crevices, etc.  This kind of brush is perfect for cheese waxing.
    7. You don’t need to use food-grade labels for your cheese, however, it’s smart to use a label on the outside of your cheese just prior to the last wax layer.  That way you don’t have to worry about it falling off.  Be sure to label not only the kind of cheese it is, but when it was waxed as well.
    8. Don’t store your waxed cheese in additional containers.  Just stack them on top of like cheeses and let them breathe.  I like to hang them from the ceiling in a “fishing net” kind of contraption. Cheese wax can be found multiple places online or in your local health food stores.  I also recommend that you use red or black cheesewax as it will prevent more light from getting int. You should also have no problem finding a boar bristle brush either.  
    9. Be sure to check for pockets or crevices that didn’t get sealed.  Four total thin layers of wax is a good practice.  There’s no need to do more coats than that.
    10. The cheese surface should be clean and dry prior to waxing.
    11. If your 2nd and 3rd coats are applied while the prior coat is still just a bit warm you will get a better adhesion.
    12. Cheese wax can be re-used several times.  You can simply wash it in warm water, let it dry and then re-melt it.  So when you remove cheese wax from your cheeses, you can simply reheat and reapply the wax.  Simply heat the cheese wax to about 200 degrees F.  This will also ensure that you’re not transferring any bacteria or unnecessary moisture to your new cheese–even when you’re putting it on your cheese which is cooler.
    13. You do not need to filter the cheese wax after you melt it.  So don’t worry about that step.
    14. Your first coat will have some unevenness to it.  Don’t worry.  The 2nd and 3rd coat will even it out just fine.
    15. Cheese will respond to gravity. So using cheesewax vs. paraffin is important as it’s more pliable. I periodically turn my cheese in view of the gravitational pull.

    Once you get the hang of this cheese waxing stuff you can progress to making your own cheese from powdered milk in any flavor you decide!  Yummy!

    cheese-wax-waxTaken from prepardnesspro.com